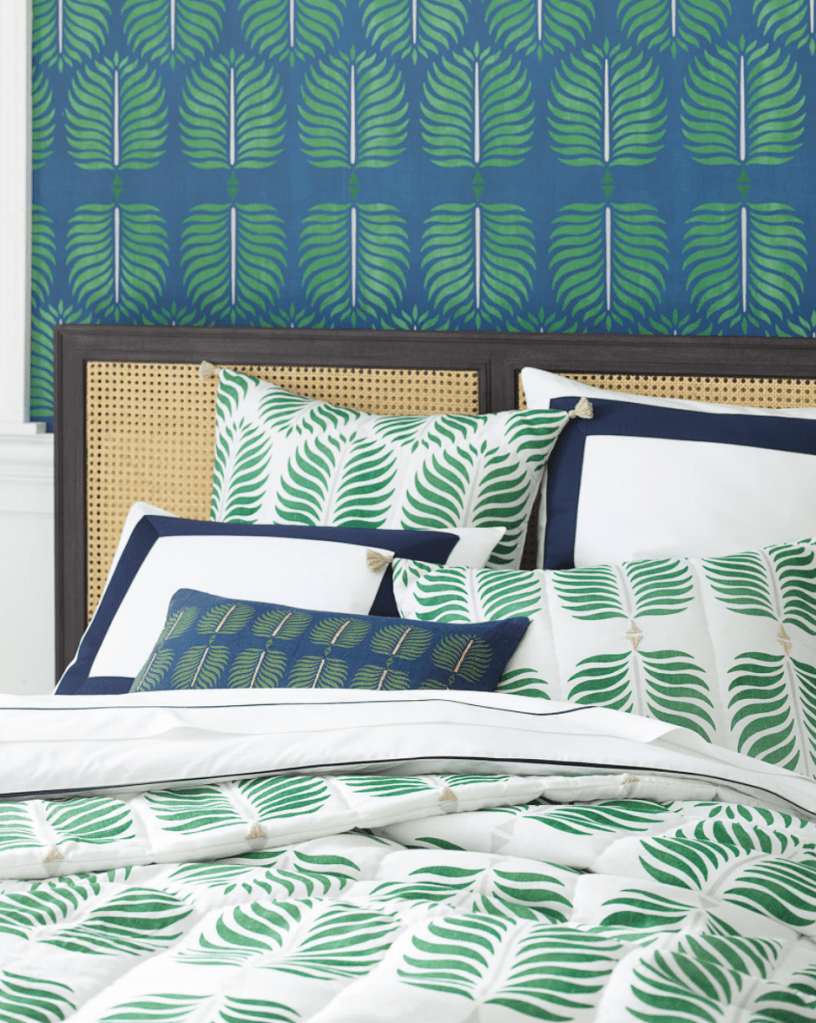
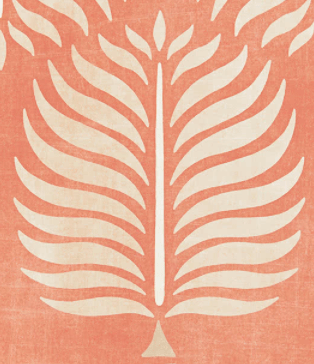
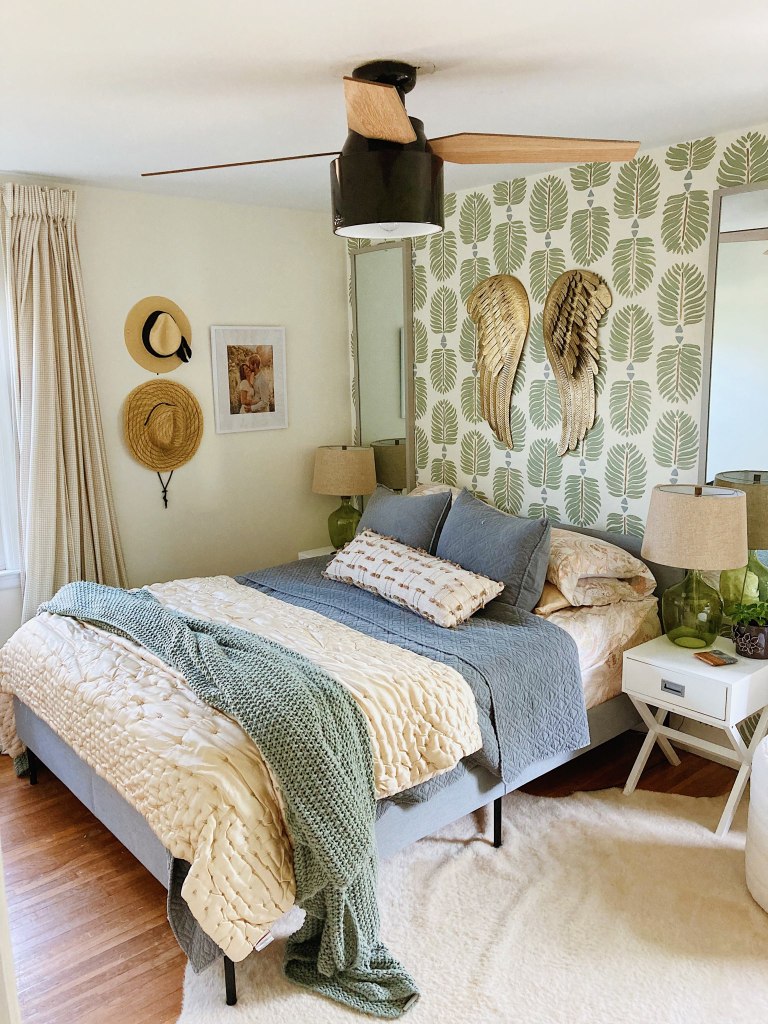
Adding an accent wall is one of my favorite tools when working on a room that “just needs something” to feel complete. A wood element like board and batten or ship lap can add texture and warmth while a paper can add color and whimsy. The opportunities are endless! I have spent hours searching for wallpapers and dreaming of places to use them, so when I came across this wallpaper by Serena and Lily I knew just the place for it. Only problem- it was way out of budget! No worries, here, I will walk you through the process of how I recreate my favorite papers, by hand, for free.
*Note: this process works on papers with a pattern repeat- not mural wallpaper
Step 1: Choose a paper and decide the scale and pattern repeat
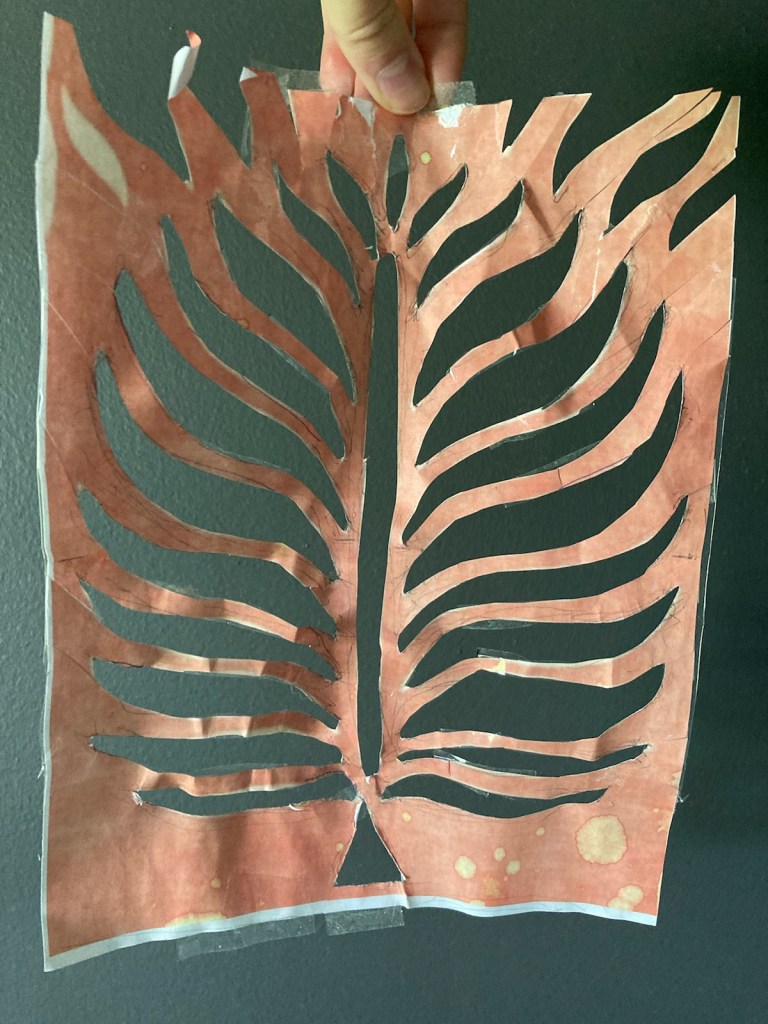
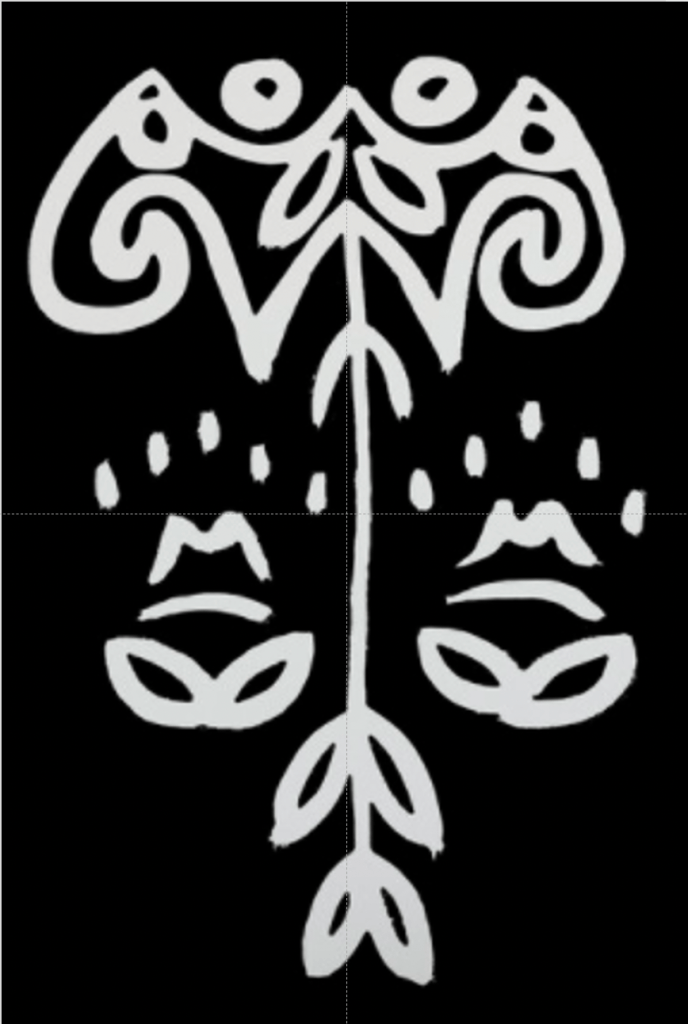
Once I found the paper I wanted to recreate, I had to make a stencil for it. For this project I decided that to keep things simple, I would make my template 8.5″x11″ (standard printer paper size). Start by screen grabbing one part of the pattern you will be repeating, in this case one palm leaf, and copying it into a word document. Next, stretch the image to fit the size you would like it to print at, for this project, the whole sheet of paper. Press print.
Step 2: Cut out the pattern from the piece of paper
Using an exacto blade or scissors, cut out the part of the template that will be painted on the wall. I used scissors and taped the cut marks that I wanted back in tact. The tape actually added some structure to the paper and made it easier to trace. Here is what my stencil looks like after using it on a whole wall.
Step 3: Start tracing the paper on your wall
Starting in the top corner of your wall, trace the pattern with a pencil. You will also want to draw a line on the side and bottom of the stencil to act as a spacing guide for where to place your next one.
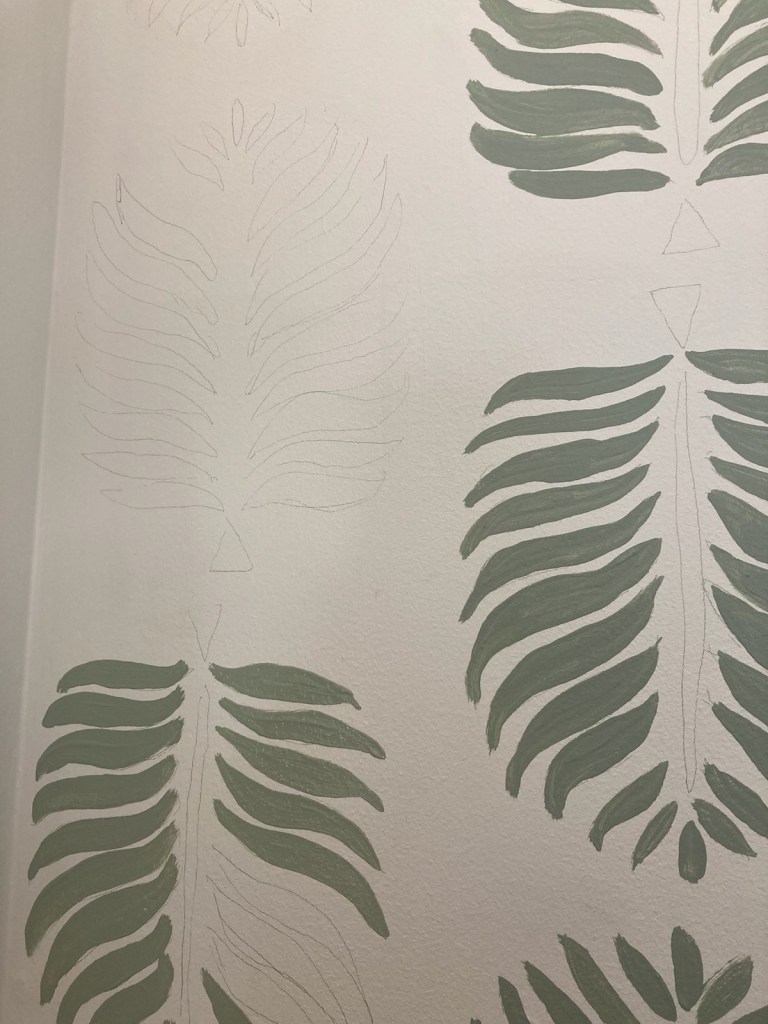
Step 4: Continue the pattern on the wall and begin painting
For this pattern I did one section of the stencil, then flipped it upside down for the next leaf. In the second column I did a half drop of the palm leaf. This made it so the palm leafs fell in between each other as opposed to side by side. My strategy was to work two columns at a time tracing then painting.
Step 5: Continue On the entire wall
Continue the pattern across the wall at your own pace. It takes some time! This pattern took me about an hour per column.

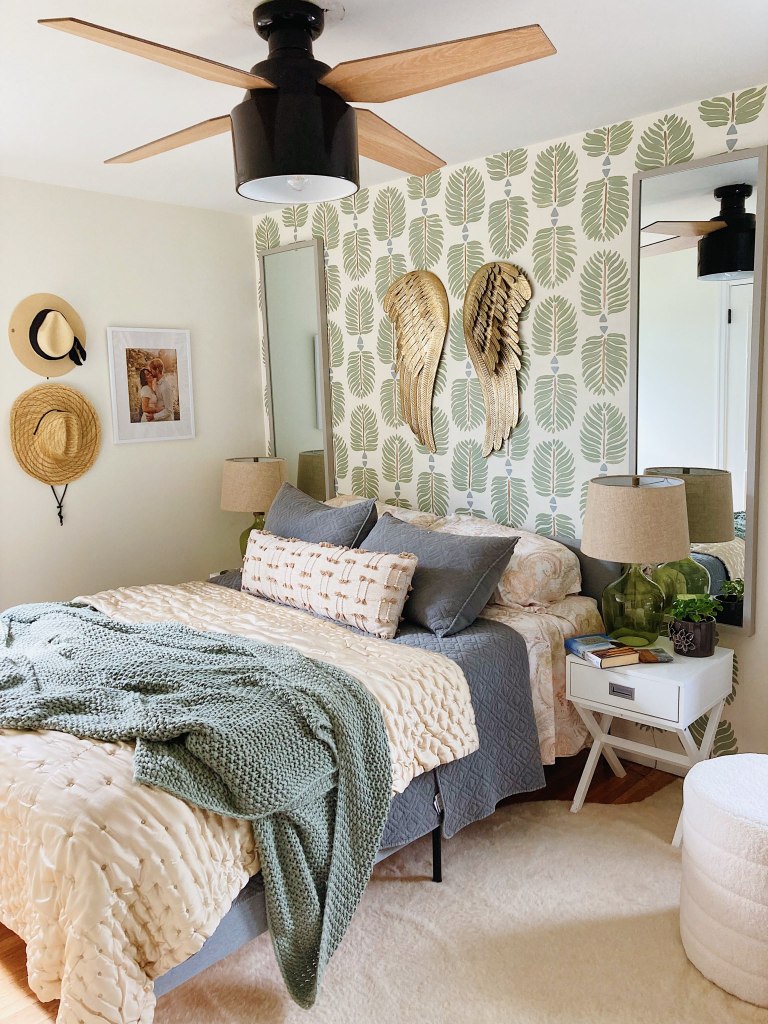
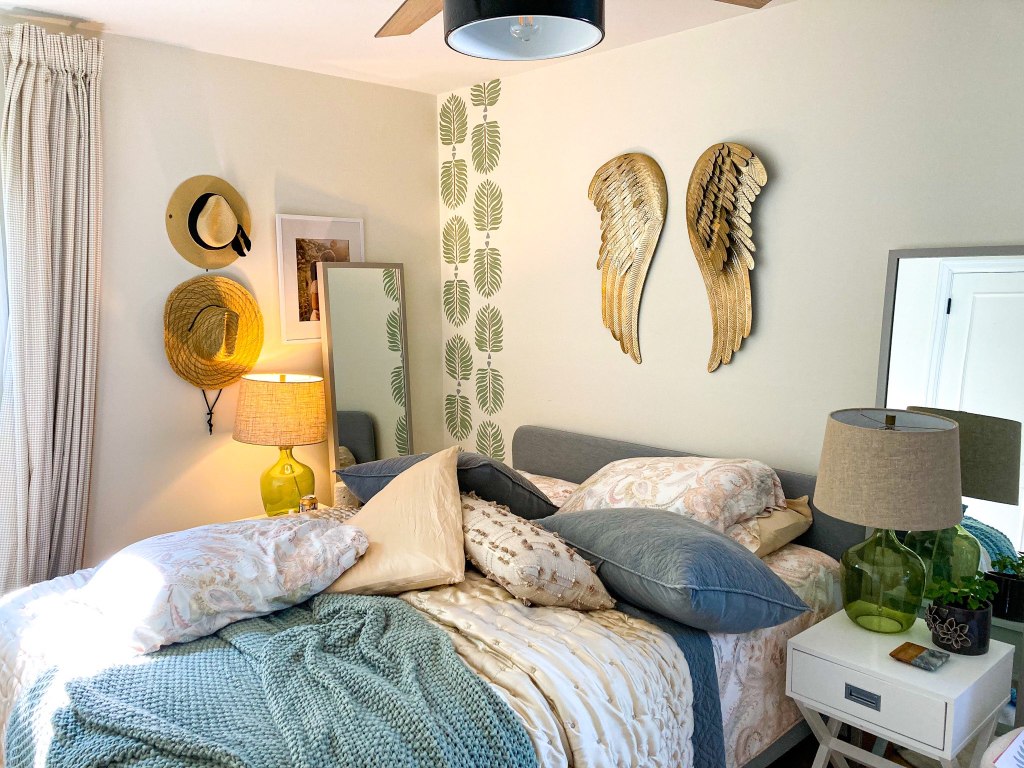
Step 6: Decorate and enjoy your new wall!!
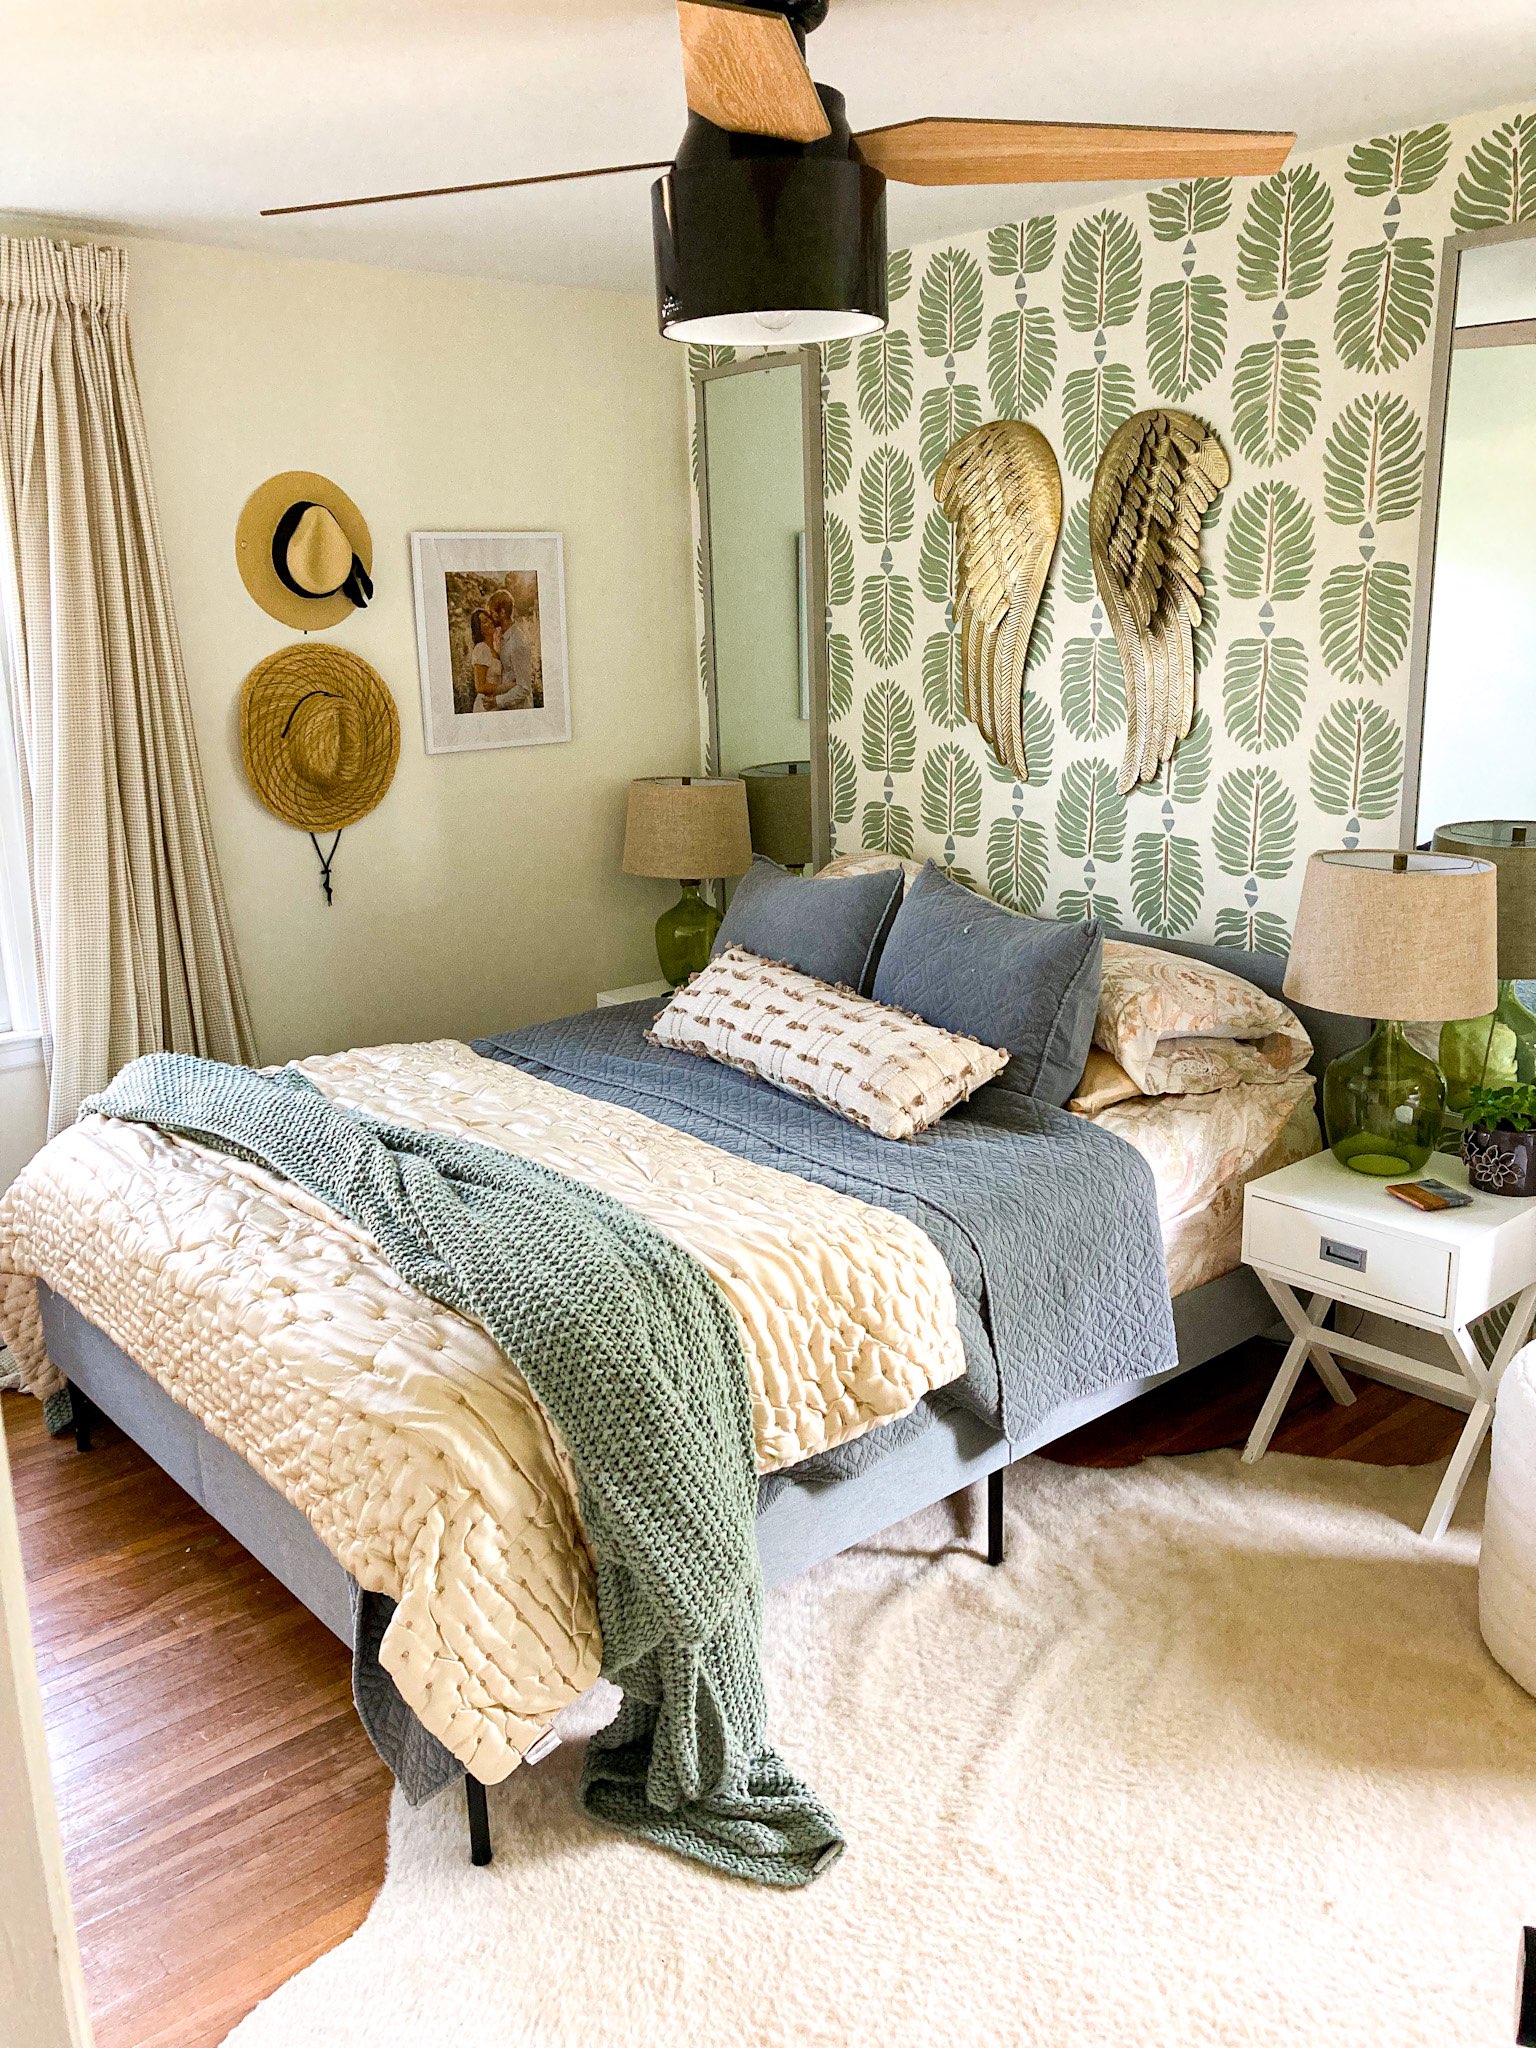
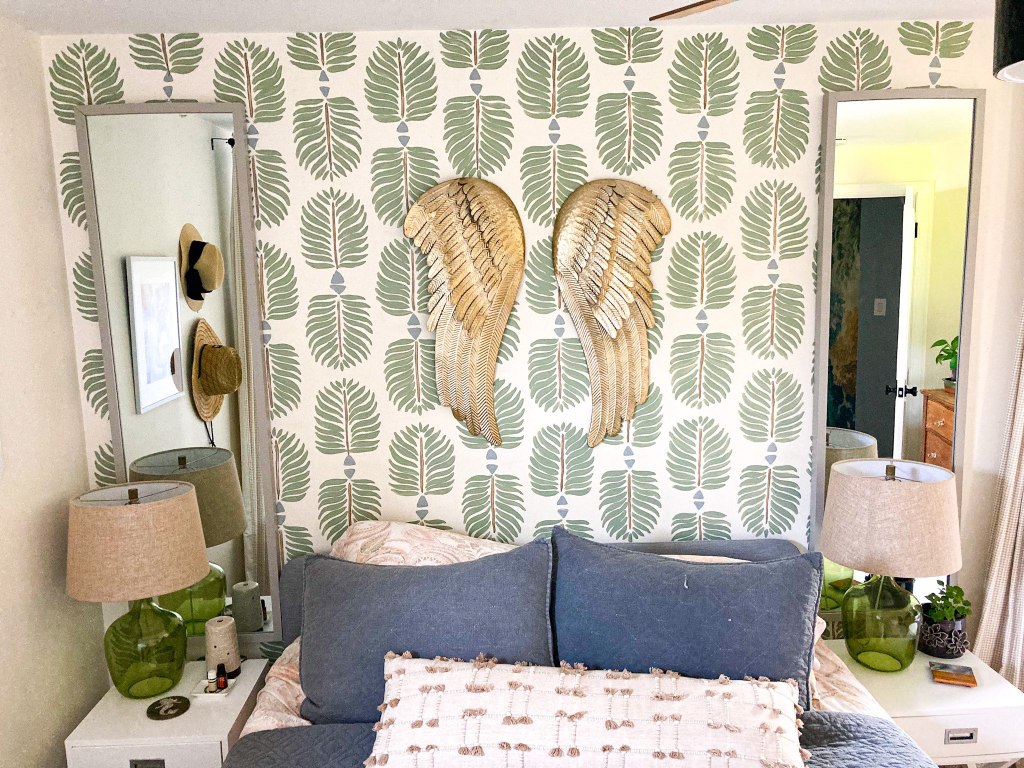
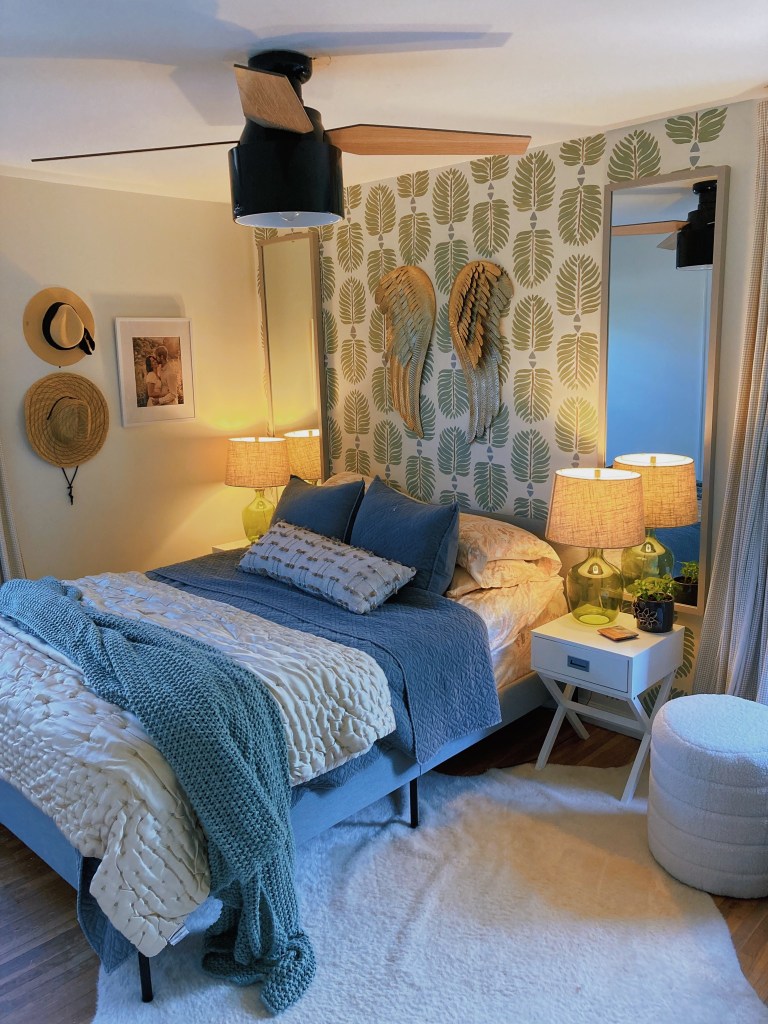
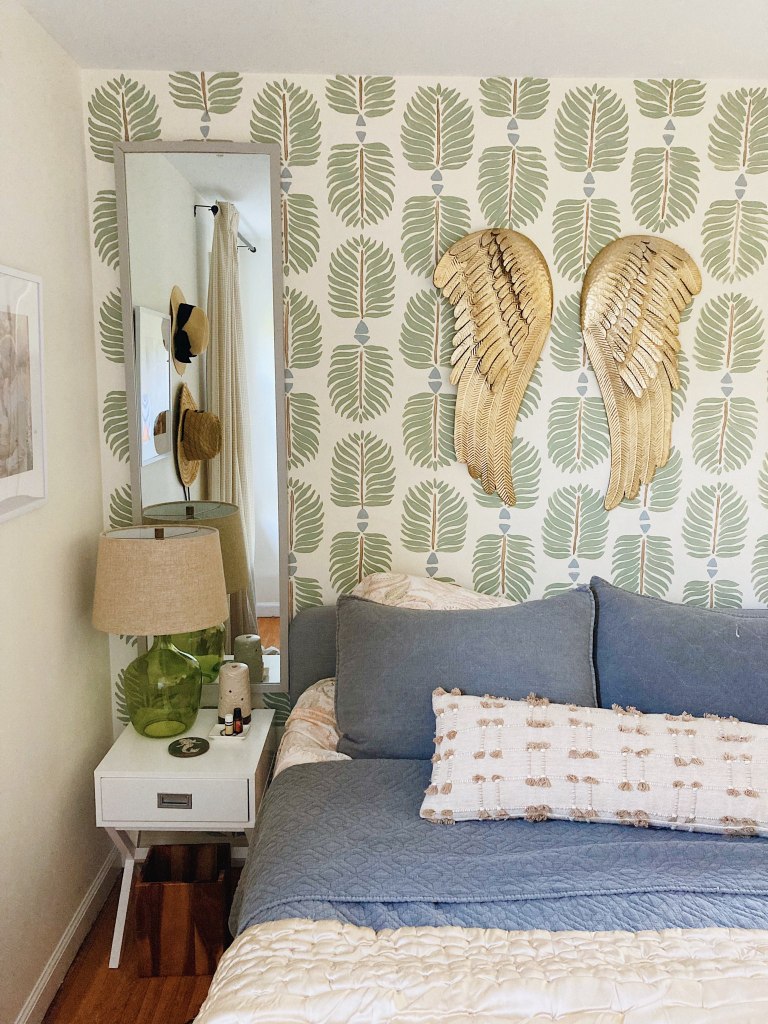
Don’t be afraid to add mirrors or other art over your “paper”. It is a fun way to add even more depth and texture!
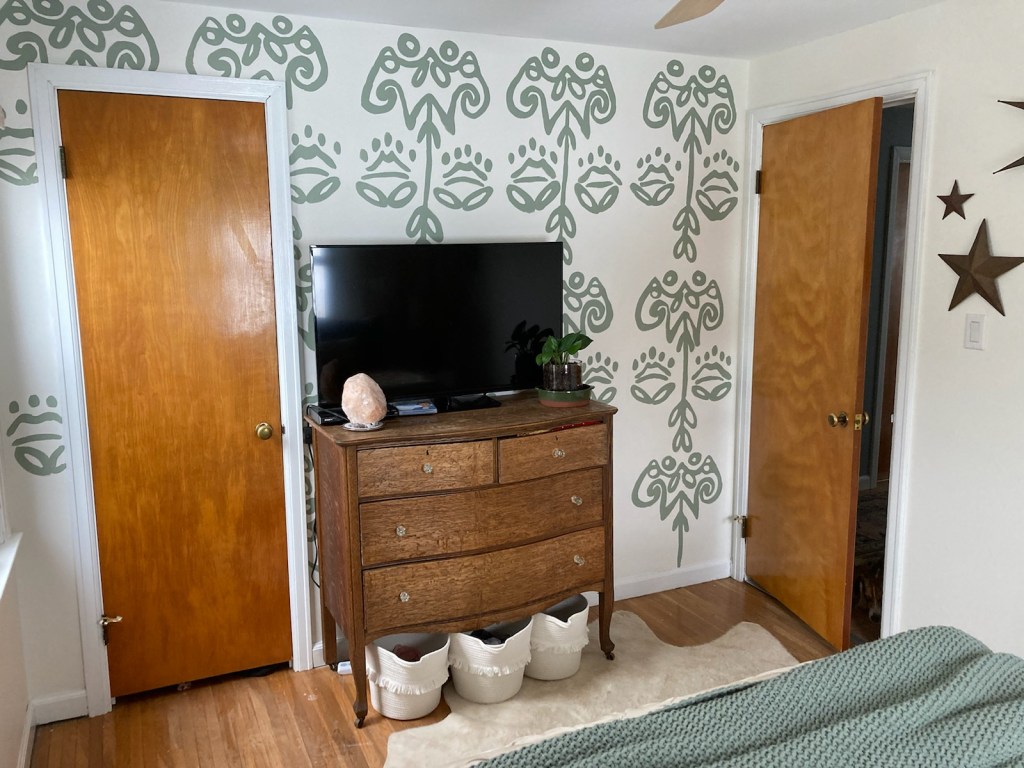
In another room of my house I stenciled a different design. This process was much quicker! The larger the scale and the less colors involved the faster it will go.
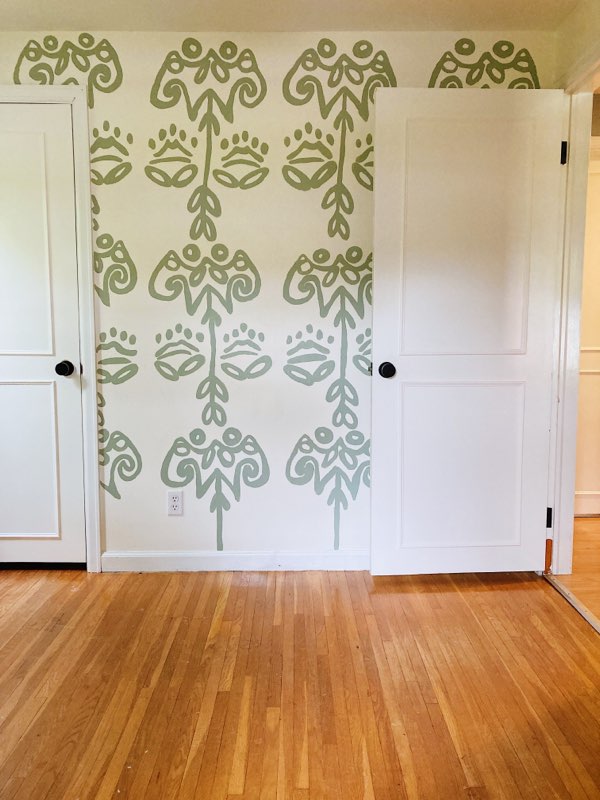
For this paper I followed the same exact same steps, except in step one I made the size different.
This time I broke up each pattern repeat into four equal parts and printed each quadrant to an 11″x17″ piece of paper. After printing all four pieces I taped them them together to create one large 22″x34″ template. I then cut and traced from that large pattern.
Below is when this room was our bedroom (before I redid our doors) which you can read about here
That’s it! I hope you found this helpful! Are there any wallpapers you would like to try out?

Love your blog! Where are your angel wings from?
LikeLike
Thank you Lisa! I received the angel wings as a gift a few years ago, so I am not exactly sure where they are from. I have seen some great comparable options for sale at Etsy, Homegoods, and small home boutiques. Thanks for reading!
LikeLike