Primary Bathroom Reveal

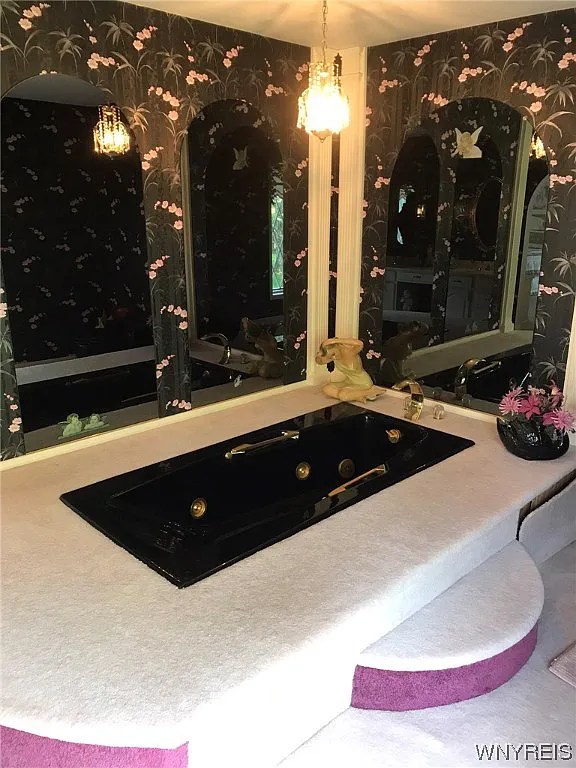
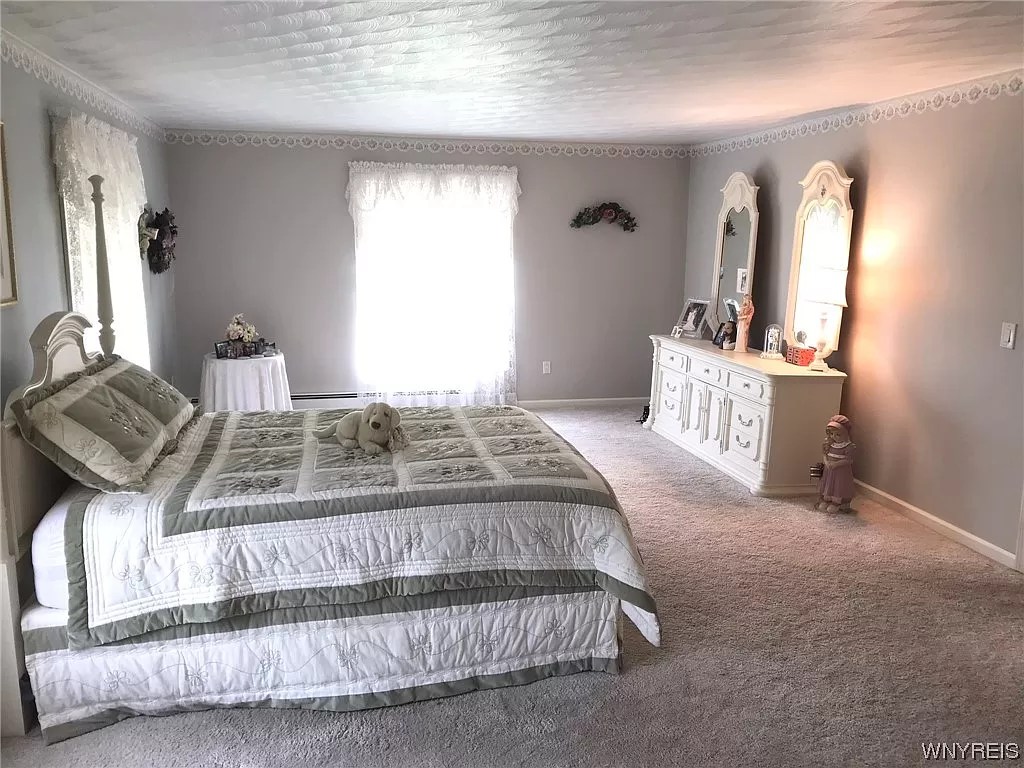
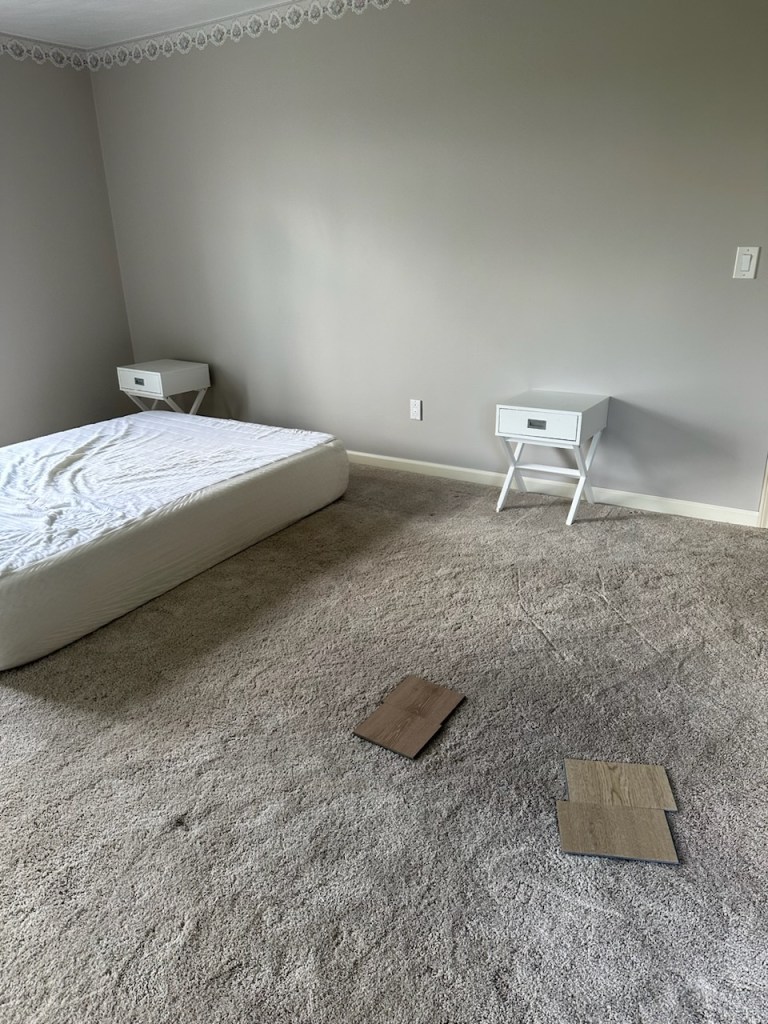
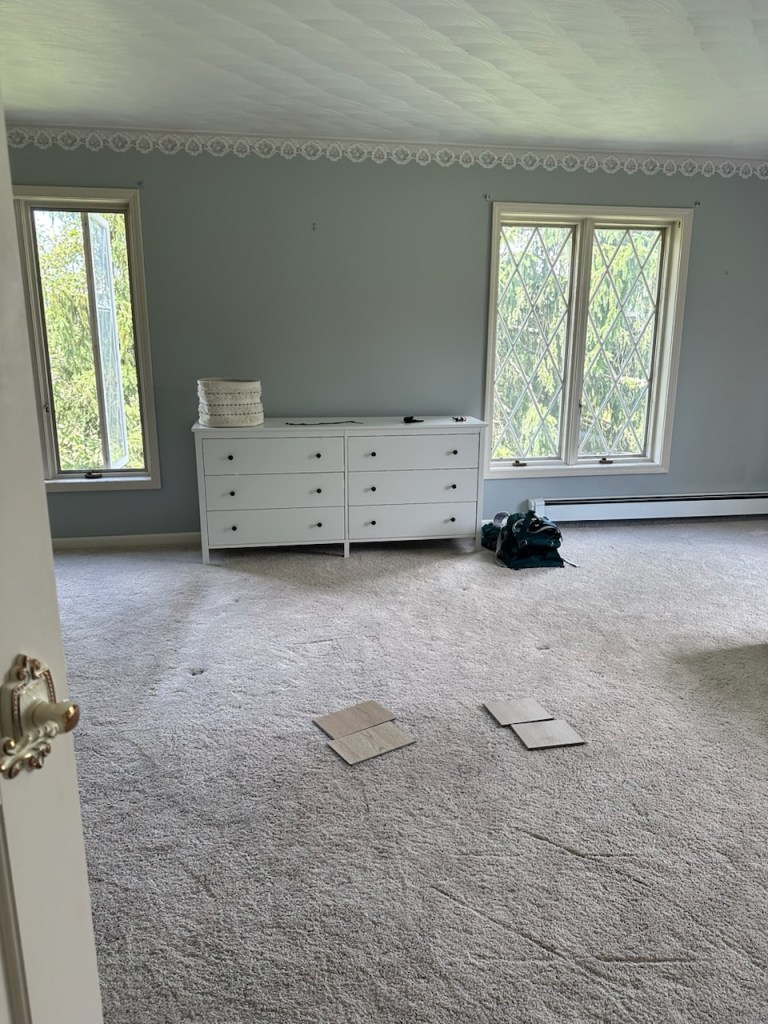
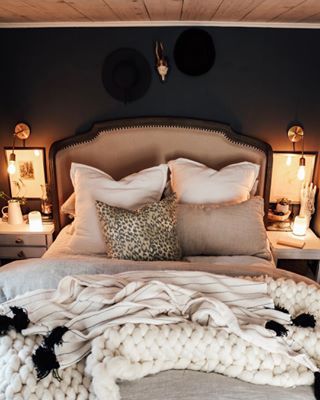
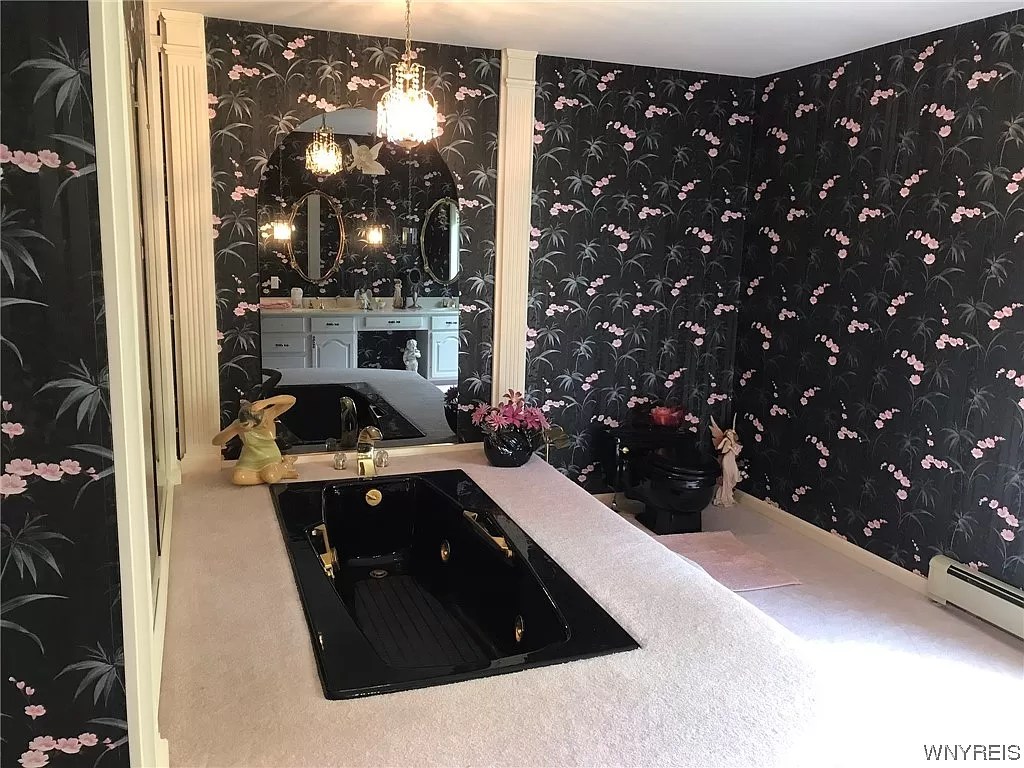
When we purchased our home, almost a year ago, one of the most interesting features about it was the primary bathroom, complete with a platform jacuzzi tub. As unique as the 1980’s space was – we knew that a different design would make more sense for our family. For one, we needed a shower, and second (maybe more importantly), the wall-to-wall carpeting had to go.

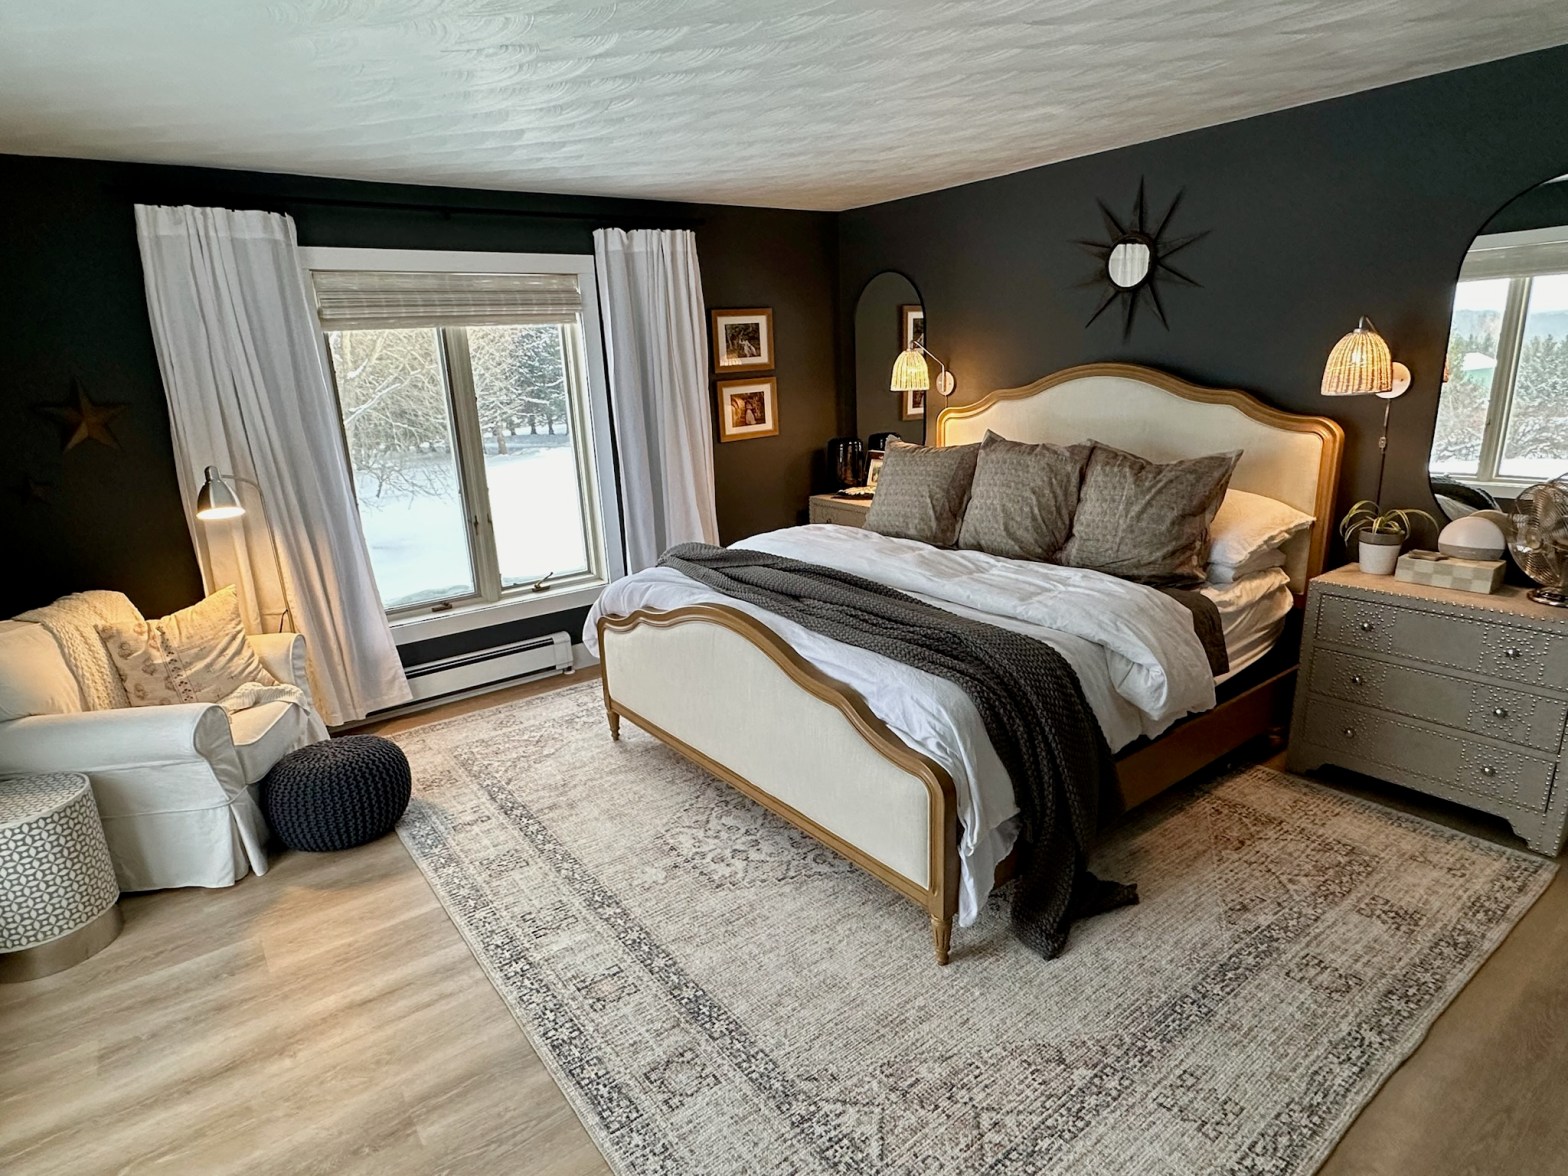
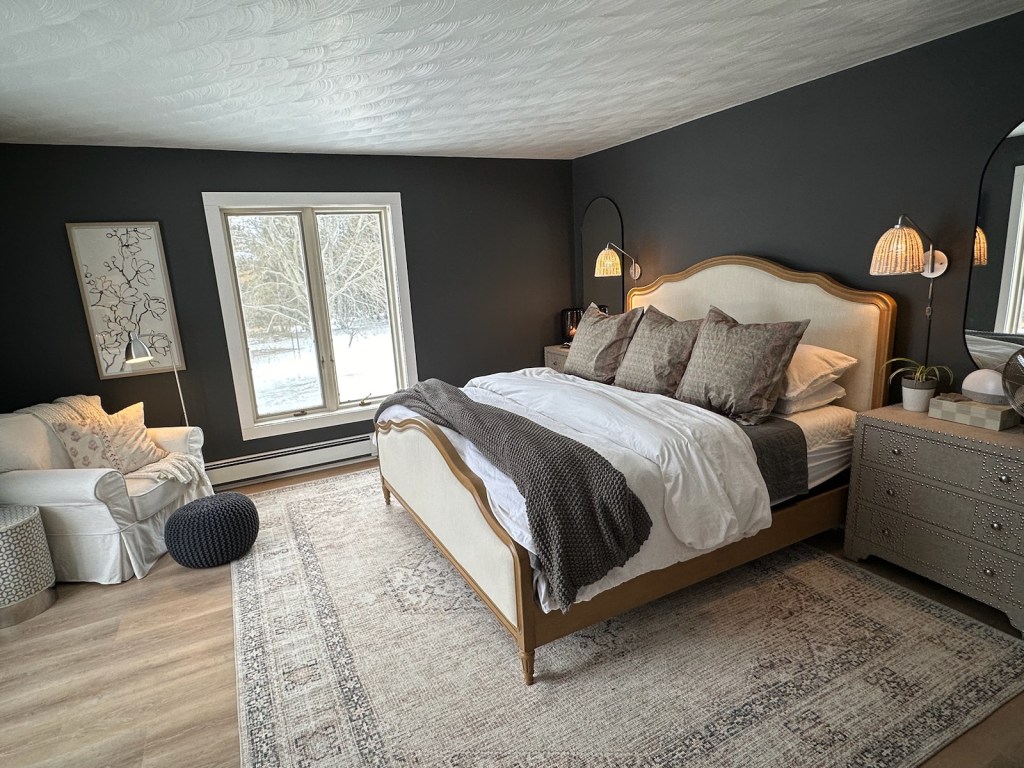
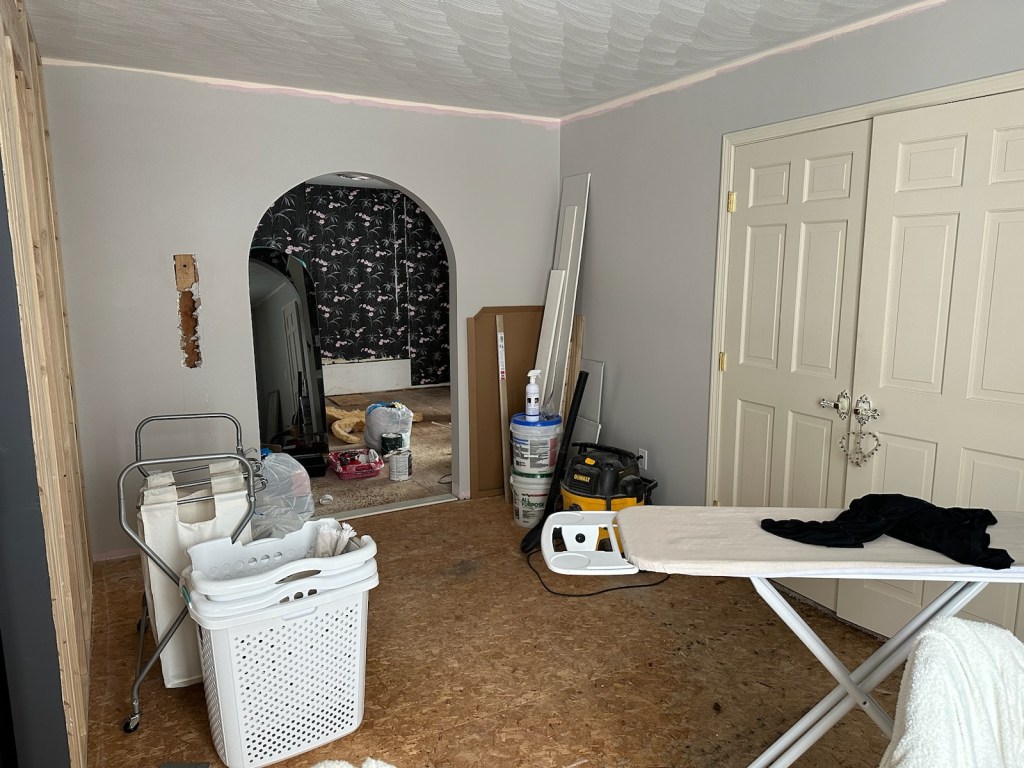
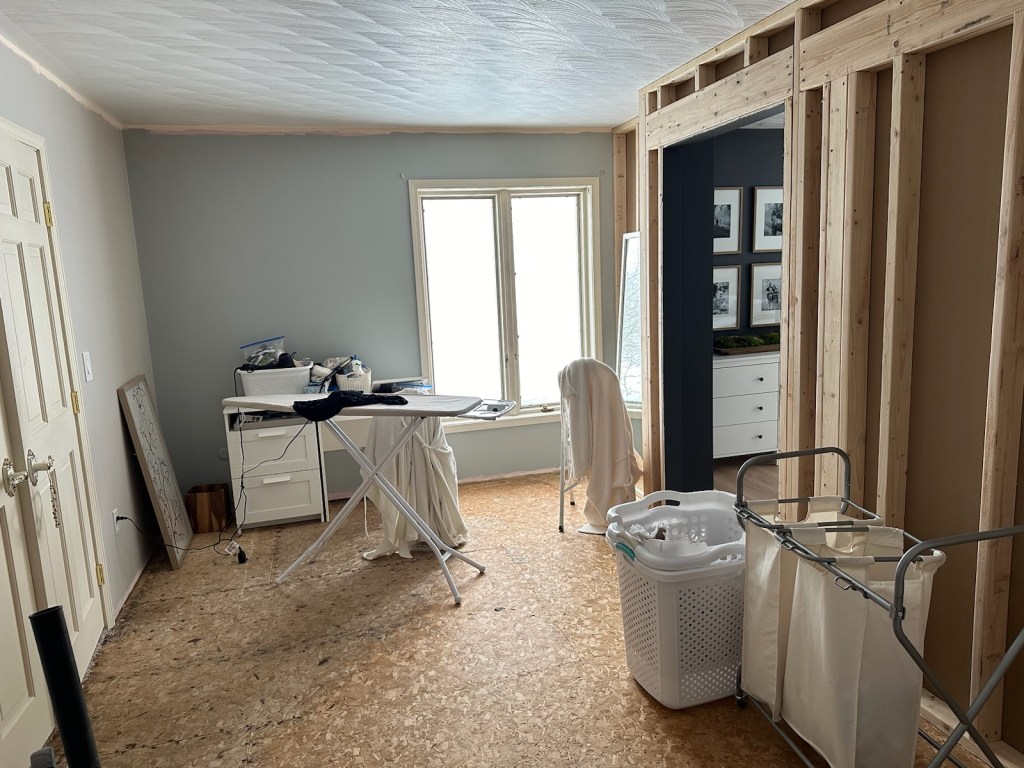
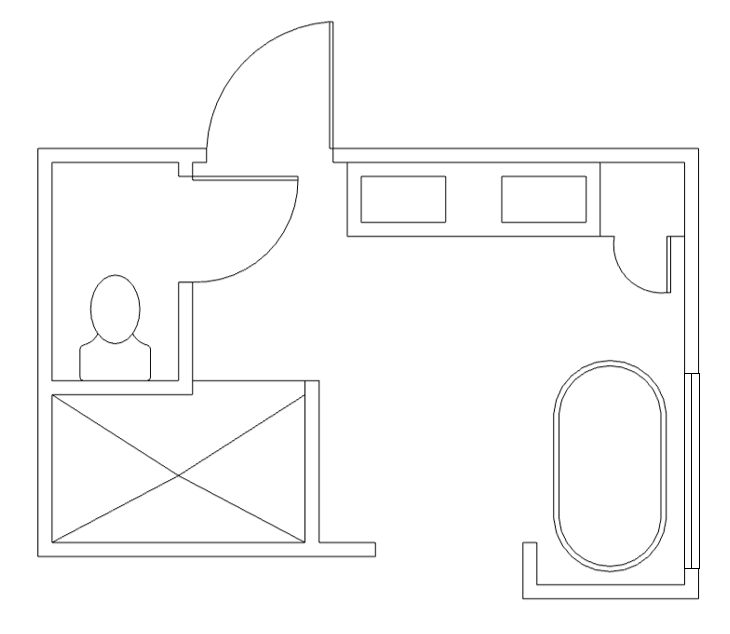
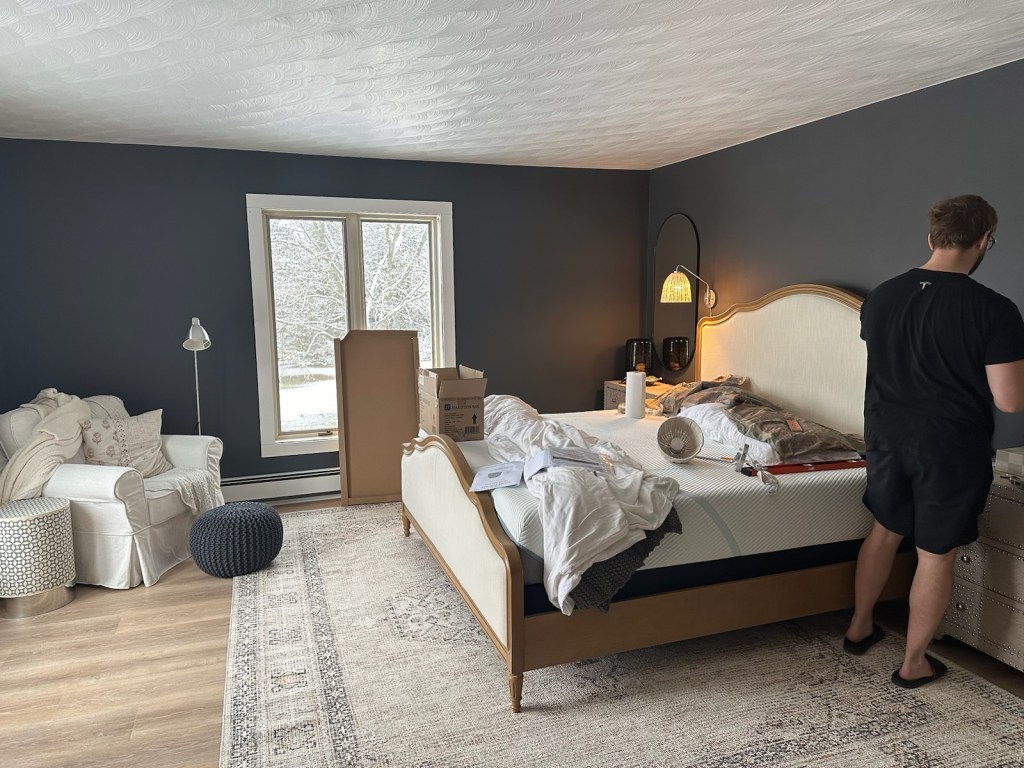
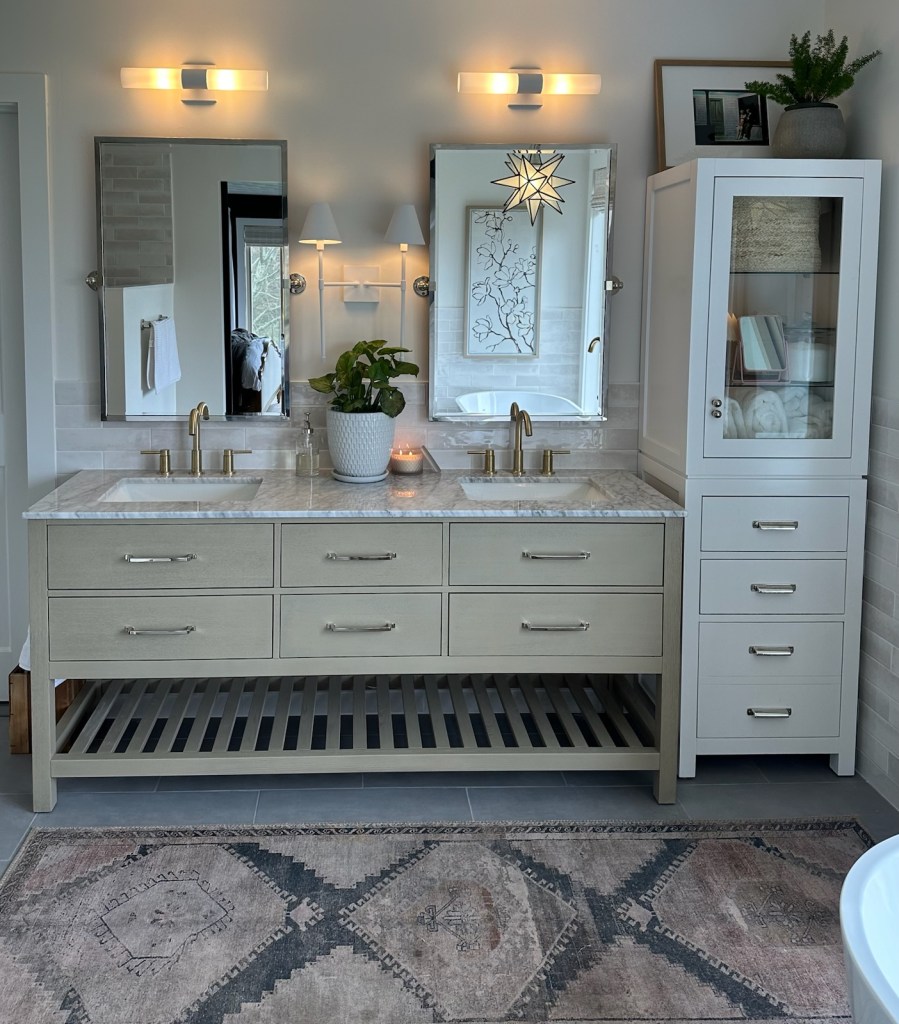
In a previous blog post (linked here) I shared some plans, and talked about how we would be relocating the bathroom. The space shown above will be reconfigured to serve a different purpose down the road. We opted to make our bedroom smaller in order to accommodate the primary bathroom. After taking space from our bedroom, we were left with about 10’x15′ to work with. Here is a plan view of how we laid out the space. We were able to fit a walk-in shower, soaking tub, double vanity, and water closet!

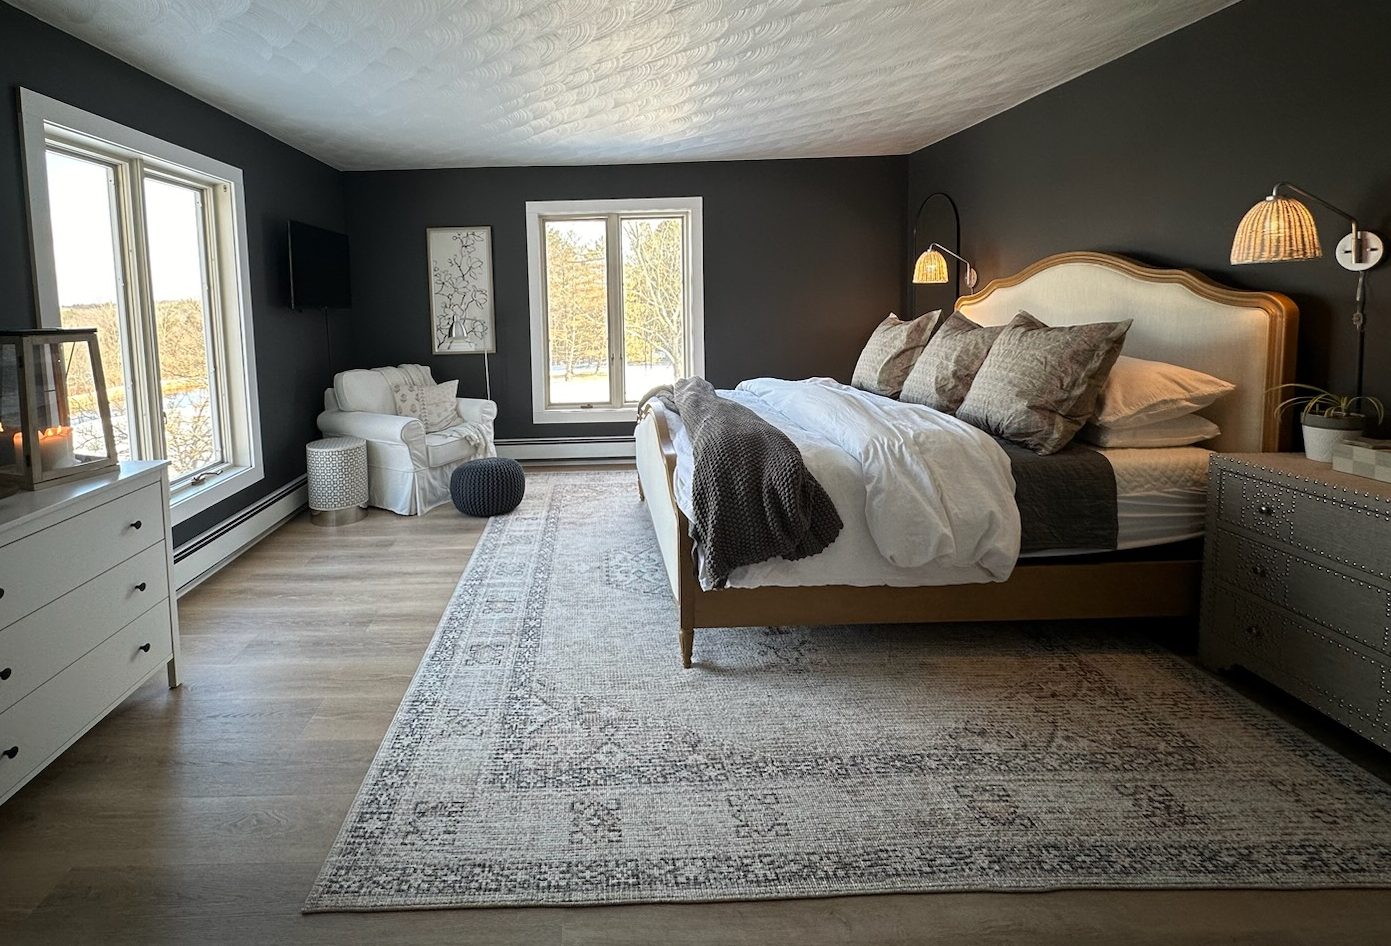
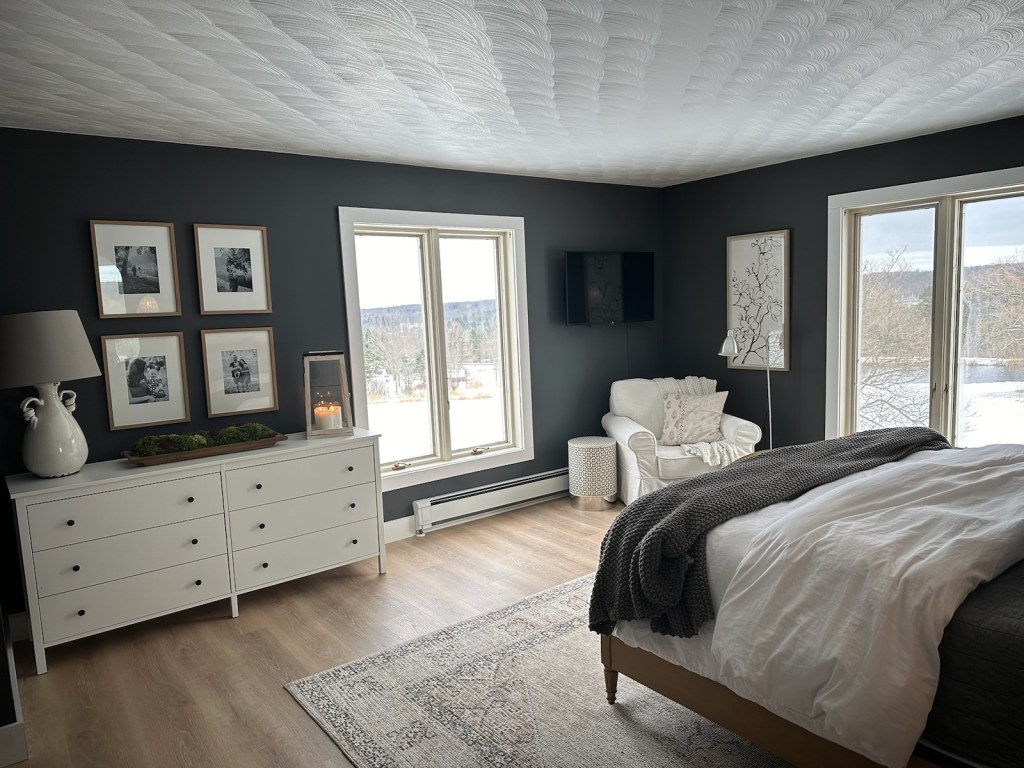
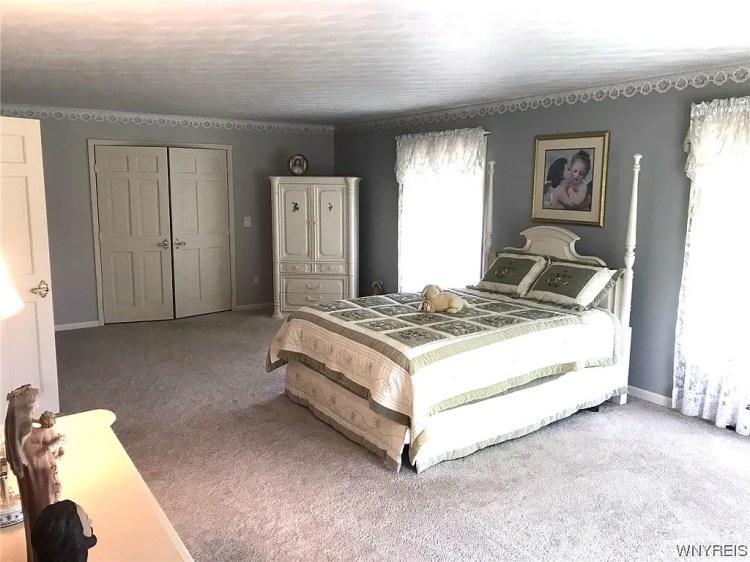
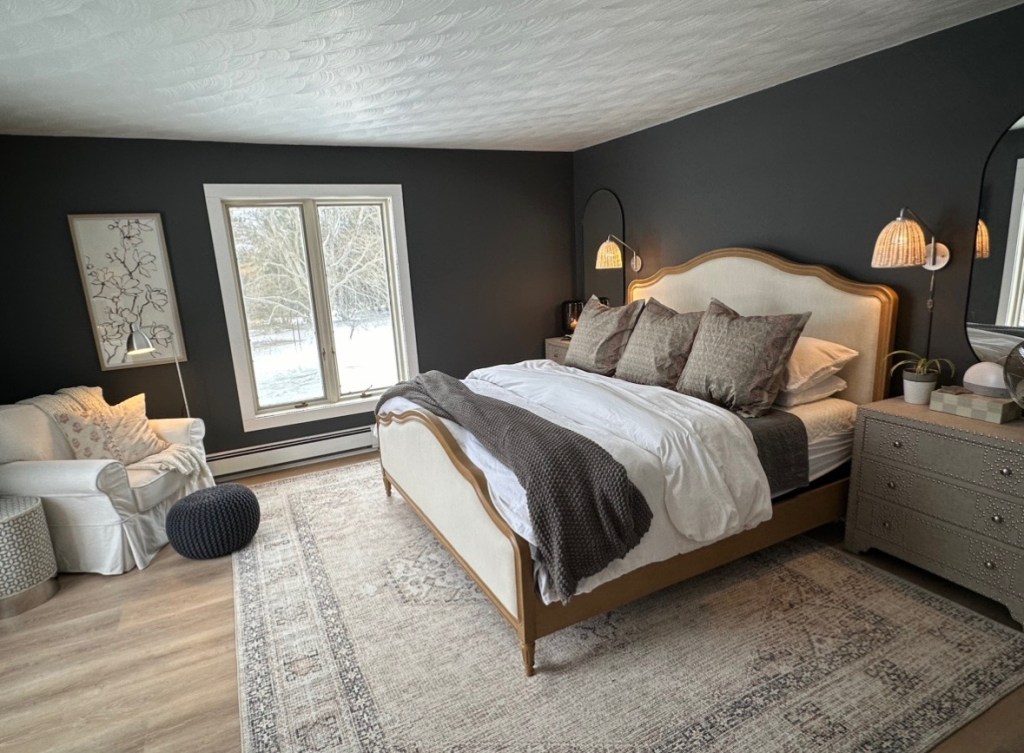
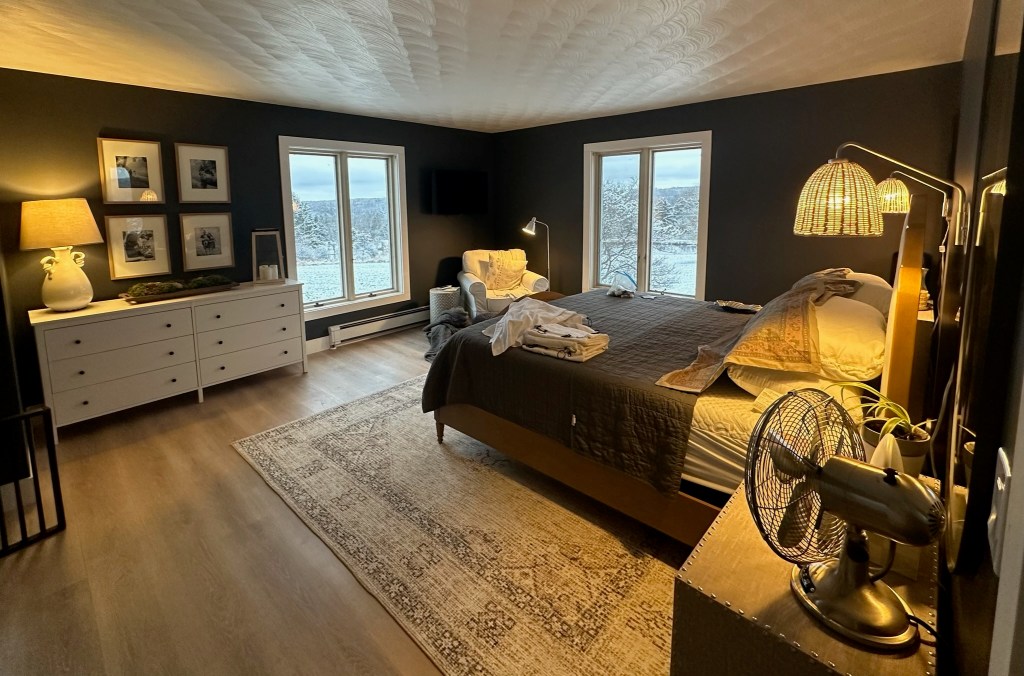
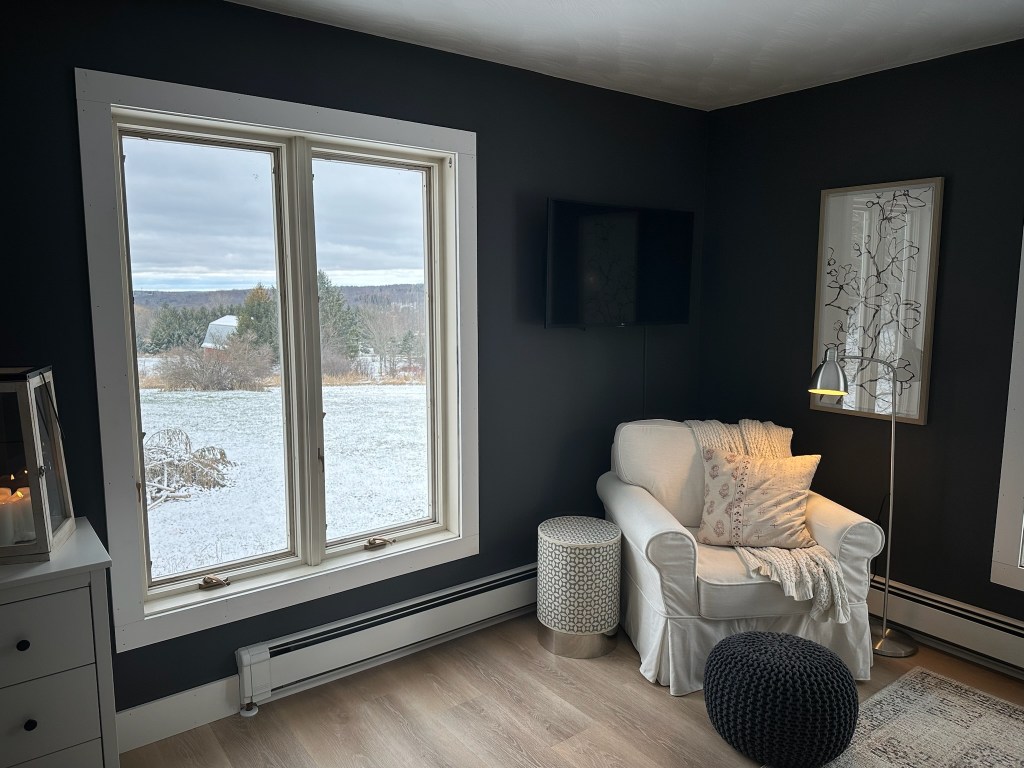
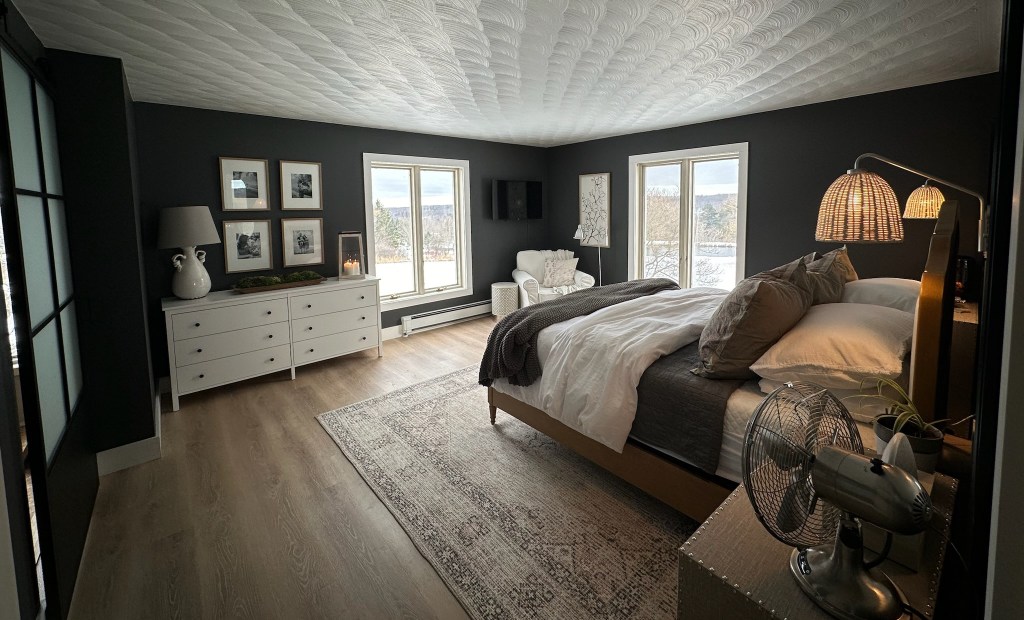
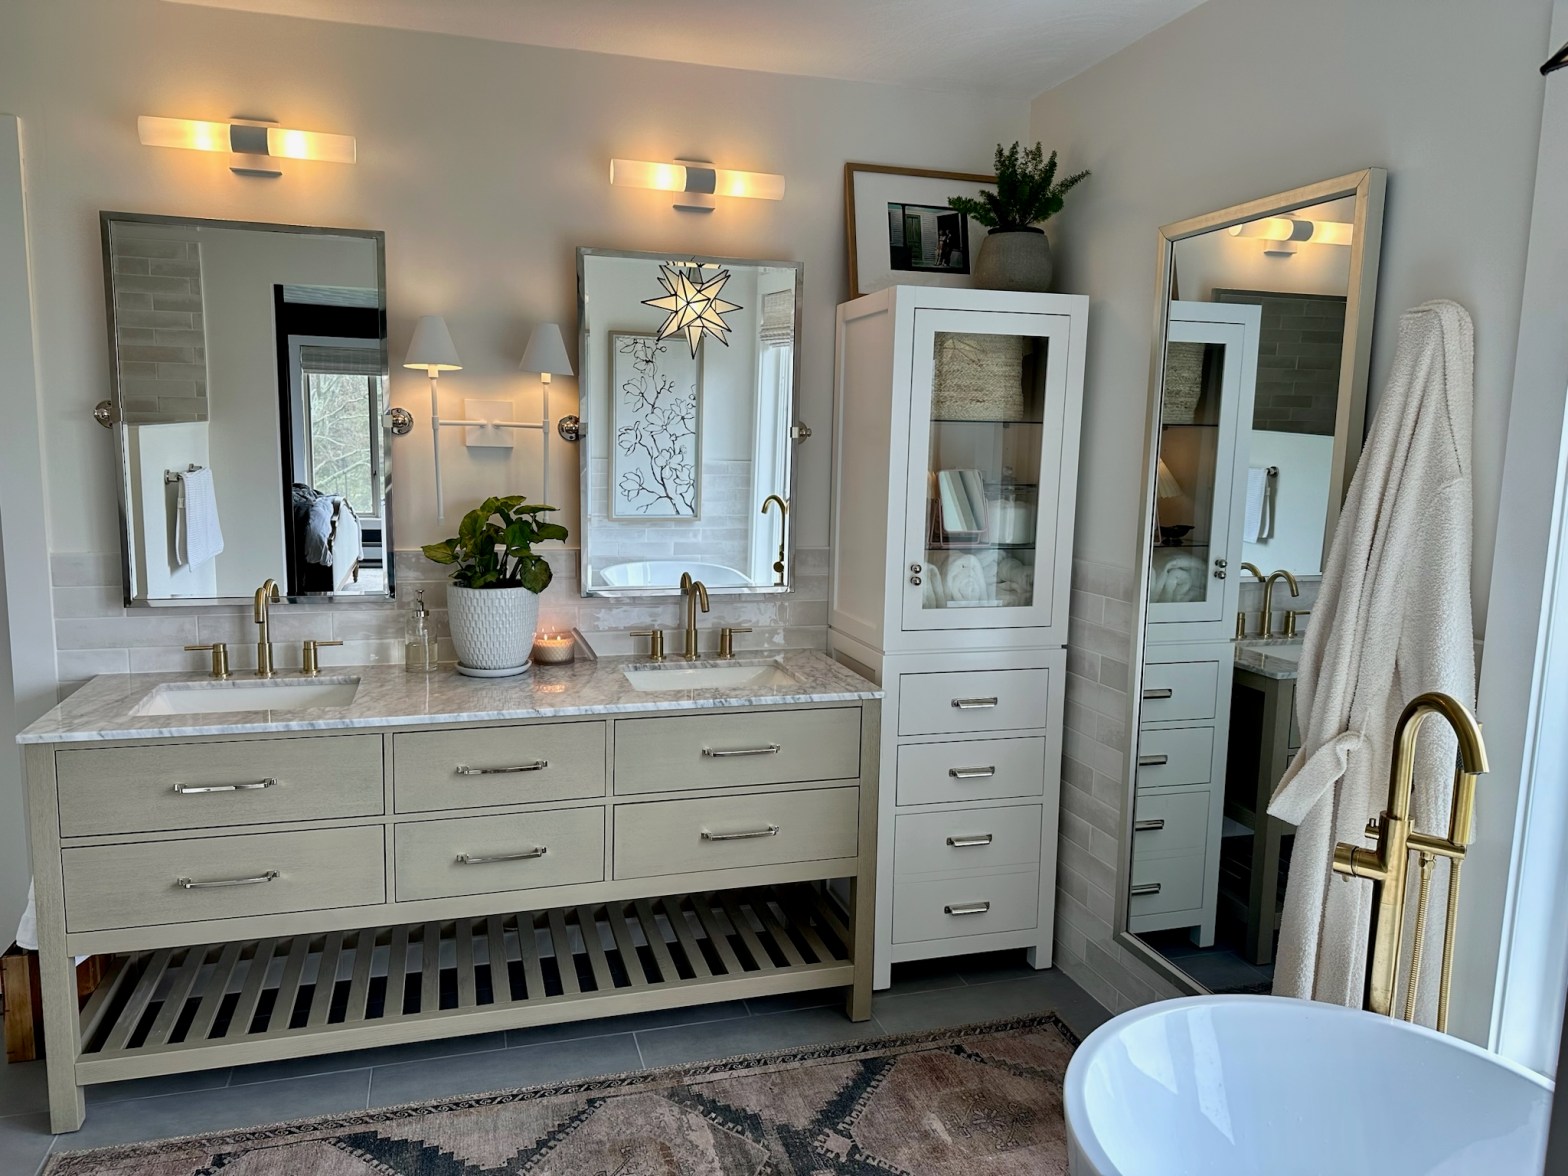
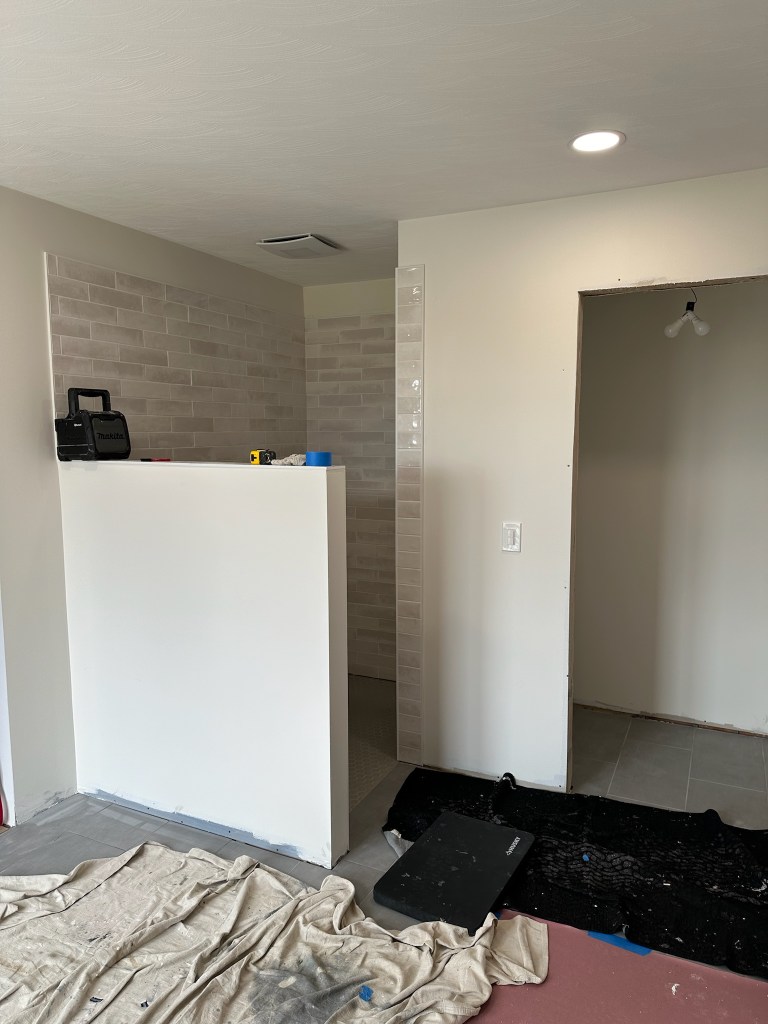
And here are some before and afters!

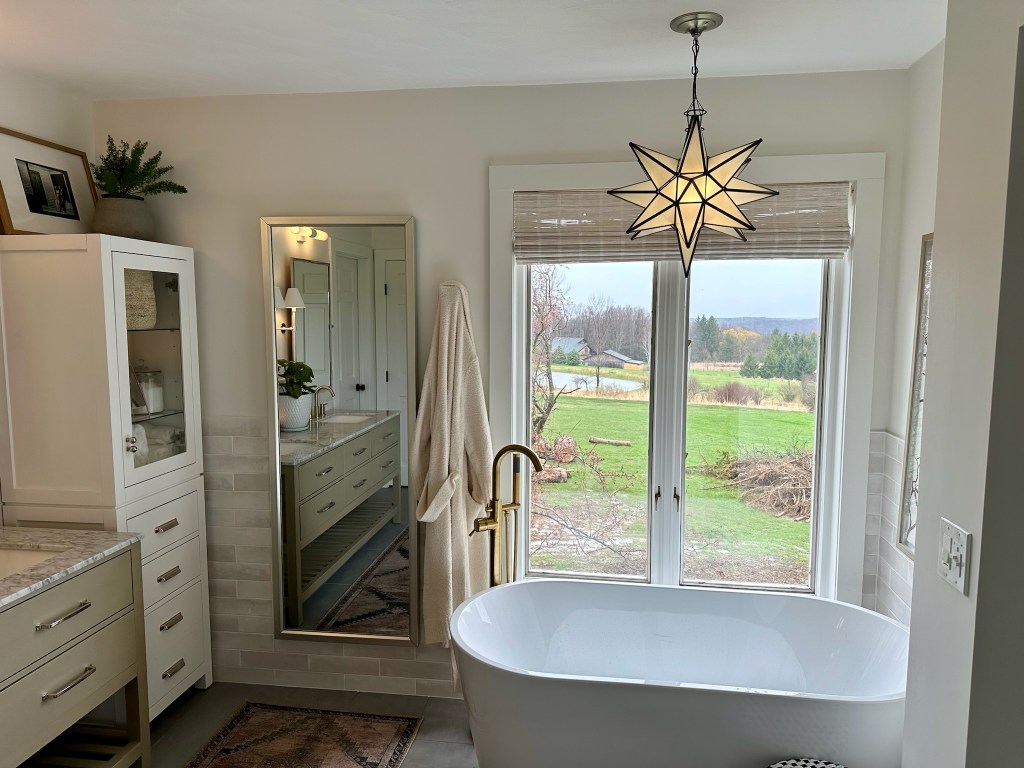
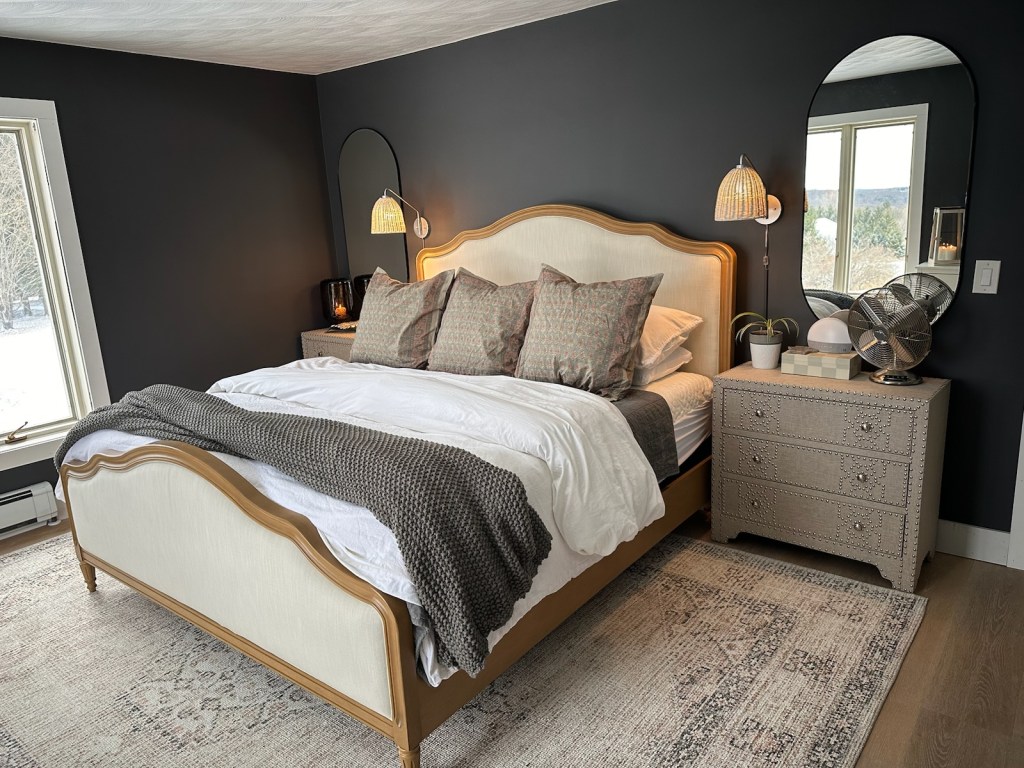
Hard to believe it’s the same space! We are so happy with it.

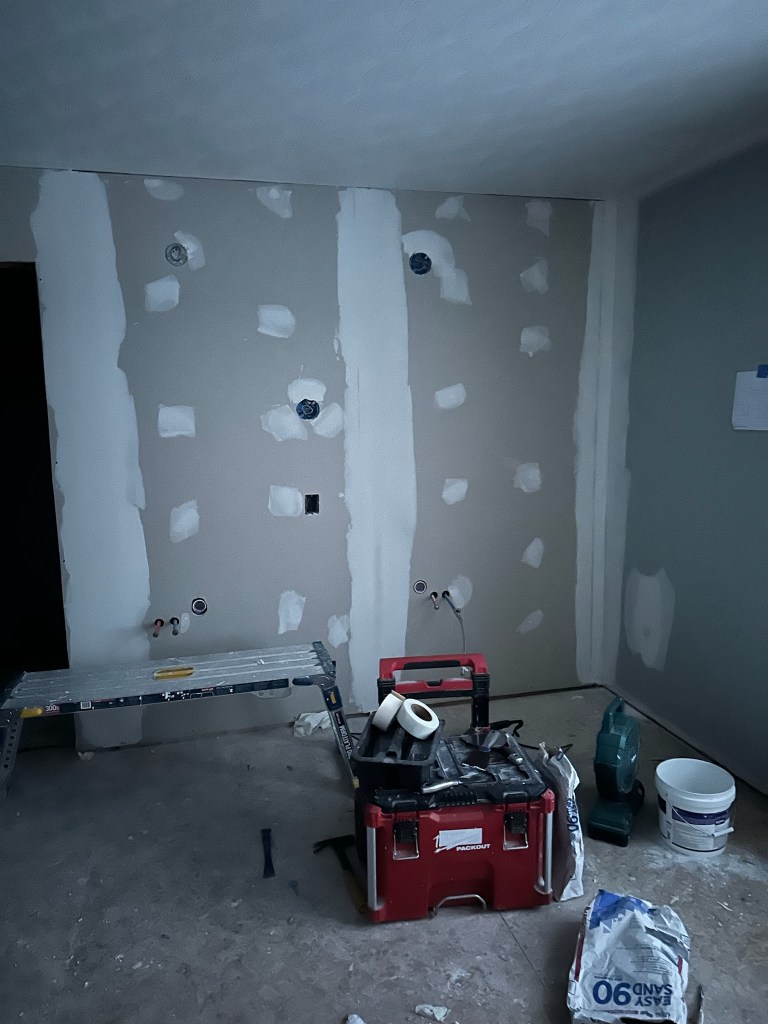
Overall, the project took six weeks to complete. Our contractors were fantastic! It’s always such a joy to see things as they start coming together, and your vision comes to life.

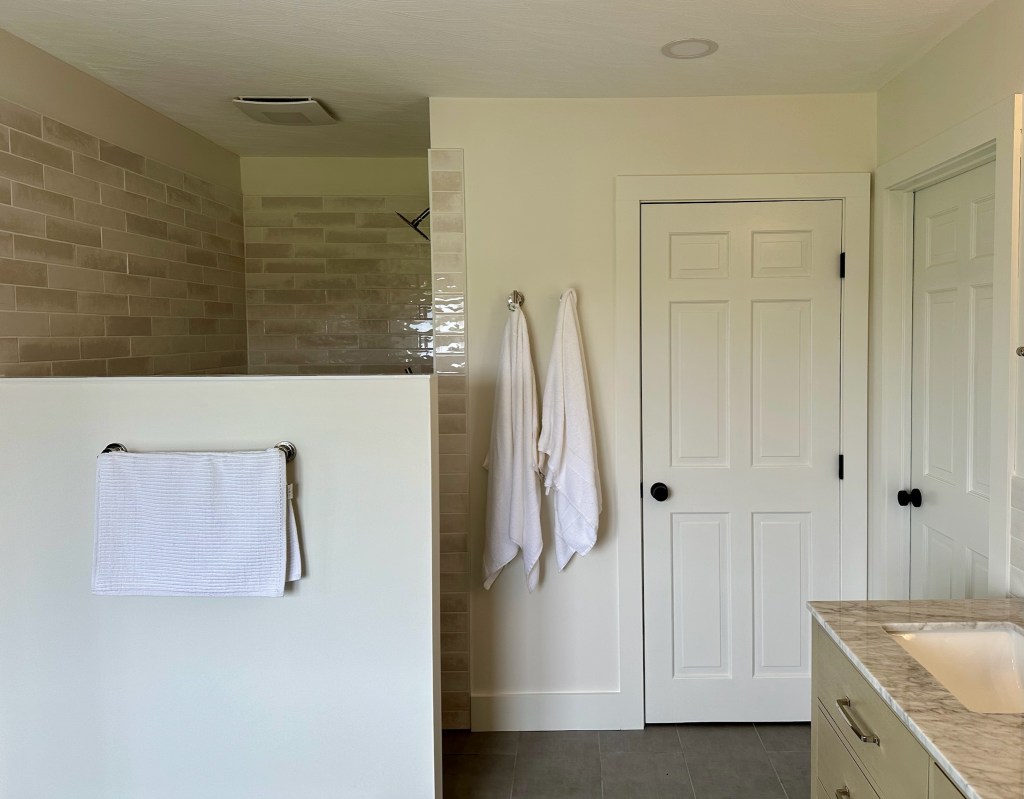
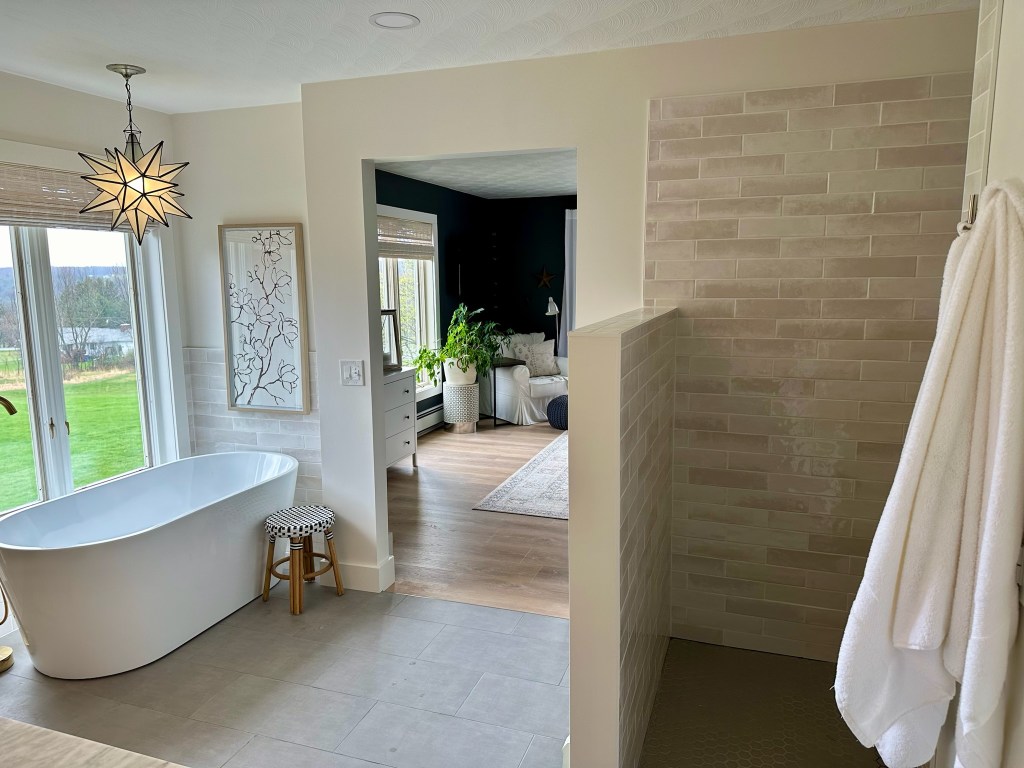
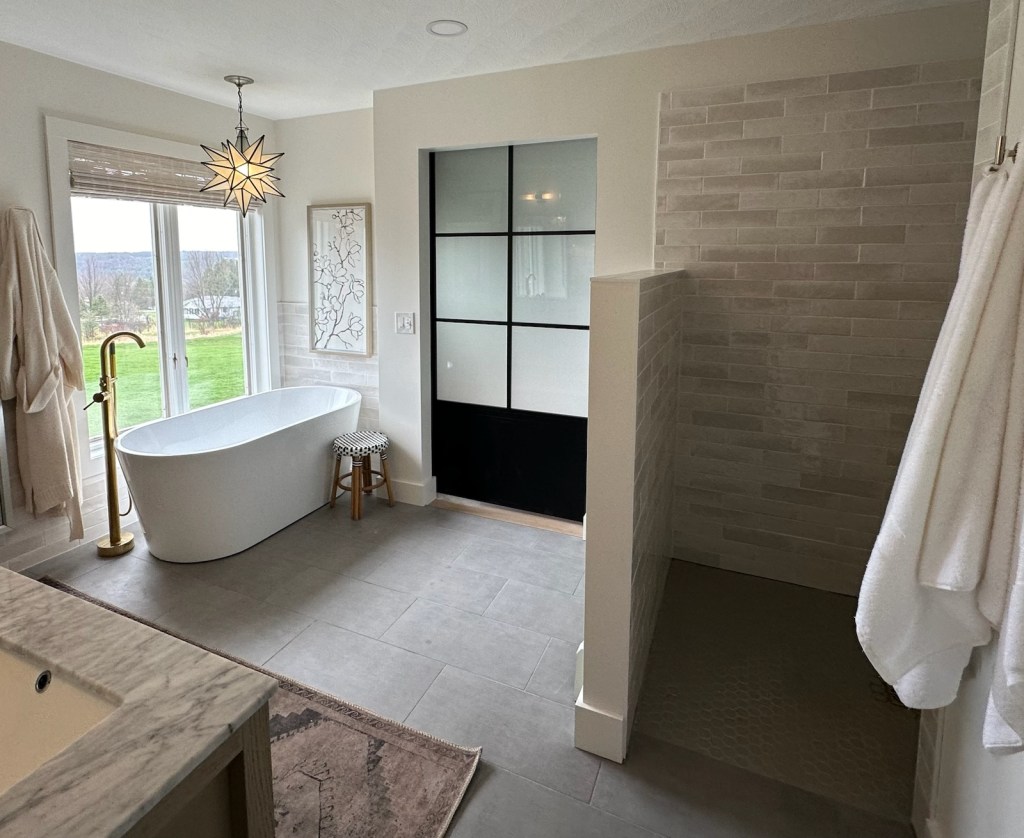
Most of the time, I keep the door to our bedroom open – thinking of our room more as a suite that’s all connected. Below you can see how it looks with the glass barn door closed which also looks really pretty.
Tip: If you choose a barn door for your bathroom, make sure the toilet is in a water closet with a door that locks. Guaranteed privacy!

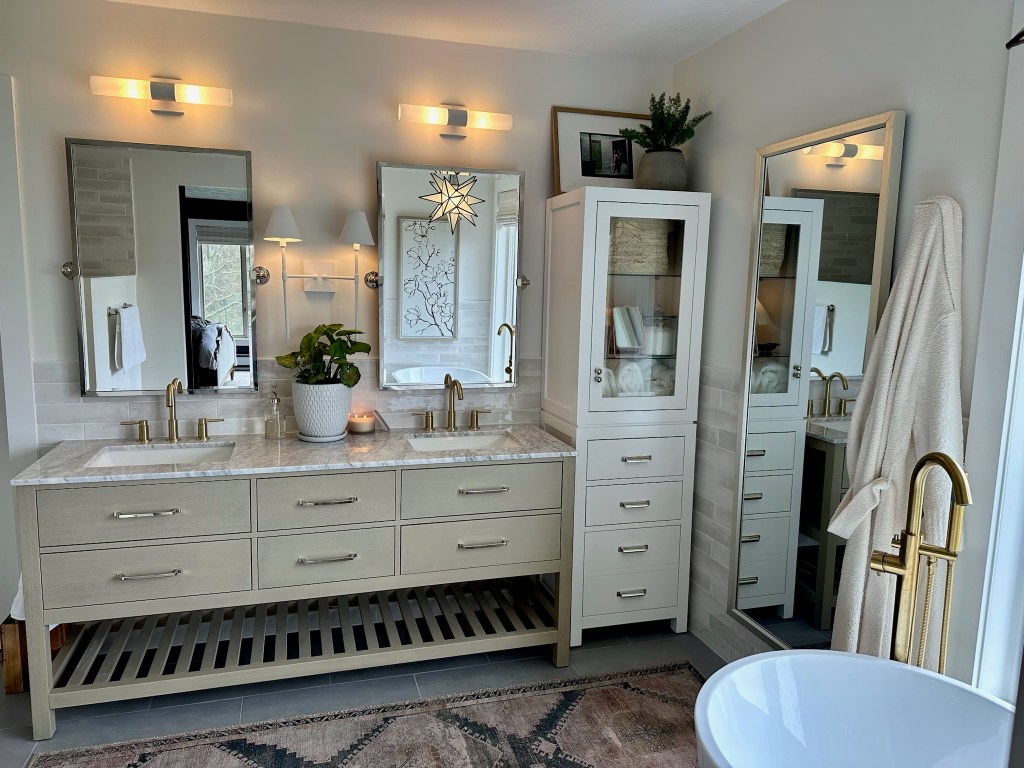
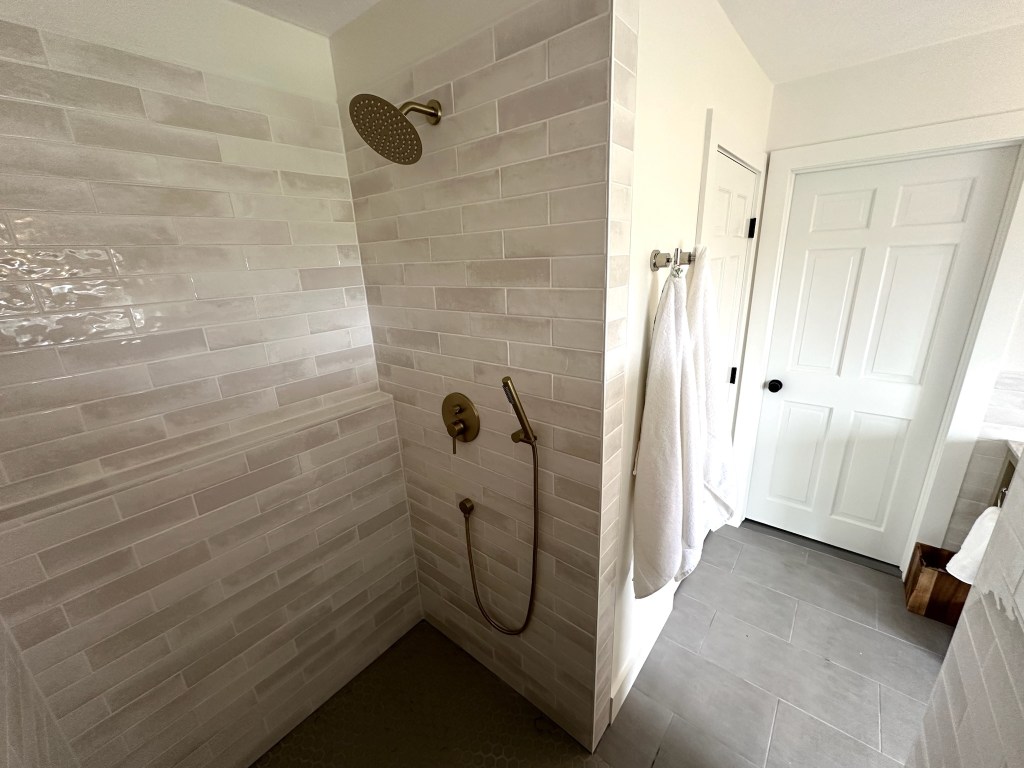
Another feature of this room that we love is the curbless, walk in shower. It feels so spacious. I also designed the shower to have a ledge, as opposed to niche for all our shampoos and soaps. Our contractor was happy with this, and I am too!

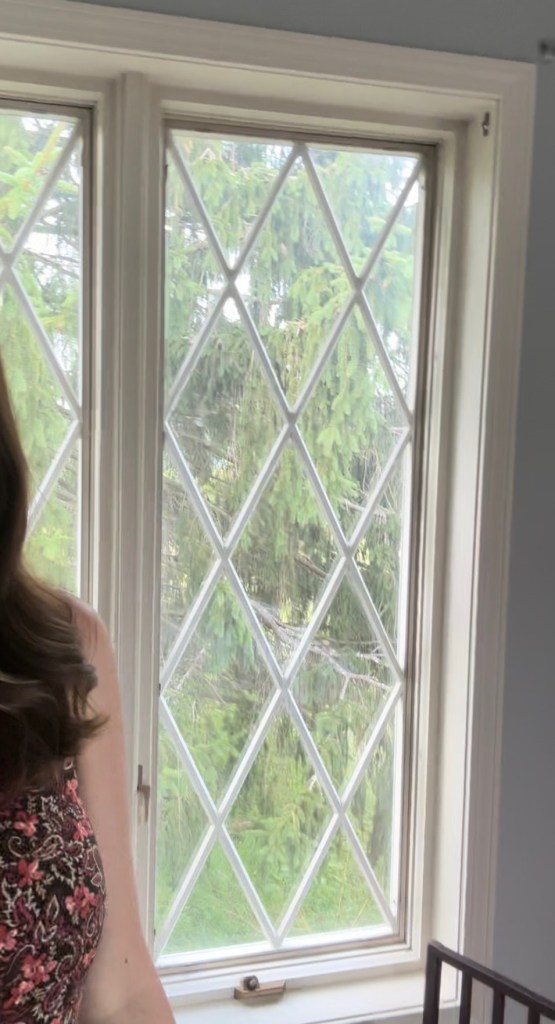
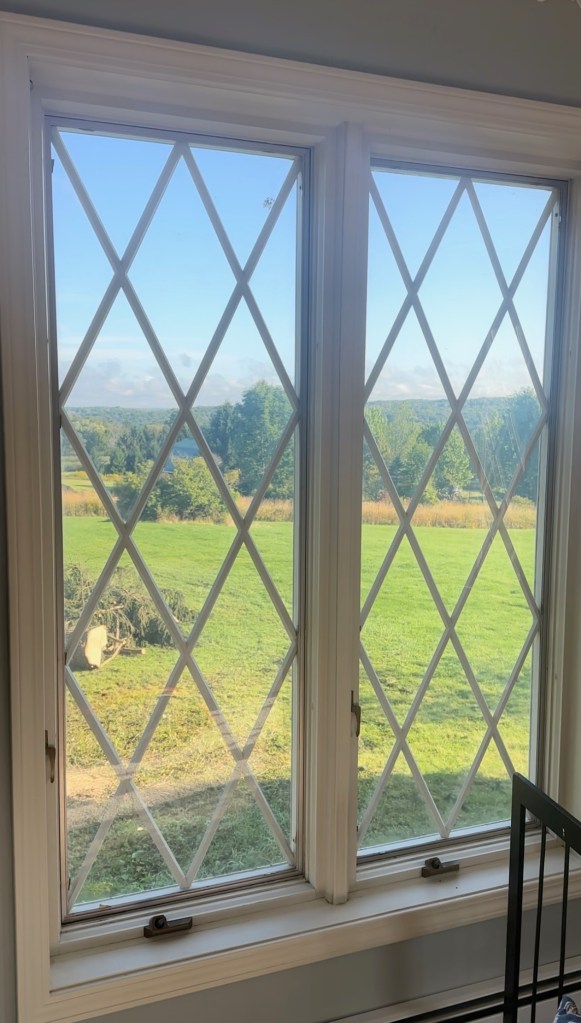
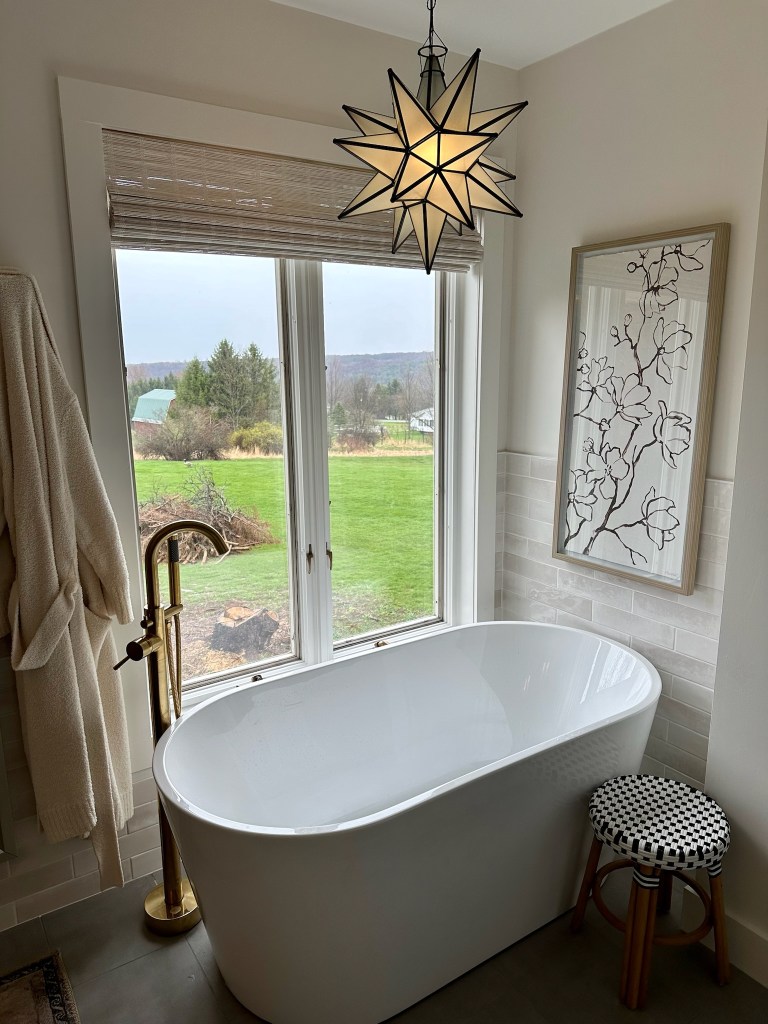
My favorite part is the soaking tub that overlooks the view!

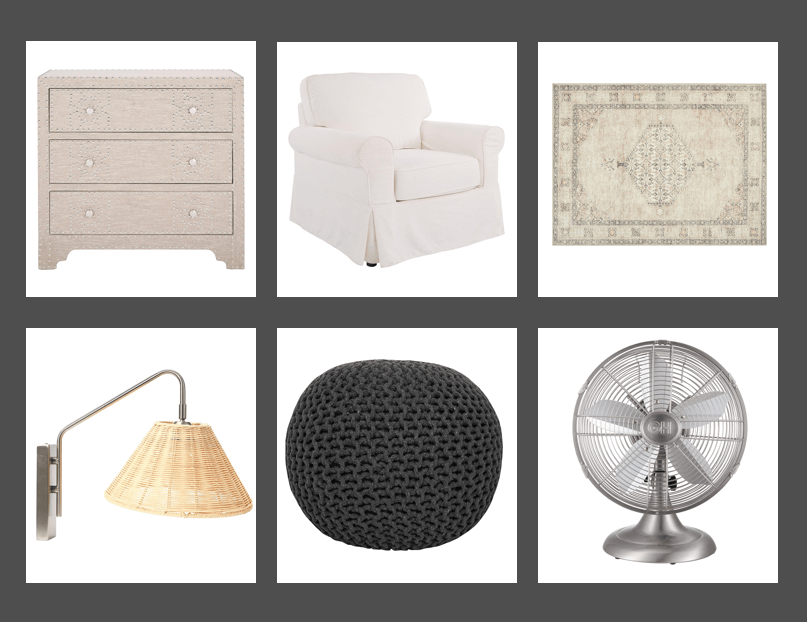
I styled the shelves with items that are pretty, but also practical. The top basket holds my blow drier and curling iron.

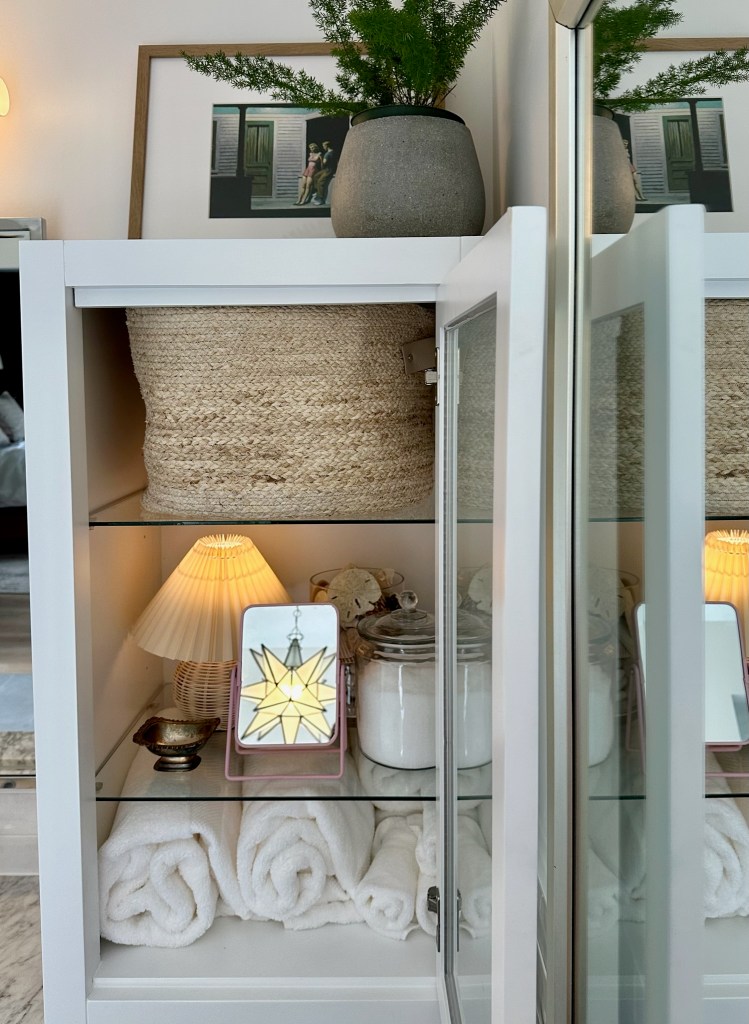
The last step was of course adding some plants. This space was a blast to design, and so worth the wait. Thank you for reading! What are some of your bathroom renovation “must haves?”

If you’re local to the Western New York area, and are looking for a contractor, we highly recommend the team that did our work. Jim Winkel – (716) 208-3683.

Window Treatment Ideas and Tips

The final stage of our bedroom makeover is complete – we installed our window treatments! Here is a before and after with the curtains hung.

Today I am sharing some tips and ideas for how to style your windows. Options can vary widely based on price, style, and quality. Sometimes it can be overwhelming to decide what is right for your home! At the end of the article I will list my go to sources for curtains, rods, shades, and more!

  1. Curtain Hanging
    -Consider hanging curtains high and wide. A good formula is about 3-4″ from the ceiling and half the width of window wide on each side.
    – A rule of thumb for curtain length is that they should be “kissing the floor” or barely grazing the ground. I sometimes cheat this and bring them up about a quarter to half inch to make vacuuming easier.
    – No part of the glass should be covered when curtains are open
    – If there isn’t enough room to give the curtains space, it is perfectly fine to hang to one side if needed. Below is a picture of how I did this in our previous home.

2. Curtain Types
– You can’t go wrong opting for linen or cotton materials. They look great and come in a variety of light filtering options.
– For hanging, I personally prefer using clip rings, or back tabs as opposed to grommet tops or rod pockets. I think they give a more custom look. Below is an image with examples of the different types.

3. Rods
– Many designers say that every room should have a touch of black. I usually choose to incorporate this in my curtain rods. (I will link my favorites at the end)
– Simple finials help to create a timeless look
-Consider what other metals are in your room when choosing the finish of the rod.

4. Shades
– Inset shades will look more custom.
-You can find shades for most window sizes online with having to order a custom shade – saving a lot of money!
– In some cases, you can mount shades at the ceiling to elongate ceilings
– For “blackout” purposes, I prefer a shade to a curtain.

Below I am linking some window treatments options that I have used, and would reccommend! I am a member of the Amazon Affliliate program and earn from qualifying purchases.

1. Curtains2. Rings3. Rods4. Shades

Thank you for reading! The next project will start on is our bathroom remodel, and getting our daughter’s shared bedroom ready for our baby’s arrival this spring.

Primary Bath Plans

Some rooms of this home have me more excited to renovate than others. It might be that our only shower is in the basement, or that only bathtub is rusty, but I am counting the days to have our primary bathroom done!

As I described in my previous blog post (linked here), we added a wall in our bedroom to create a space for the primary bathroom. The previous bathroom will be reconfigured to a laundry room and hall bath, but that will be down the road. Below is a picture of what that space looked like when we bought the house.

And here are some pictures of the space we created for the new bathroom – a blank slate!

I spent a few hours trying to come up with the best layout…I had finally perfected it and showed my husband. “I like it, but I think you can do better” he said. I hated to admit it, but he was right. I am so glad he pushed me because I think our new plan will be the best use of space! Sometimes it takes a few tries and a couple set of eyes to land where you should.

My favorite part is the bathtub that will be in front of our window. I can’t wait to have a spot to unwind and see God’s creation.

Below is the mood board for the room. Some things will be different in execution, based on budget and availability. But I always like starting with a dream board and trying to achieve that look for less. I can’t wait to see it all come together!

I will be sharing updates as we begin construction and finally start diving into this project- thank you for reading!

Primary Bedroom Reveal

Our bedroom is finally complete! I am so grateful to be settling into this space.

In a previous blog post, I shared the plans for our bedroom as well as my inspiration. My husband would ask what my vision was, and I would tell him, “Think cozy, beachy, cottagey, country, mountain lodge, chic” – lol! But truthfully, I just like to design with all the styles I love, instead of sticking to one “theme”.

Something unconventional we did in this room was add a wall. Most renos involve knocking walls down and opening space (we will be doing plenty of that elsewhere), but for this room, adding a wall was the right call. We did this to create a space for the primary bath. An upcoming project that will be such a relief as it will be the bathroom that not only we use, but our kids, and guests will use as well. Even with dividing the space, our bedroom is still about 20’x15′ and very spacious.

Here are some before and afters taken from the same angle!

In addition to the wall, we had new flooring installed. We purchased Lifeproof LVP from Home Depot and can’t say enough good things about them. I have never been a fan of wall-to-wall carpeting, so this was a change I was very excited about.

My favorite thing about this room is the metal and frosted glass barn door that leads into our future bathroom. You can see a peek into that space below.

After construction was done, I painted the walls Gray by Benjamin Moore. We spent an afternoon moving in, building furniture, and hanging things on the walls – one of my favorite ways to spend a Saturday!

Of course the best part of the room was here all along – that view!

Below are some links to products I used (or similar), that you can shop for your home. I am an Amazon Affiliate and earn from qualifying purchases.

1. night stands  2. rug3. chair  4. sconce5. poof6. fan

Next up, I will be sharing our bathroom plans as we prepare for that remodel. Thank you for reading!

Tree Removal and a Whole New View

There are a few reasons that a tree might need to be taken down. It might be too close to your home, block light, or have roots that are causing problems. We had two trees that checked all these boxes, so they were high on the priority list of things to be taken care of.

The first one was right outside of our bedroom window. You can see it on the right side of our house in the picture below.

From inside our bedroom, the view was just of the tree branches, growing right up against the window. I was blown away by the difference when the tree was gone! Look at the view we were missing out on!

It was one change that truly made such a difference. I am so grateful for that view! Below is the side of our house now that the tree is gone. Much more open.

The next tree that was removed was directly in front of our home. Another big pine that was a bit too close for comfort.

Now that it’s gone we have another great view that welcomes us home every time we walk up the path to the front door!

You can see in the picture below that we have also started removing the pines that line the driveway. They make it difficult for deliveries, and almost impossible to plow in the winter.

We have some trees down and a lot of cleaning up to get started on! Each time we accomplish one task it’s a step towards our final goal. Thank you for reading!

Diaper Bag Organization

I was a new mom who googled everything. “How many times a day to nurse?” “How long are wake windows?” “What should I bring to the hospital?” and so on. There were so many great resources as I navigated all the things I needed to learn as I entered motherhood.

One thing I could have researched more was tips on how to pack a diaper bag. Too many times I would be out and realize I was down to my last diaper or had old snacks floating around the bottom of the bag.

After a year of lugging around odds and ends, I finally have a system that has kept me organized and prepared for whatever the day brings us! Today I am sharing my system for organizing a diaper bag and what essentials we always have with us. I will link what I used down below. I hope you find this information helpful!

I started by emptying everything out to better assess the situation.

Then, I divided my items into six sections and got a zipper organizer pouch for each.
1. Diapering
2. Eating
3. Cleaning
4. Toys
5. Clothes
6. Seasonal

  1. Diapering – Just the usual items like diapers and wipes. One thing I have found useful is having disposable bags in here for dirty diapers in case we are out and about and don’t have a garbage can nearby.

2. Eating – This is where I put her snacks before we leave the house. One thing I always have in here is a bib, and disposable placements. They are life savers and have adhesives to stick right to the table!

3. Cleaning – An extra washcloth, sanitizing wipes and pacifier wipes are what I keep in here. The pacifier wipes are great for toys that get dropped on the floor as well!

4. Toys – A few toys for in case of emergency. Anyone else have a baby that’s more entertained by people when you are out and about?

5. Clothes – One extra set of clothing including socks and a sweater.

6. Seasonal – This will change as we get into fall and winter. But for now, I keep sunscreen, a sun hat and swim diapers.

This system has honestly been such a game changer for us!

I am linking some of our favorite diaper bag essentials! I am a member of the Amazon Affiliate program and earn from qualifying purchases.

Thank you for reading!

Wishing Well Makeover

At our previous home, there were many things that I was able to do to improve our space. I could paint, I could rip up carpet, I could landscape, I could even redo our exterior (linked here). Accomplishing those things was so rewarding!

This house is a bit different because I cannot renovate a bathroom, or move load bearing walls, or install flooring (I mean, maybe I could, but it wouldn’t be pretty!). Those tasks will take patience, and the help of professionals to get done.

In need of some instant gratification, I looked around for something here that I could do myself. The decorative wishing well in our front yard needed some serious tlc. In fact, it could probably be knocked down and we wouldn’t miss it at all. But I thought it would be a fun project, and making a beautiful place for my daughter to play sounded like just the thing my spirit needed to get back on the design wagon!

Here is a before and after of this project!

The first thing I did was power wash the entire structure.

Then I painted. I used spray paint for the roof and sides which made it much easier to get an even coverage on all the hard to reach places.

And finally, I decorated!

It may not be perfect, but it was a fun project to work on and my daughter loves it! I am linking the flags I used – I think they would be so cute in a kid’s bedroom too! Linked here

It feels great to have one project checked off my list! Thank you for reading!

Scarlett’s Bedroom Plan

One of my all-time favorite rooms was my daughter’s nursery at our last house (linked here). I spent many hours in there, rocking my baby to sleep at all hours of the day and night. As tiring as those early weeks were, there was something special about being up with her while the world slept. Having the opportunity to design her room again brings me so much joy!

I am going to keep the permanent elements of this design a bit more gender neutral in case we are blessed with more children down the road who will also be using the space. But for now, I will be adding in girly elements through her bedding, and decor pieces!

The first mood board I am sharing shows the neutral base I am starting with and the second one shows how I will be incorporating some girly elements for her. Just a few additions can totally transform a space!

We will hopefully be getting started on the floors in bedroom wing of the house soon. It will be a budget friendly change that will have a huge impact! Goodbye wall to wall carpeting!

If you like this look, I am including links to similar items that you can purchase for your home. I am a member of the Amazon Affiliate program.

  1. Pillowcase 2. Blanket 3. Duvet 4. Ceiling Light 5. Sconce 6. Unicorn 7. Kids Table 8. Bed 9. Rug 10. Star Light 11. Chair

Thank you for reading!

Do I Need That? 10 Questions to Ask Before Making a Home Decor Purchase

One thing I look forward to each month is the Monday evening that my book club meets. Last month’s book was Braiding Sweetgrass by Robin Wall Kimmerer. Her writing inspired me to be more mindful of my impact on the environment, and the change I can make with my daily habits. One habit I am working on is buying less, starting with my home. Today I am sharing a list of ten questions I am trying to ask myself before making a home decor purchase.

  1. Have I taken the item out of context?
    I saw someone post this online the other day and thought it was brilliant! If you are contemplating a home decor purchase, take it to the trash can isle and put it on the shelf. If you still like it in that setting, buy it. When home pieces are out of the context of their beautiful merchandising, we have a better gauge on if we truly like it.

2. Do my inspiration pictures support this?
Check your Pinterest boards. Does the item you are wanting to purchase fit into what you are trying to accomplish with your design?

3. Is there a sustainable alternative?
It can be so fun shopping for the seasonal changes! If you have enough seasonal decor but still love grabbing a pumpkin latte and going shopping, head to a garden center. Mums, pumpkins, and hay are great fall decor that won’t take up space in your basement, or a landfill when fall ends.

4. Could I find this second hand?
Cased goods and decor are great secondhand purchases! Check marketplace and your local thrift shop for unique finds.

5. Do I have something similar?
Sometimes we collect things because we like them, not because we have a use for them. Chances are, we have a collection of things we love, and don’t really need another mug (my favorite thing to collect), vase, picture frame, etc.

6. Have I waited a day?
If you are on the fence about a purchase, wait a day and then come back to it. If you still love it just as much, it is probably a good bet!

7. Do I have a place for this?
Shop when you have a specific item in mind or space you are trying to fill. It can be so tempting to buy something because it is “pretty.” Having a place for everything means less items in storage and less money wasted.

8. Is this something I would normally purchase or is it just trendy?
While our tastes are always evolving, it can be easy to get swept up in trends. Ask yourself if you would like an item a year ago, and if you think you would like it a year from now.

9. Will this bring me joy?
Sometimes things that bring you joy are a great purchase for that reason alone!

10. Is this useful?
Items like pillows, blankets, coasters, plants, candles, mirrors and lamps can add so much to a space and have a function. Knick-knacks are great additions, but don’t always have a use.

Thank you for reading! These are tips that I am working on incorporating into my life. I hope they were helpful for you too!

Primary Bedroom Plans

Someone once gave me the advice that when moving to a new home, take care of your bedroom first. That way when you have the chaos of construction and unboxing all around, there is a comfortable place to retreat to at the end of the day. I loved that bit of wisdom!

There are many rooms we want to renovate in this home (okay, every room), and one that I have been so excited about is our primary suite! I have always loved my bedroom. If there is an hour to relax at the end of the day, I prefer to be in bed than on my sofa. Anyone else feel that way?

My biggest design inspiration came from Brooke Christen’s Connecticut home. Her bedroom captured everything that I would want our room to be – cozy, comfortable, and clean. Here are some pictures of her space.

Our space doesn’t just need decorating. We will be making the room smaller to add a primary bathroom. Right now, the bedroom is almost 30′ long so there is PLENTY of space to work with! (The current primary bathroom and teeny-tiny main bathroom will be demolished and reconfigured, but those are projects for another day).

Did you know that bed placement can affect your quality of sleep? The previous owners arranged the room to have the foot of the bed facing down a long hallway. This typically isn’t the best for restorative sleep as there is too much action heading directly your way as you lie down. We are rotating the bed next to the door for more privacy and to take advantage of the beautiful views out our windows!

Here is the mood board for our room! I am so excited to see this come to life! Some things we have already purchased, and others we are waiting on. Some of items we will need to swap out more affordable options, but I like to dream big with the inspiration, and then reel it in from there.

If you like this look, I am adding some links to items from Amazon that you can shop for your home! I am a member of the Amazon Affiliate program.

  1. Blind 2. Flushmout 3. Light 4. Mirror 5. Door 6. Bed 7. Quilt 8. Duvet Cover 9. End Tables

Thank you for reading! I hope to have more to share on this space soon!