Our home office tour – Plus tips on maximizing a small space

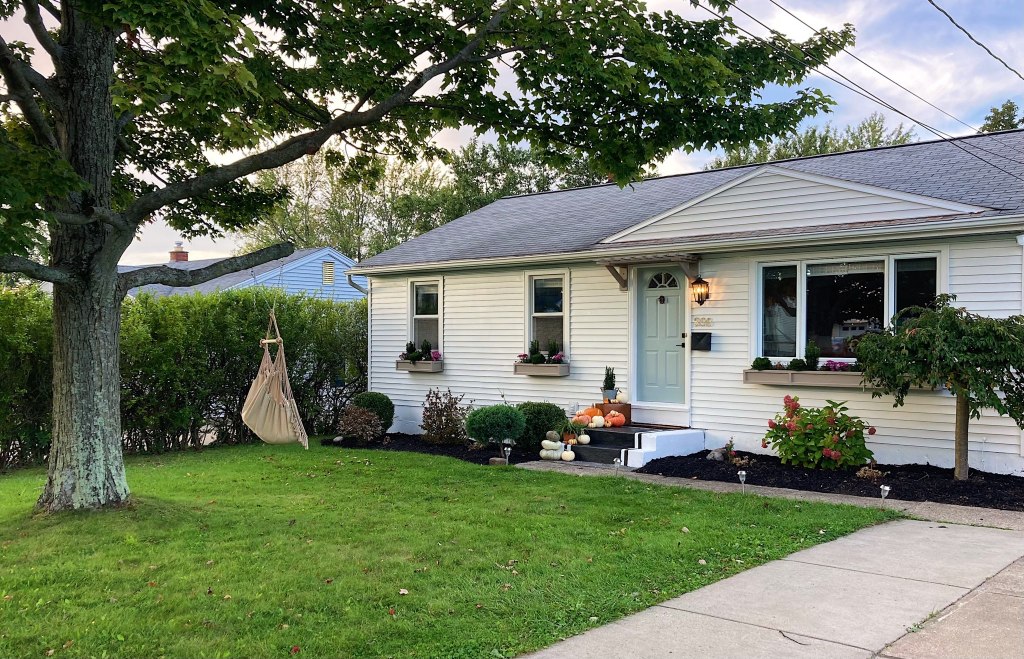
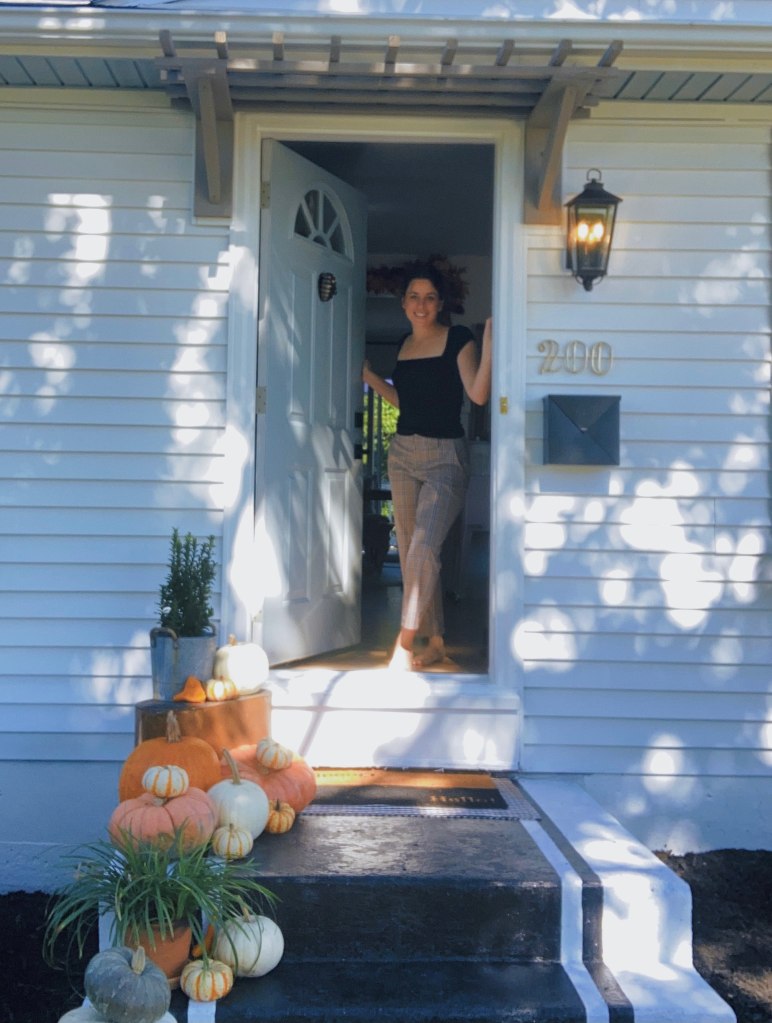
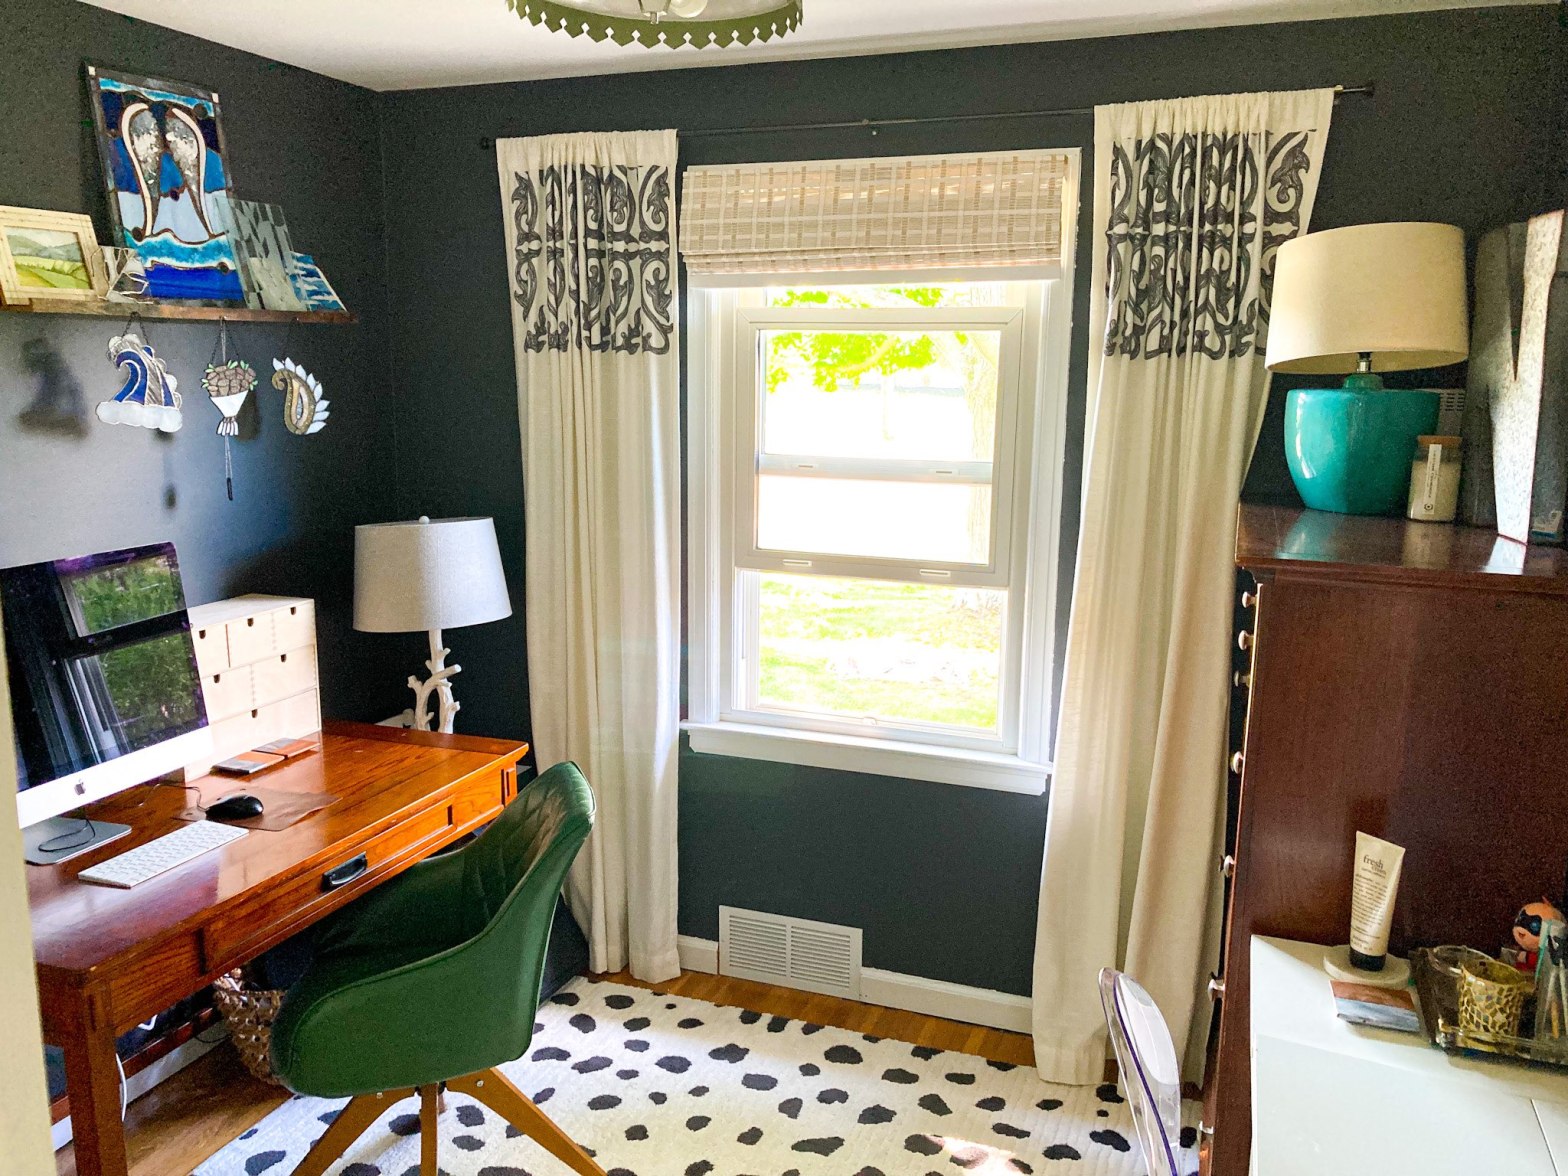
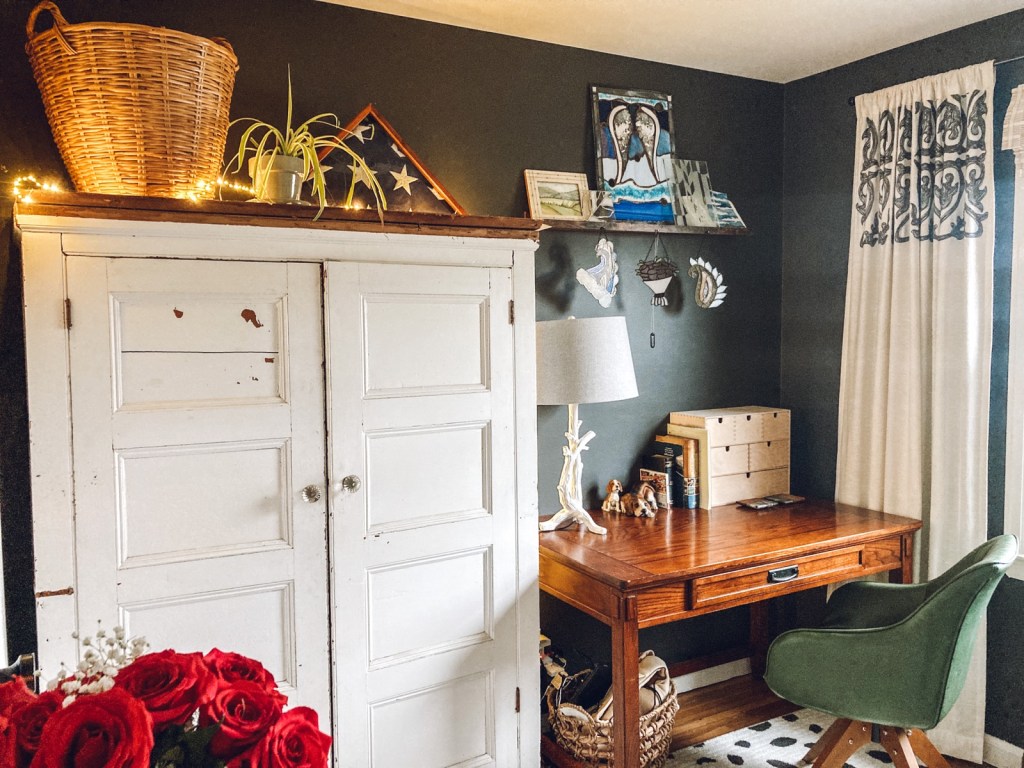
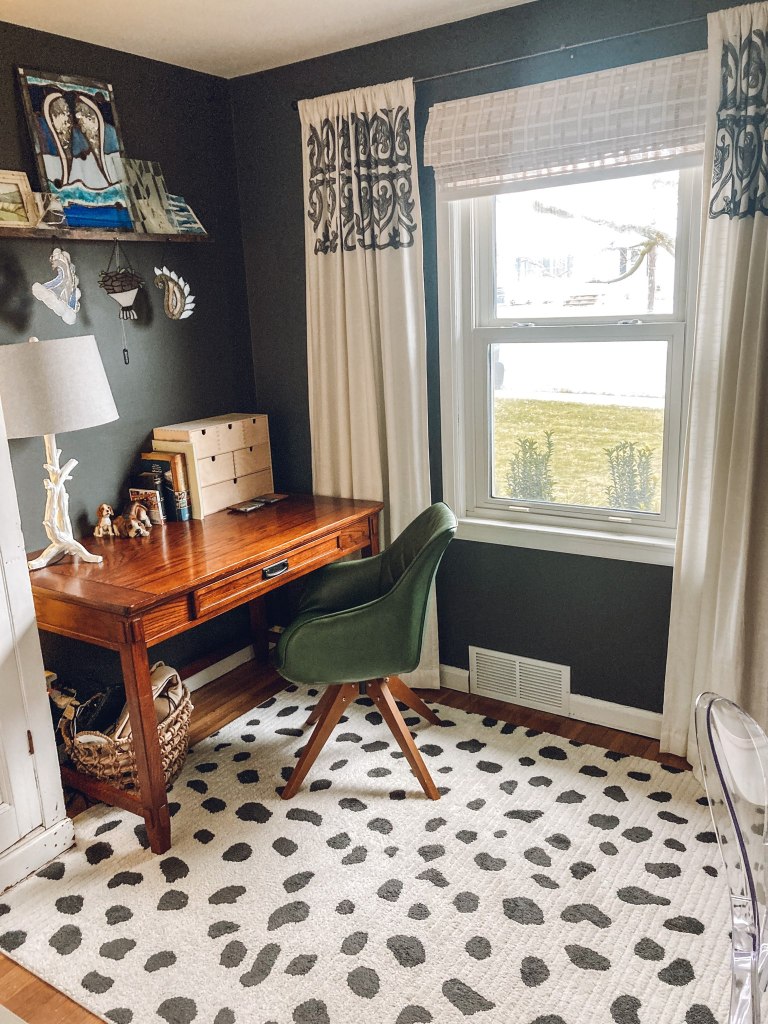
Our office has the most personality of any room in our home. I chose to design it that way for a few reasons. The first being that it wasn’t central to our main living area, which gave me some freedom to venture from the colors and styles happening in the rest of our house. The second reason was that I knew it would be a mix of hand me down furniture, so I leaned into an eclectic approach. My goal was to fit a dresser, desk, vanity, cabinet, and set of drawers into this small space without it feeling cluttered. And I think we were able to achieve that! Here are some before and after’s followed by tips for working with a small room that I learned along the way.

Before
After
before
after
before
after
before
after

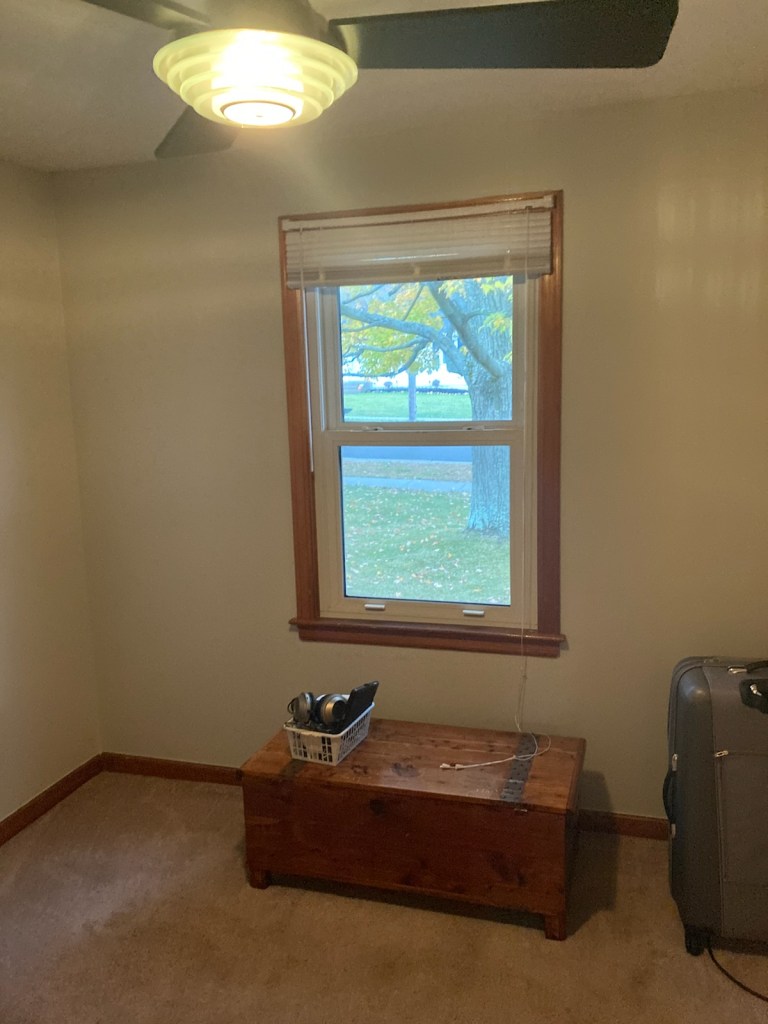
I am so glad we were able to see the potential in this room, I feel like it has a new life! Here are a few tips I learned when working in a small space:

1. Closed storage

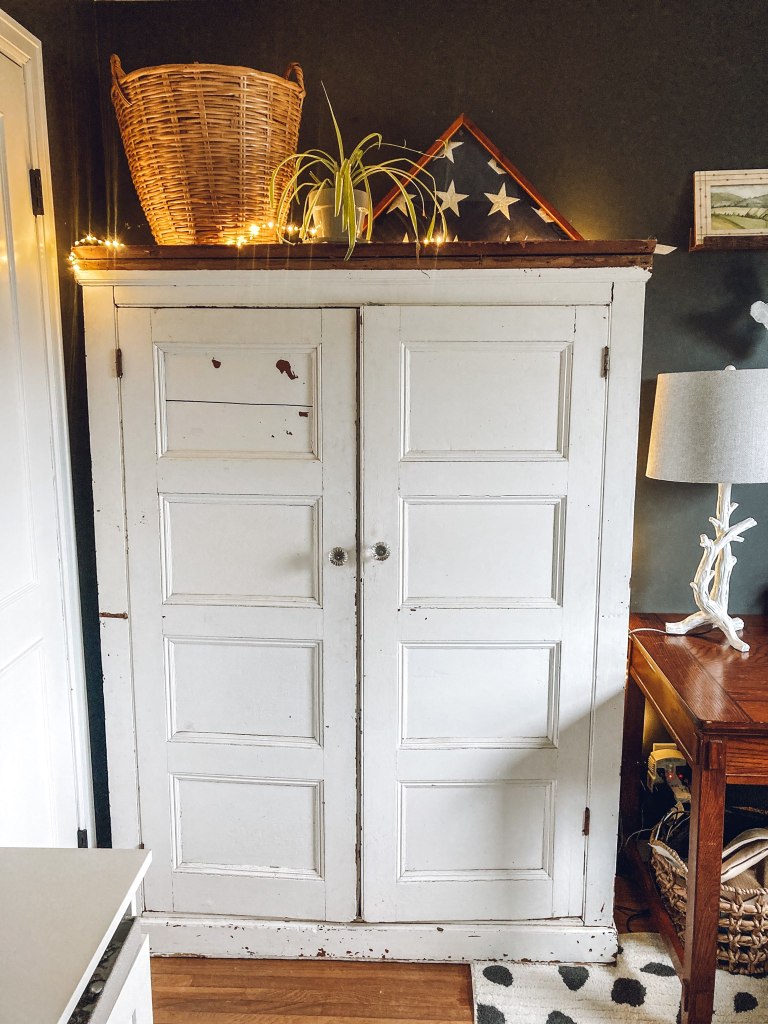
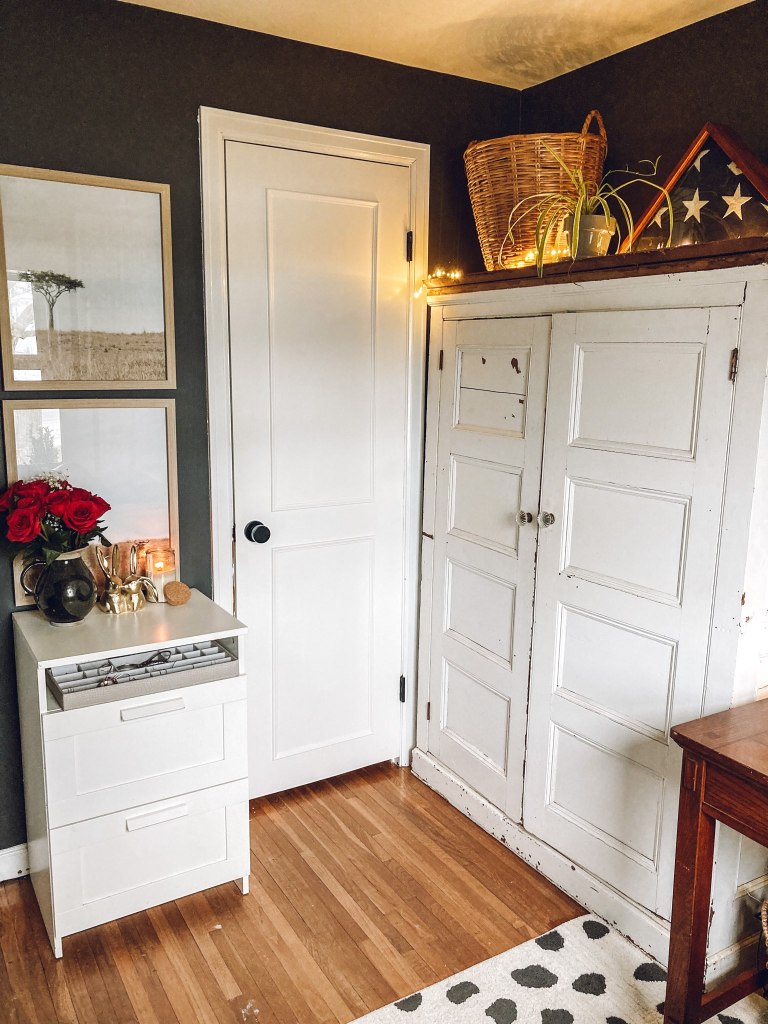
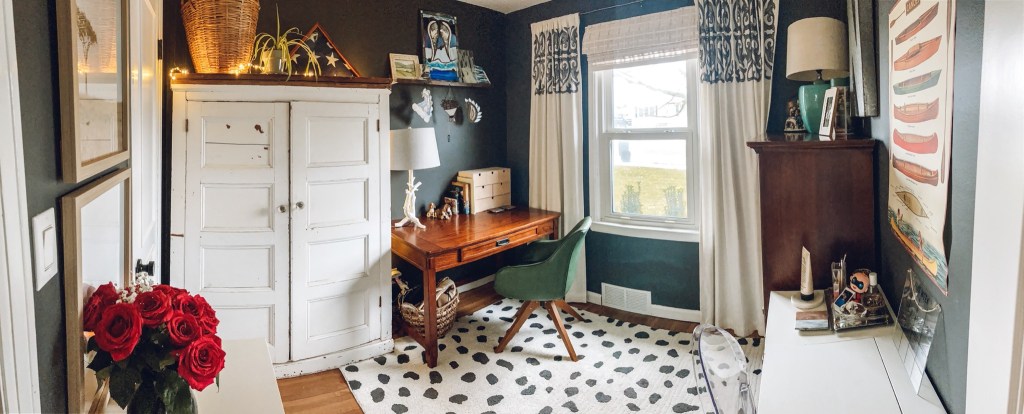
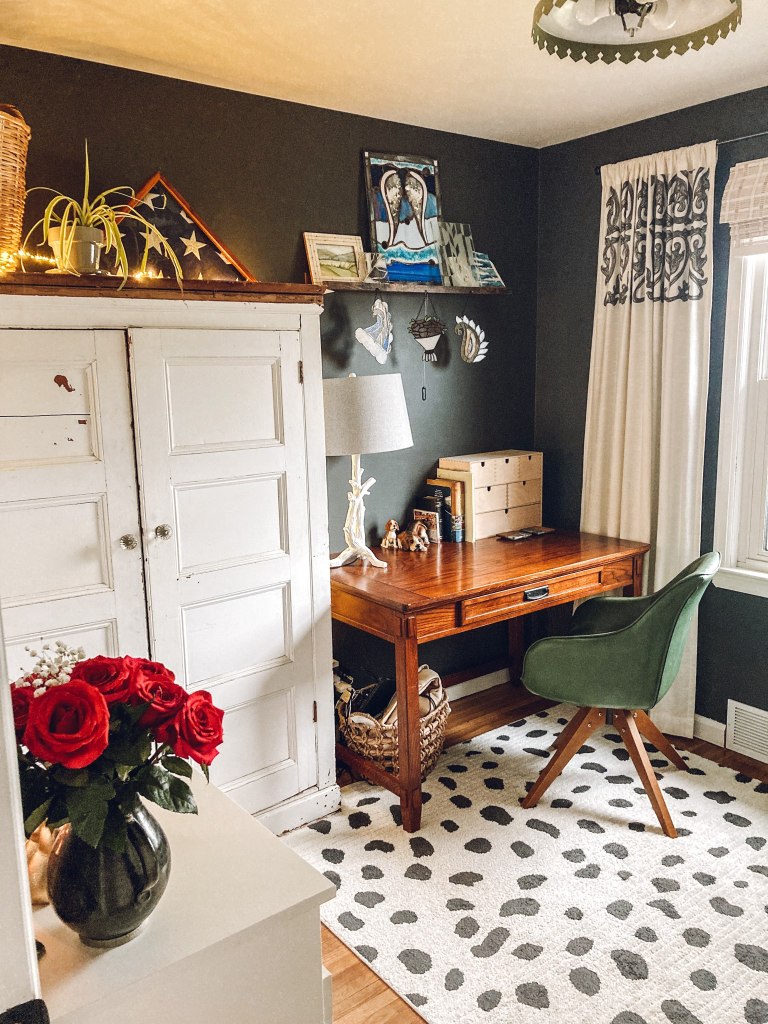
We needed this room to have a place to store things like books, crafting supplies, and all the odds and ends that a house acquires. Keeping those items tidied away behind solid doors limits visual clutter. This vintage armoire from my mom was originally in an old farmhouse and hides everything we don’t want out – I love the chipped white paint.

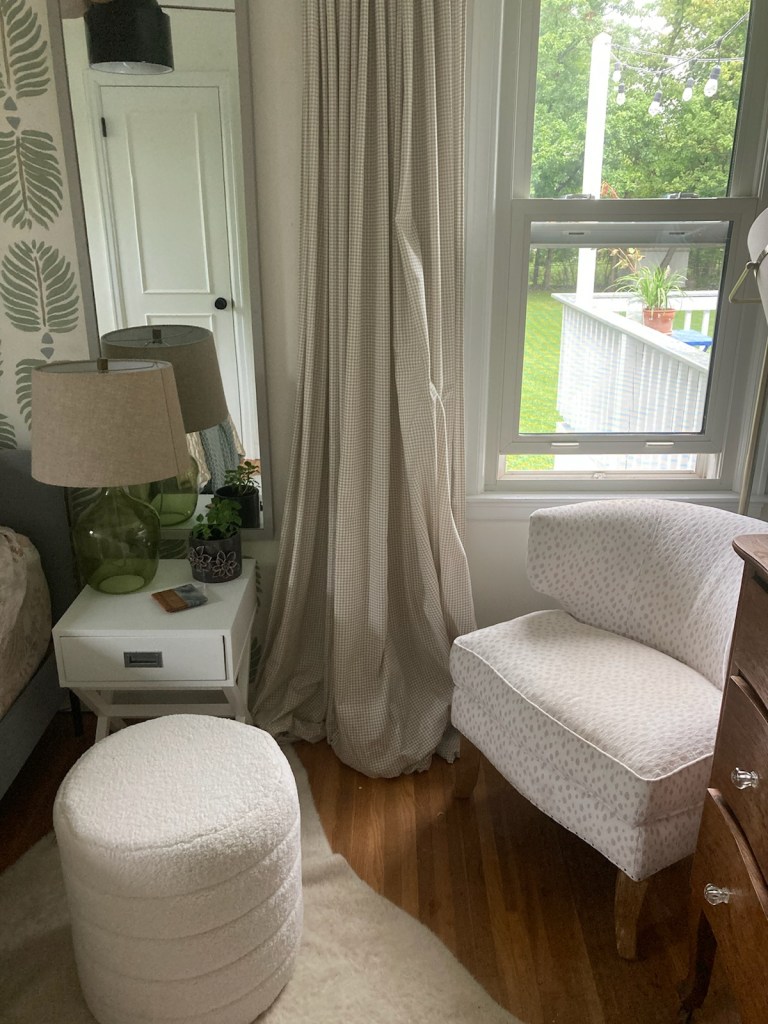
2. Try a dark wall color

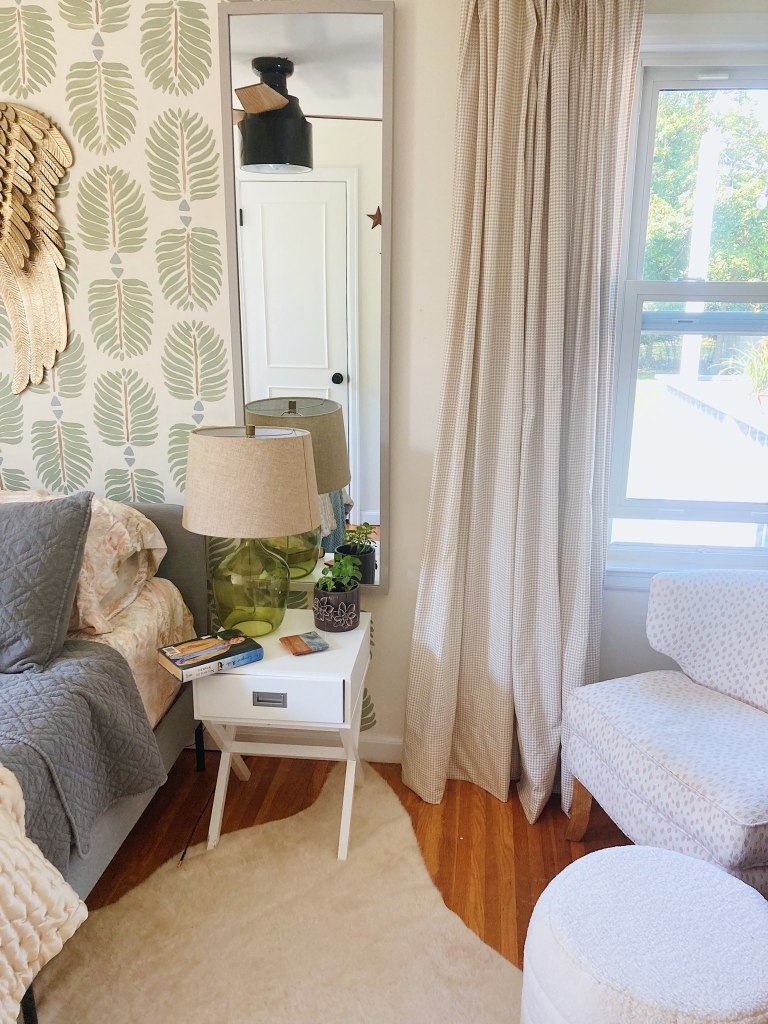
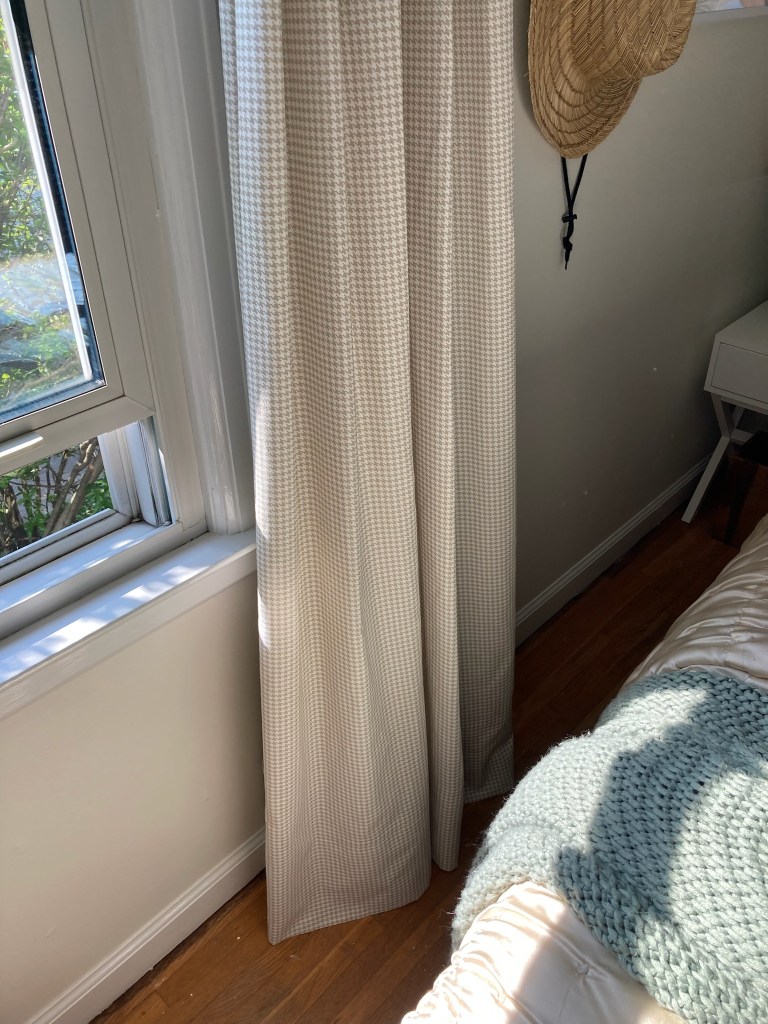
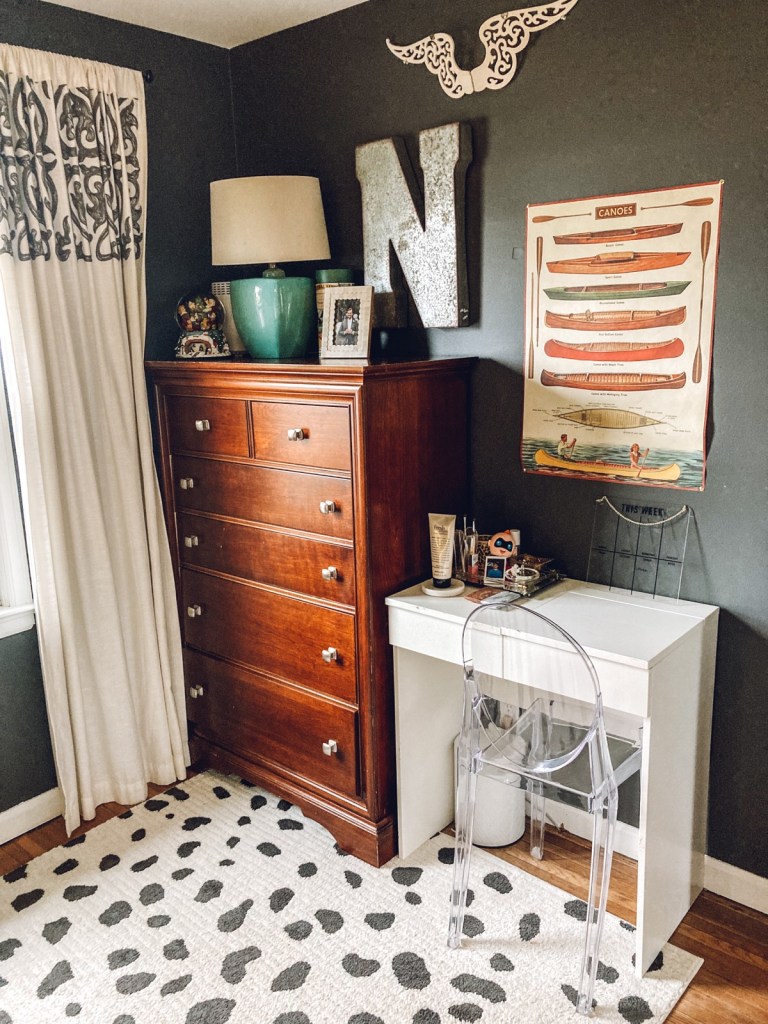
When picking paint for this room, a dark color seemed like the perfect option. We chose Gray by Benjamin Moore. Rather than making the room seem smaller, it gave the space more dimension. The color works especially well when contrasted by white, which we chose to do on our trim, doors, curtains and furniture.

3. Consider Light

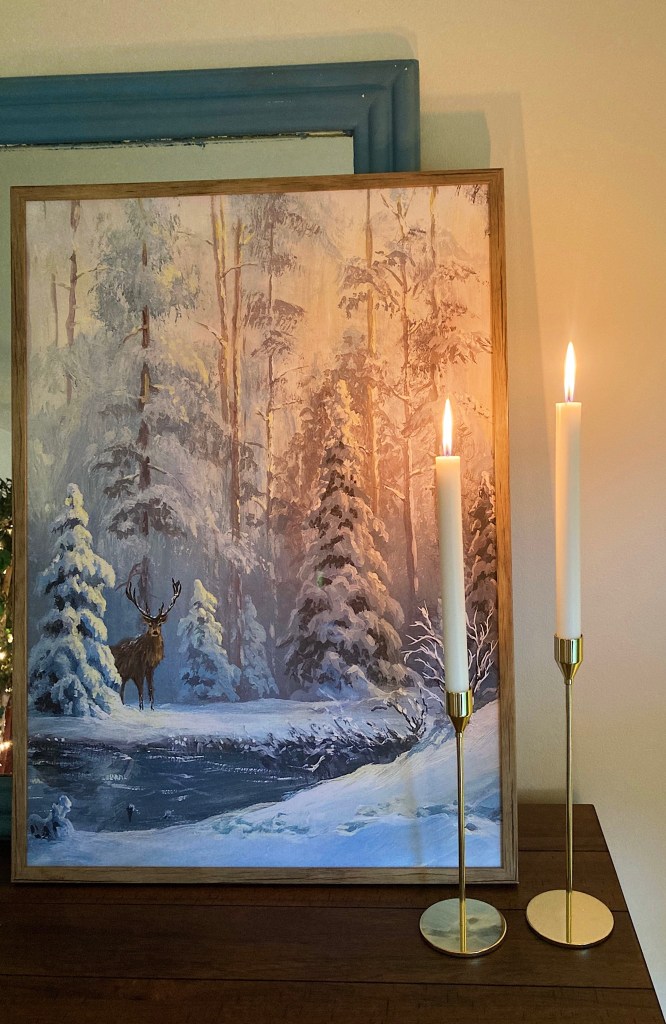
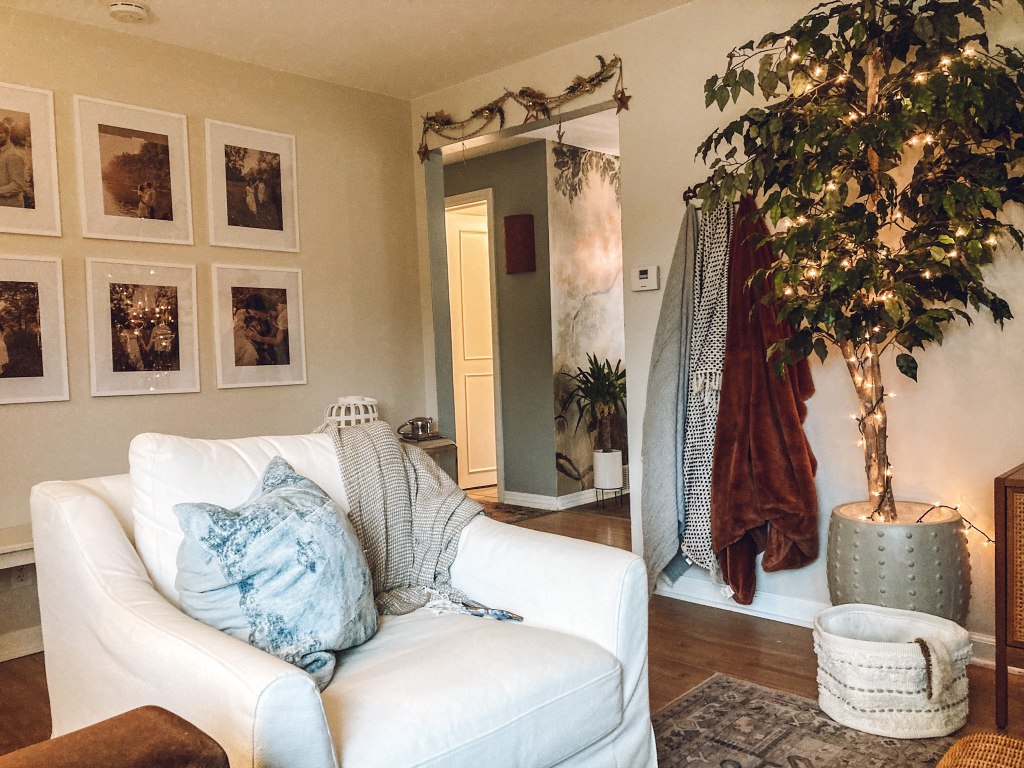
Not every room’s objective needs to be appearing “large and bright”. Some rooms, like this, are great because they are cozy and dark. Natural light is the best way to keep a dark room from feeling dingy. Keep windows clear from blinds and add coziness by lighting a candle, or stringing fairy lights.

4. Don’t be afraid to fill it

With tight spaces, the inclination can be to only use small furniture, and not much of it. In our case, by adding more pieces with substance and function, we were able to make the room feel bigger and more purposeful.

5. Add an area rug

The first day we had the keys to our home we ripped out the old carpets in each of the bedrooms. Underneath were beautiful hardwood floors! All of which needed some major tlc, but we were happy to have them. We gave the wood a good clean and lay down an area rug, which broke up the floor and gave the illusion of more space.

6. Designate “zones”

Each corner of the room acts as it’s own island with a specific purpose. Meaning clothes from the dresser don’t get piled up on the desk, and papers from our cabinet don’t get left on the vanity. My favorite tip for organization is that if everything has a place, you will never have clutter.

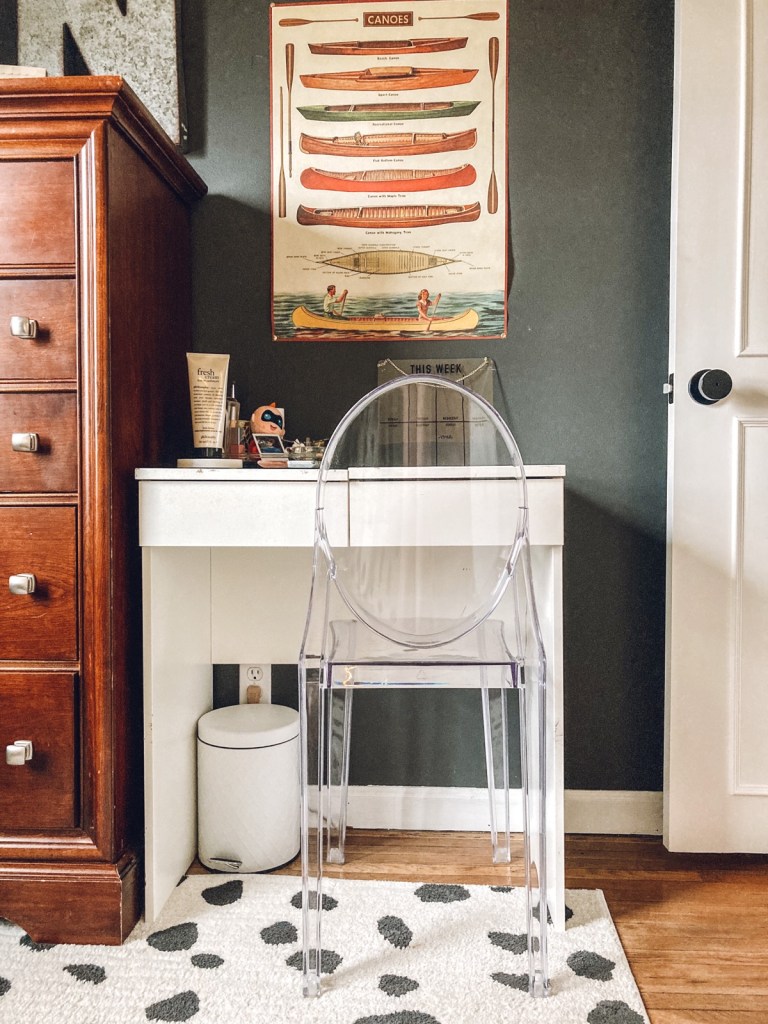
7. Choose meaningful items and take advantage of wall space over surface space

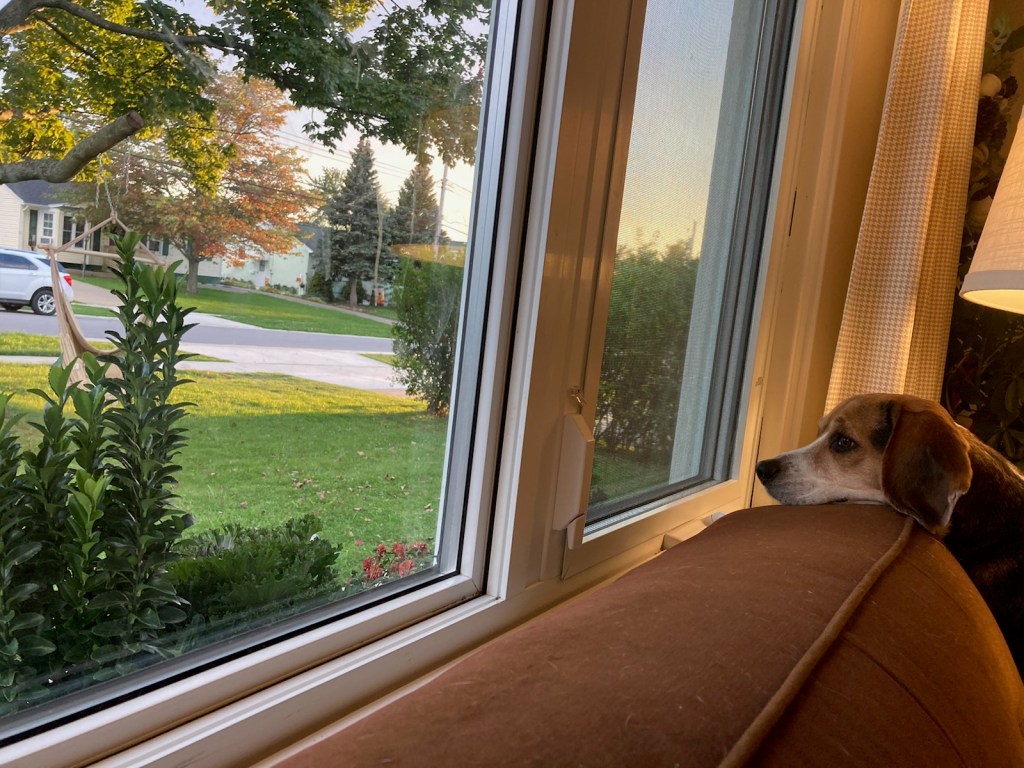
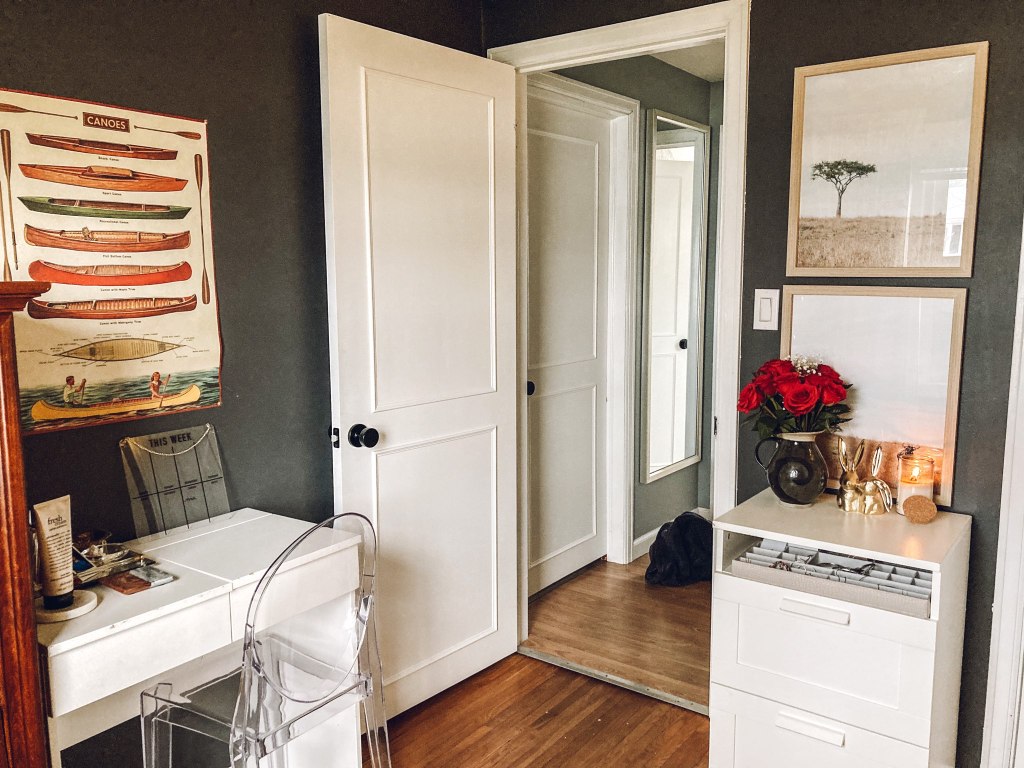
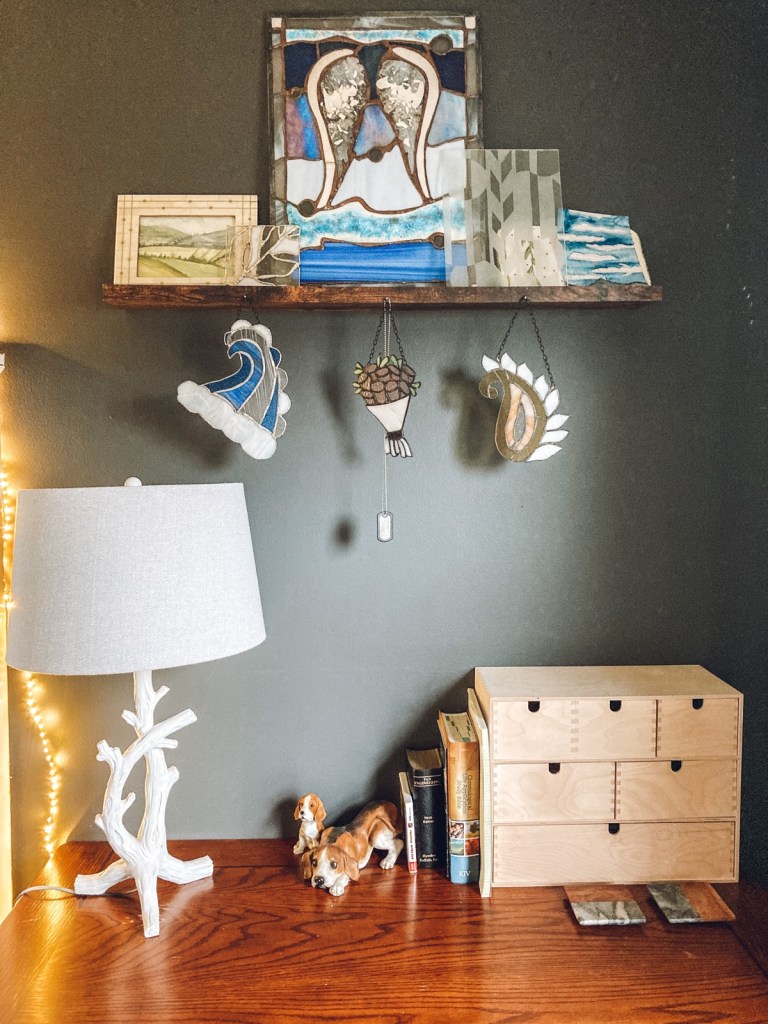
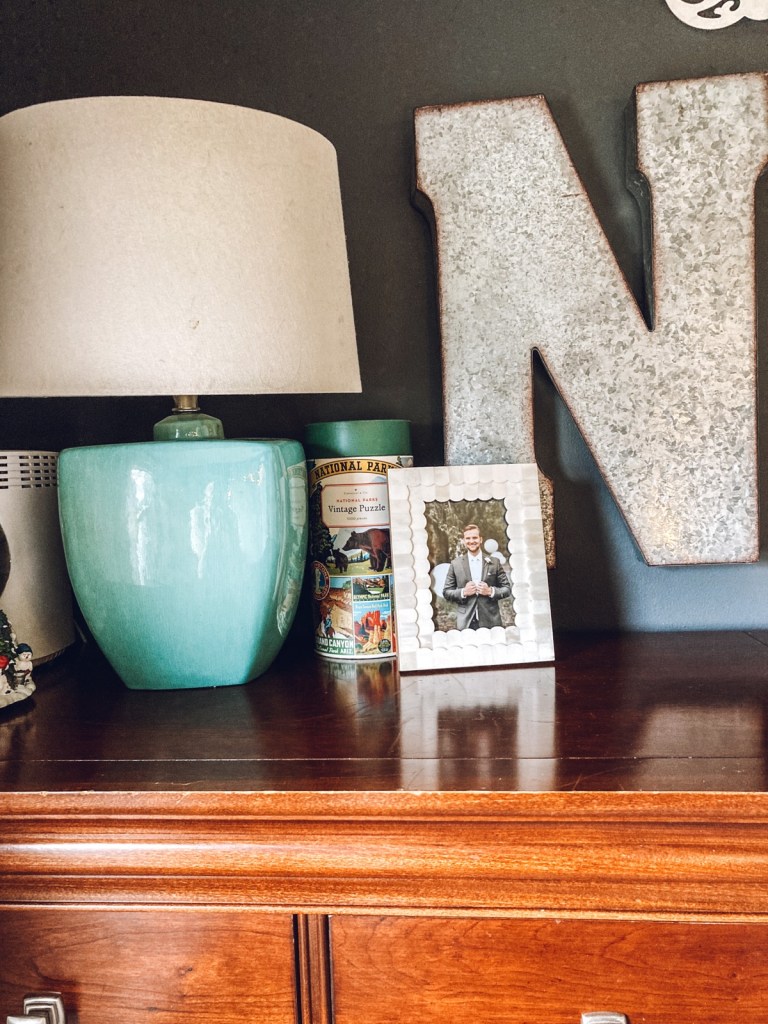
Nick hung this shelf above his desk that displays some of my stained glass work, which makes me smile! He also put a couple of beagle bobble heads on his desk for our dog, Peppermint. On the other side of the room I framed a picture of him from our wedding day. A general rule I like to follow is to limit the amount of items on a surface, and use most of your décor on your walls.

Thank you so much for reading! I hope you enjoyed our office tour. I’d love to know any tips you may have for designing in a small space!

Easy Roasted Chickpea and Cauliflower Side Dish

This is a side that I make at least once a week. It is my husbands favorite and so good! My dad has made this for years and when I became a wife I knew I had to get the recipe for my own home.

I will post a few pictures with step by step instruction and then include the full recipe at the bottom.

Start by gathering ingredients- one head cauliflower, two cans garbanzo beans, olive oil, sugar, the juice of one lemon, salt, curry powder

Mix together olive oil, lemon juice and seasonings

In a separate bowl combine washed and chopped cauliflower with strained and rinsed garbanzo beans

Add olive oil mixture to cauliflower bowl and stir until vegetables are evenly coated

Pour onto parchment lined tray and spread evenly on pan. Place in oven at 375 for 45 minutes

At about half way through remove from oven and stir… the sauce should begin thicken at this point

Finally remove from oven and stir one last time.

Enjoy! We usually serve ours with salmon or shrimp on the side for a healthy weeknight meal!

We Have a Fireplace

For me, one version of a perfect day includes bad weather, good food, and a cozy place to read or watch a movie at home. Our living room is where I choose to spend these types of days, and now, with our new fireplace it is cozier than ever!

Here is a before and after of the same view

When we bought our house we knew we wanted to build a fireplace in this room. We were prepared for a big undertaking, but had our design, start date (January) and placement set. That was until I was in Big Lots last week and saw this one ready to go! The design was similar to what we had planned, it was under budget for the project, and would save us time. Check, check and check.

I am the type of person who starts to decorate for Christmas directly after Halloween. (Yes, I know how some people feel about this lol) I try not to dive head first into decking the halls, but slowly incorporate things leading up to Thanksgiving. Right now, our living room has a mix of velvet pumpkins and Christmas garlands that I like to put in the category of “holiday season”.

For the mantel I went the Christmas route. I love the texture these chunky garlands from Hobby Lobby add! Cant wait to see how pretty they will be with stockings hung in front of them.

I also found this print from Hobby Lobby that we can keep up all winter long, along with these candelabras.

The fireplace meant we no longer had room for our white chair in the corner, so we swapped it out with our smaller one, and thankfully were able to not lose any seating.

I love our pink cooler that used to be on this wall.. but it was feeling too summery and I was ready for a change. I swapped it for this cute coat hook and hung some extra blankets on it. I think it adds such great texture.

I painted this old dresser and added new knobs to use as an end table. The extra storage is great, and I like that the height balances better with the fireplace.

Thank you so much for reading! Are you an early Christmas decorator too? Or do you wait strictly until after Thanksgiving?

Front of House Makeover Reveal

It’s been a while….but it’s finally done!! The makeover to the front of the house was by far my most challenging and nerve wracking project yet. There were some hiccups and problem solving along the way, but also a lot of fun and learning. In the end I am so happy with how it turned out!

Here is a before and after of the final product:

BEFORE
AFTER

What We Did:

Step One: Preparation

Several months ago we removed the aluminum awning over the door and took down the fake plastic shutters. After that it was time to clean the siding; I scrubbed the cobwebs and mildew off the vinyl. You can see where the sun had faded the material in comparison to where the shutters had been covering it. We also patched, sanded, and caulked all areas that needed it. Finally, I taped off all the doors and windows and covered them with plastic to prepare for painting.

Step Two: Painting

This was the first stage of the project that started to make me nervous. I had used our paint sprayer all summer, starting with the garage (which you can read about here), and then the back of the house (which you can read about here). By this time I was confident that I knew what I was doing. I however, was wrong. After finishing the paint job (which takes about 20 minutes with the sprayer) I noticed dripping, smudging, and smearing. Cue internal panic. Thankfully, I was able to scrape off most of the paint and redo the biggest problem areas without much of a noticeable mess. Calmness restored. I also painted the door Iced Marble by Benjamin Moore – the same color I used on our garage door and soffit.

Step Three: Carpentry

After removing the aluminum awning we were left with a piece of trim around the top of the door where it had been installed. Rather than leave it exposed, Nick built a pergola to cover the footprint of the trim. In addition to that, he made window boxes. His design involved installing “L” brackets that he would place plastic window boxes on, and then build a wood “shell” to wrap around the plastic containers. This gave the look we wanted without the bottom rotting out or warping.

bottom view of window box

The pergola was built on the ground then installed as a single piece.

Step 4: Details – here are a few we included

  1. A new Light – We purchased this one after being inspired by the gas lanterns on the homes in Charleston
  2. New house numbers – Out of everything we did for this project- these were the most challenging to install! It took about 5 attempts and multiple spackled drill holes to finally get it right, but I am so glad we stuck it out!
  3. A new mailbox – Mounted to the house instead of a post in the ground
  4. A new doorbell – I was waiting for this to be delivered so Nick could install it before posting. Sometimes it’s the small details that make the space feel complete.
  5. A door knocker – This was a wedding present that we love
  6. A new doorknob – I like how the style works with the mailbox

Step 5: Decorating

To me, this was the most interesting stage of the project, I call it “the awkward stage”. At the time I felt so discouraged…I had worked so hard on this makeover and something just wasn’t right. Everything (but the doorbell) had been installed, decorations were put out, flowers were planted.. so what was it? I called my favorite designer, my mom, to help me trouble shoot. She took one look and knew the problem.

Here is what she recommended:

1. Take down the wreath – We should be able to see the new door knocker

2. Streamline the stair decor and stick to a neutral color theme – It was looking too busy

3. Put fresh mulch in the garden – It would clean up the whole look

Lo and behold I took her advice and was amazed at the difference it made! See the before and after with just the few tweaks.

awkward stage
after

Extras:

I wanted the stairs to match the foundation without getting lost in a mass of white blandness. I was so excited when I came across this inspiration to paint a runner down the center of the stairs. It’s an added detail that is super fun.

Decorating the front steps helped me check off a fall bucket list activity – pick pumpkins! Nick and I found a great farm stand on the way home from a weekend getaway. The stacking ones are my favorite ones.

For the window boxes I went with a fall grouping of flowers. The two taller plants are evergreens, so I’m hoping to keep them alive all through the winter.

Another small detail that I love is seeing the plants in the window boxes from inside our home. (Peppermint loves it too!)

What’s left for next summer:

  1. Add stones to the pathway
  2. Redo all the landscaping
  3. Build another step. Right now you pretty much have to leap to get into the front door.

One Final Before and After

Thank you so much for reading! Have you started decorating for fall yet? My grandma always said she enjoyed the change in seasons because it meant you could change up your diet, wardrobe and activities. I’ll add home to the list too!

Home Tour Before and Afters

For me, fall signals another year has passed more than any other season. That distinct crispness in the air, the earlier sunset, the smell of the breeze, all seem to poof into the atmosphere on September 1st. All of these things tell my mind it’s time to slow down and reflect. Today I would like to share a reflection of (nearly) a year in review for what we have done in our home. Below are the before and afters!

The Hallway

BEFORE
AFTER

The Eat-In Kitchen

BEFORE
AFTER

The Bathroom

BEFORE
AFTER

The Living Room

BEFORE
AFTER
BEFORE
AFTER

Bedroom

BEFORE
AFTER

The Office

BEFORE
AFTER

The Deck

BEFORE
AFTER

The Garage

BEFORE
AFTER

The final before and after for this year will be the front of our house. We are currently in the midst of that project and will be sharing the results soon. Thank you so much for reading!

The Simplest Way to Hem Curtains

If you’re anything like me, you may have a list of projects that need to get done but always seem to fall last in the priority line. These are typically the same projects that once completed make you think “Why did I wait so long to do this?”

At our house, the task was hemming my curtains. I put it off for so long, mainly because the process intimidated me. I don’t own a sewing machine and the thought of stitching the panels by hand felt daunting. Then I discovered hem tape and got right to work. Here, I will walk you through the quick and easy process of using hem tape to custom tailor your curtains.

As a rule of thumb, a window shouldn’t look like it is wearing “floods,” or have curtains that are too short. On the other hand, ones that are too long will create puddling on the ground, and have a romantic, relaxed feel. At first, I was okay having this look in our home, but after months of vacuuming and cleaning underneath them, I came to realize they were dust traps! Ideally the curtains should “kiss the floor” for a perfect length. Below is a before of the curtains puddling in our bedroom followed by an after, once they had been hemmed.

How To:

Step 1. Find Your Length

While I am sure that measuring and marking is a trusty process for determining length, I simply pulled the curtains taut to the ground and pinned them up where they just met the floor. I placed one pin at the bottom of the fold, and one at the top where the flap ended. Do this for both sides and hold them to each other, making sure they are even.

Step 2: Iron on Hem Tape

I used this product from Michael’s and followed the instructions on how to apply the tape. I began on the left then the right side of the curtain and did the middle last, as to ensure I stayed level. I also worked in about 12″ strips at a time.

*Tip: Before ironing on the hem tape, begin by ironing the crease at the bottom of the fold for a crisp line, and to make sure you stay level.

Step 3: Hang Your Curtains Back Up and Enjoy!

How easy is that? A customized look for a $3.99 roll of tape and an iron.

Thank you for reading! Who knew there was such a simple way to make an alteration?

Seven Ways to Add Country Charm to Your Suburban Home

As I write this post, I know full well that the contents are for a specific reader with a unique set of goals. But I know I would be someone interested in these tips, and if I feel this way there might be at least one other person who at one time has wondered the same thing.

Let me start by saying that I love our home. I am so grateful for the blessing of a safe place to live! However, I didn’t think that this is where we would be spending the first few years of marriage. Nick and I were house hunting during a strange time…the pandemic. Houses were flying off the market faster than you would pull your hand off a hot stove. We were determined though, checking the listings hourly, waiting for a something to come up. There were a few places we saw and fell in love with. Country homes with acres of land, amazing views, and the rural setting we desired. After putting bids in on a few of the houses I believed to be “the one” we were consistently outbid by buyers with more cash to offer. Then one day, our cute suburban cottage came at the perfect time, fit our needs, and most importantly was in our budget. We put an offer in and got the house!

I decided early on that even though this wasn’t the exact location we pictured, I had the ability to make this place more like the homes we had thought were meant to be ours. Here are seven things that anyone can do who wishes to bring a little of that rural charm to their highly populated area. This won’t be a post recommending a “Farmers Market” sign above your kitchen sink, but rather changes that capture those feelings that make a country life so desirable.

Some of these things we have done, and some we have yet to tackle. My hope is that these tips can help you feel at home, no matter where you live.

  1. Hang a Hammock

Having a quiet place to read or nap outside creates a relationship with the outdoors. Even in a more populated area, the nature around you can be so peaceful. I have spent many, well-enjoyed hours reading in the shade on our hammock this summer.

2. Add Diversity to Your Yard

http://www.christian-douglas.com/classic-country-cottage

These two pictures speak for themselves! Neither one is a photo of our yard, but they represent the stark difference between grass alone, verse a mixture of shrubs, grasses and flowers. Next summer we plan to do a lot of landscaping! Adding diversity around our home, deck, garage and fence line will bring in layers of color and life.

3. Install a Clothesline

I got this one from my mom who has always had a sweet spot for a clothesline. There is nothing like fresh washed sheets dried in the sun. Hanging clothes outside on a summer day makes life feel so simple.

4. Add Privacy to Your Outdoor Living Area

For our recent deck makeover, which you can read about here, Nick built a privacy wall between our house and the neighbors. Even though we can’t add distance between the houses, it was nice to be able to create a private outdoor space.

5. Start a Vegetable Garden

Growing your own food is one of the best gifts you can give yourself. Having a garden with fruit and vegetables is great for your health, and well being. This is a project we are both excited to start next summer!

6. Add a Fence to the Front Yard

Whether is be picket or split rail, a wooden fence is just so charming.

7. Hang a Tree Swing

A tree swing captures such nostalgia for me; I like to imagine swinging with the view of rolling fields that glow from the sunset. Adding one to our front yard brought in that sense of joy I remember from swinging in my backyard as a child.

https://sanctuaryhomedecor.com/tour-our-california-farmhouse/

I hope you enjoyed these ideas! Thank you so much for reading. I’d love to know if you prefer the peaceful life of a country setting, or the exciting life of a bustling city. We’re all different and that is what makes life fun!

Back Deck Reveal

I have been gone from my blog for a couple weeks, hard at work on a big project…the back of our house! After many hours, we are nearly finished. I am so excited to share the before and afters!

As you may know, this summer I set out to redo the exterior of our home. Starting with the garage (which you can read about here), and then working my way around the house. The next phase of this plan was our back deck.

I will start by saying the back of the house was in ROUGH shape. The siding had been warped from the grill, was splattered with old deck stain, and had that chalky residue old vinyl can accumulate. New siding isn’t in our budget, or even desire for this home, so we knew a good scrubbing and fresh coat of paint was the first order of business. Here is a close up of what we were working with. A messy “before” always leads to a more rewarding “after”!

After washing the siding with a vinyl cleaner, I taped off the areas that I didn’t want to get paint on. Then I sprayed everything Pure White by Sherwin Williams. When painting a ranch house like ours, using the same color on the foundation will give the illusion of height, so I sprayed that as well.

Nick and I honeymooned in Charleston, SC and had so much fun taking in the architecture of the old city. Inspired by our trip, I painted the underneath of our soffit blue as a nod to the blue porch ceilings in the south. It is a subtle detail that made a huge impact, and added a needed bit of color.

After the house was painted it was time to replace some deck boards that had become spongy and brittle. In reality the whole deck could probably be replaced, but weeding out the weakest links will give this one a few more great years.

One of the reasons the old boards failed was a lack of space between them for water to drain after a rain. Nick added space between the boards to prevent future rot, meaning one board had to be cut slimmer that the rest. After a coat of paint this was barely noticeable.

Which leads me to the longest part of the project…painting the deck. I love painting! But after a week of doing it everyday in the sun I was ready to be done with this. Each spindle of the railing needed two to three coats of paint for coverage and it ended up taking much longer than I anticipated. In the end, it was all so worth it! Here is a before and after of the deck painted. (The “before” picture was actually a listing photo from ten years ago when the deck was “fresh”. Since then it had faded quite a bit.)

Finally came my (isn’t it everyones?) favorite part…decorating!

A couple of the biggest changes were in the form of lighting. Nick replaced the old flood light by the door with this cute sconce and we strung up bistro lights across the porch for a cozy feel.

There was some trial and error in deciding on the best way to hang the bistro lights. We tried a few options, and ended up using 3, 4″x4″ posts that were 8′ tall. We strung the lights on hooks from the house to those. I painted the posts white and we added brass caps to them for an extra detail.

This week I purchased a variety of plants to place around the porch, then potted them in different size and style pots for an eclectic feel. The plants truly pulled it all together! Choosing something large scale is especially important when working outside, as there is more visual space to fill and you don’t want your plant to get “lost”.

Next were the fun details like this hanging cow I got from my mom. It used to belong to a farmer who sold yogurt and I absolutely love it! All of the furniture had been gifted to us for our wedding, which gave us a great starting point to work with. I dug the pillows out of our basement storage and was so happy with how they tied it all together.

Although these don’t sit out all the time, I brought out these napkin rings that we bought on our honeymoon from a little boutique by the beach. It’s all about the staging!

Here is what approaching the deck from our driveway looks like now vs. before.

Nick will be building a privacy wall right here this weekend. The other side of the deck has tall shrubs between us and the neighbors so we wont any added privacy, but we have a plan for this side. Right now we can see all the way to two houses down. Stay tuned for the final phase of this project, and as always, thank you so much for reading!

How to Recreate Your Favorite Wallpaper For Free

Adding an accent wall is one of my favorite tools when working on a room that “just needs something” to feel complete. A wood element like board and batten or ship lap can add texture and warmth while a paper can add color and whimsy. The opportunities are endless! I have spent hours searching for wallpapers and dreaming of places to use them, so when I came across this wallpaper by Serena and Lily I knew just the place for it. Only problem- it was way out of budget! No worries, here, I will walk you through the process of how I recreate my favorite papers, by hand, for free.

*Note: this process works on papers with a pattern repeat- not mural wallpaper

Step 1: Choose a paper and decide the scale and pattern repeat

Once I found the paper I wanted to recreate, I had to make a stencil for it. For this project I decided that to keep things simple, I would make my template 8.5″x11″ (standard printer paper size). Start by screen grabbing one part of the pattern you will be repeating, in this case one palm leaf, and copying it into a word document. Next, stretch the image to fit the size you would like it to print at, for this project, the whole sheet of paper. Press print.

Step 2: Cut out the pattern from the piece of paper

Using an exacto blade or scissors, cut out the part of the template that will be painted on the wall. I used scissors and taped the cut marks that I wanted back in tact. The tape actually added some structure to the paper and made it easier to trace. Here is what my stencil looks like after using it on a whole wall.

Step 3: Start tracing the paper on your wall

Starting in the top corner of your wall, trace the pattern with a pencil. You will also want to draw a line on the side and bottom of the stencil to act as a spacing guide for where to place your next one.

Step 4: Continue the pattern on the wall and begin painting

For this pattern I did one section of the stencil, then flipped it upside down for the next leaf. In the second column I did a half drop of the palm leaf. This made it so the palm leafs fell in between each other as opposed to side by side. My strategy was to work two columns at a time tracing then painting.

Step 5: Continue On the entire wall

Continue the pattern across the wall at your own pace. It takes some time! This pattern took me about an hour per column.

Step 6: Decorate and enjoy your new wall!!

Don’t be afraid to add mirrors or other art over your “paper”. It is a fun way to add even more depth and texture!

In another room of my house I stenciled a different design. This process was much quicker! The larger the scale and the less colors involved the faster it will go.

For this paper I followed the same exact same steps, except in step one I made the size different.

This time I broke up each pattern repeat into four equal parts and printed each quadrant to an 11″x17″ piece of paper. After printing all four pieces I taped them them together to create one large 22″x34″ template. I then cut and traced from that large pattern.

Below is when this room was our bedroom (before I redid our doors) which you can read about here

That’s it! I hope you found this helpful! Are there any wallpapers you would like to try out?

Ideas for an Eat In Kitchen

When we purchased our home last fall there were a few areas I immediately felt excited to transform; one of them being the eat-in portion of our kitchen. The previous owner had arranged the space with a high top table and two chairs, which left a good amount of room for a traffic pattern from the kitchen to the living room, but not so much for eating. I wanted more seating for guests and a cozy place to drink coffee in the morning or enjoy dinner with my husband. I should mention- our home is a cozy 988 square feet with no dining room or kitchen island so this is the only designated eating area. We decided to arrange the room differently, using every inch available to make this a place we love to spend time.

Below is a before and after:

Before
AFTER

Such a difference! (we still would like to redo the floors one day but that will be down the road)

Below is an image during the first couple of weeks getting settled in the space, sushi takeout and all!

When it came to eat in kitchens, a built-in banquette seemed to be the perfect solution for almost every magazine/instagrammer/home blogger I could find. We didn’t quite have room for a banquette, but after a bit of brainstorming, we decided that a dining bench in front of the slider and two chairs would fit comfortably and leave plenty of room access the door.

Moving the light fixture from the middle of the room to centered directly over the table grounded the space and made it feel like an intentional dining area. We also swapped the semi flush mount for a statement pendant light. If moving electrical isn’t an option for you, swagging a light to the desired area is a great solution.

The sliding glass door previously had black out curtains that blocked natural light and made the room feel dark and dingy. We purchased these green curtains from Ikea and hung them as high as possible, the new height makes the room feel taller. Ikea is my favorite spot for affordable window treatments!

From the moment I saw this wallpaper on the Anthropologie website I dreamed of using it and thought that this wall would be the perfect spot. I love how it turned out!

Progress picture of the wallpaper install

All that was left to do was decorate the table and add some comfy pillows to tie everything together! I wanted to have something on the table that felt substantial but wasn’t “lean forward in your chair and crank your neck to see the person across from you” tall. I decided on this mix of new and thrifted finds that includes a plant and a couple unscented candles.

We now use this space to enjoy meals, do work, read, and just hang out! Unique and personal touches are all the elements that create a home.

Thank you so much for reading!