
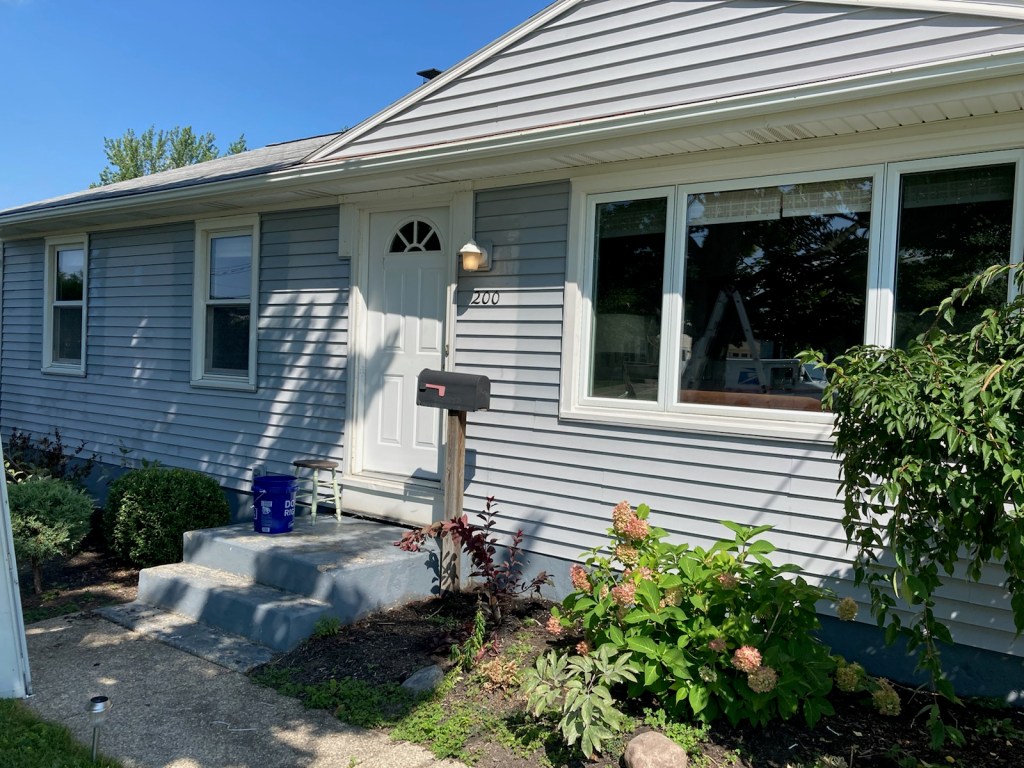
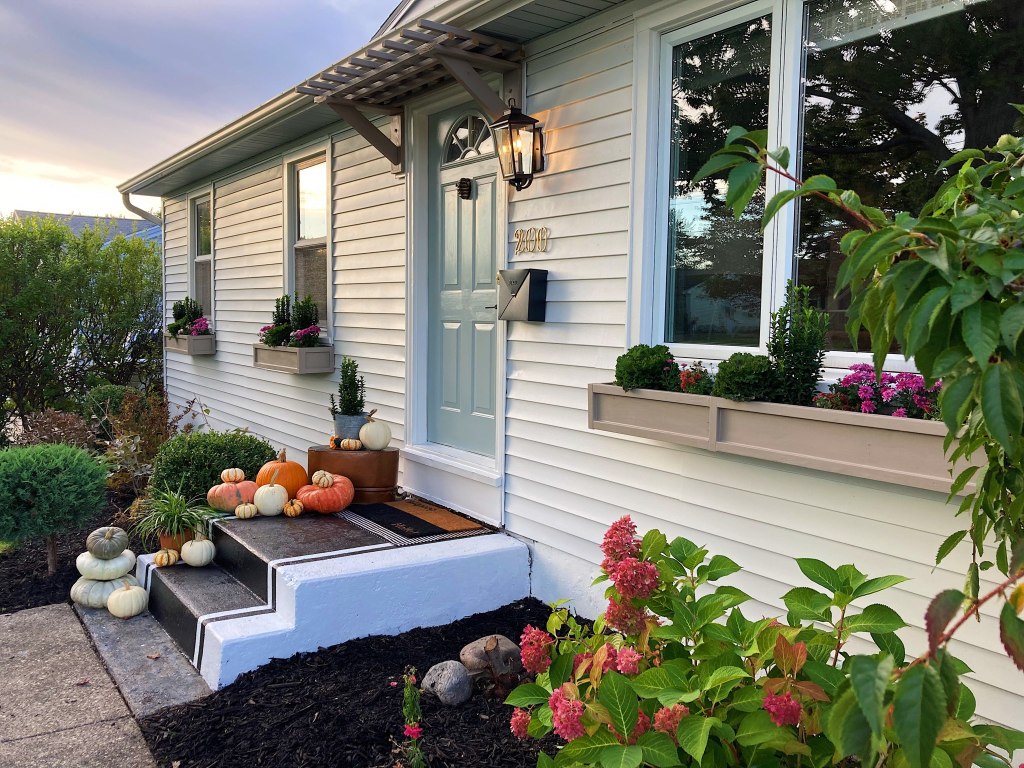
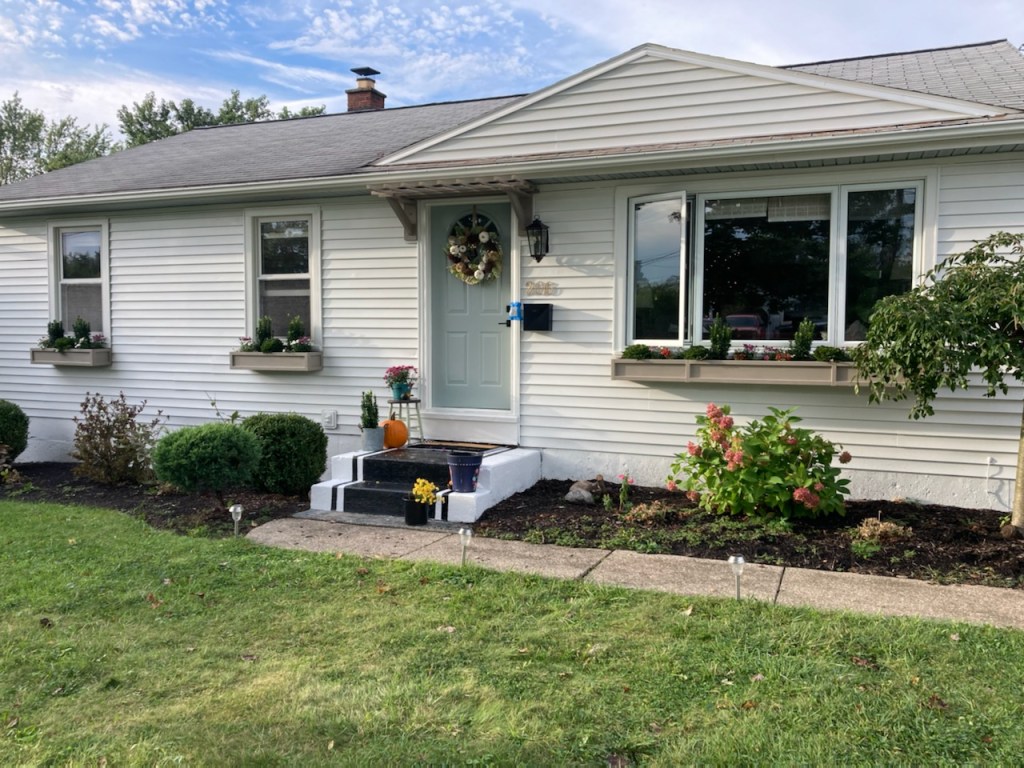
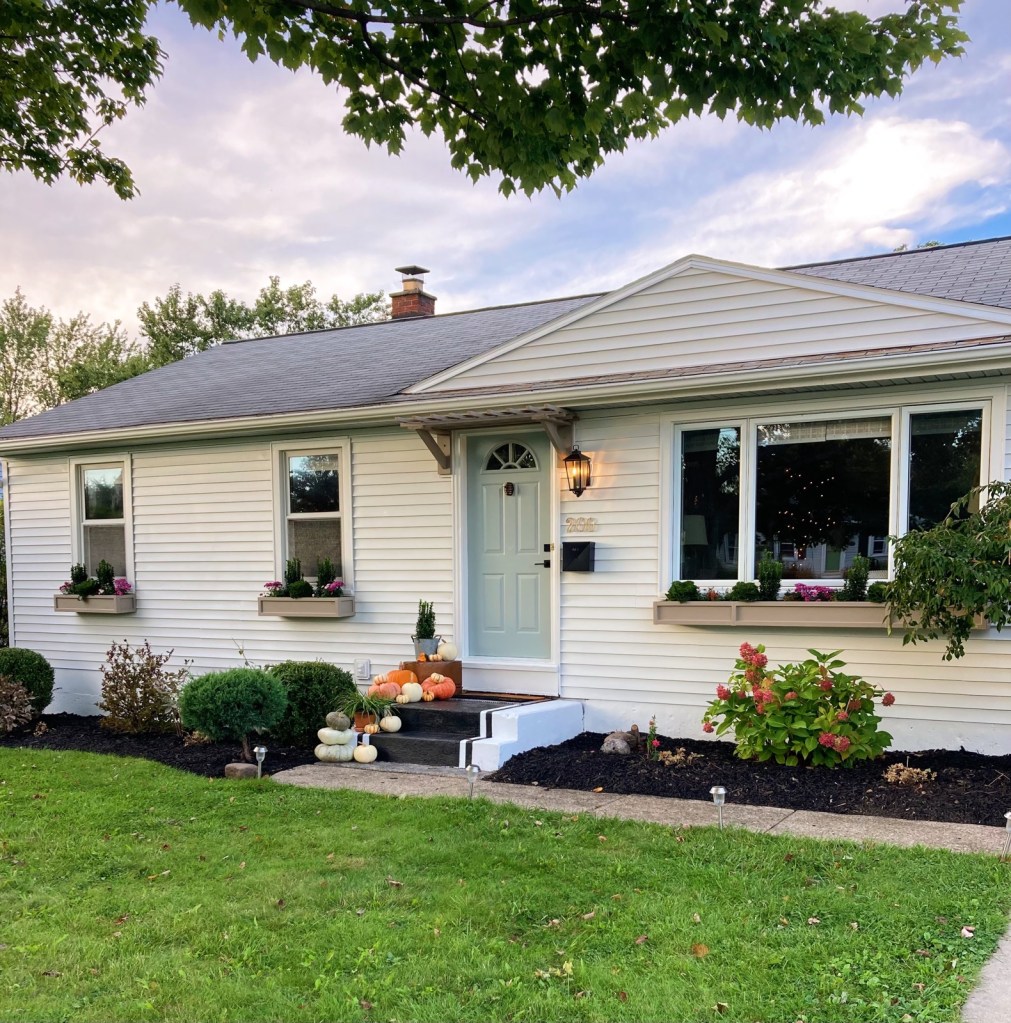
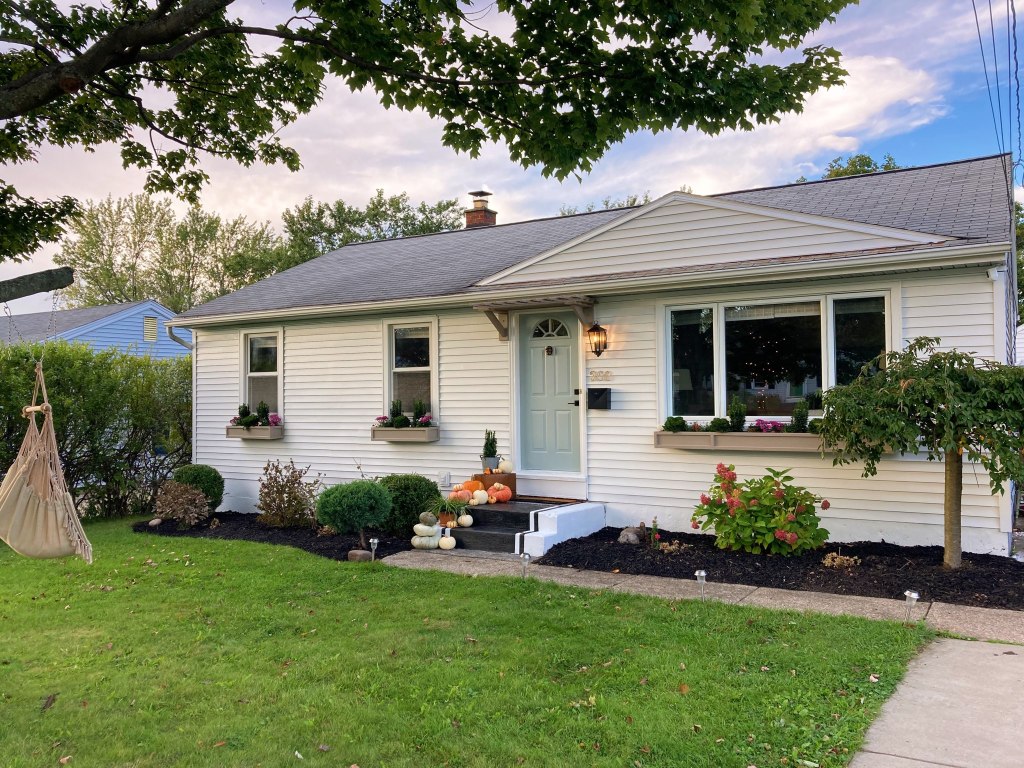
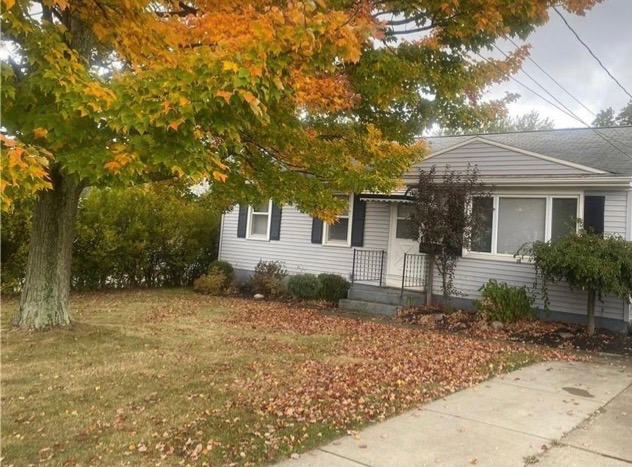
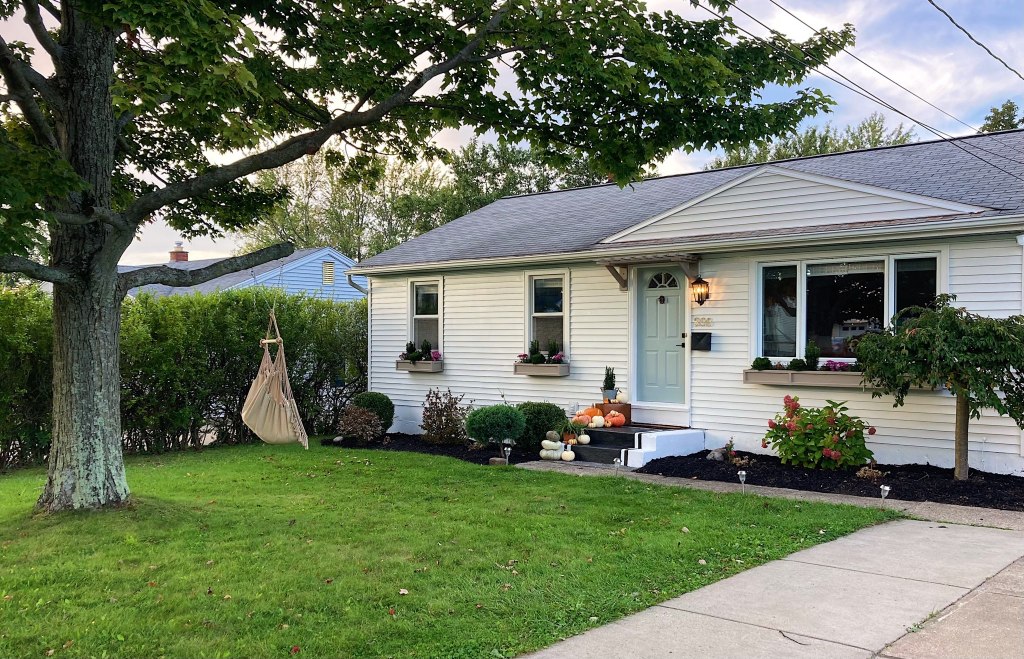
It’s been a while….but it’s finally done!! The makeover to the front of the house was by far my most challenging and nerve wracking project yet. There were some hiccups and problem solving along the way, but also a lot of fun and learning. In the end I am so happy with how it turned out!
Here is a before and after of the final product:
What We Did:
Step One: Preparation
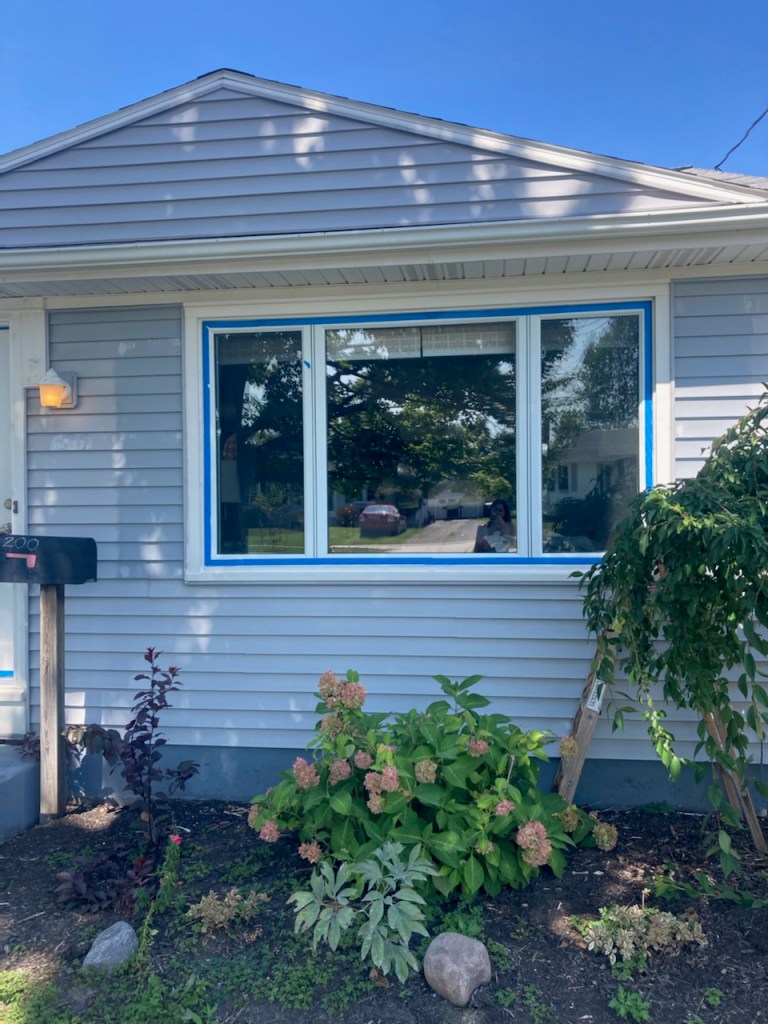
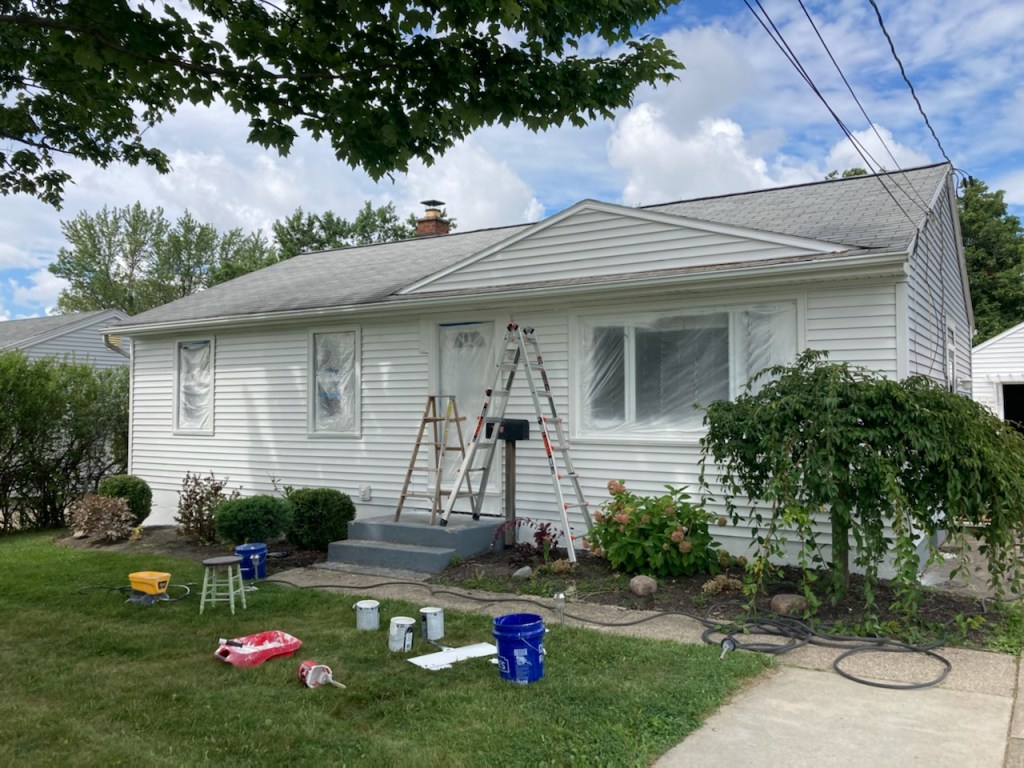
Several months ago we removed the aluminum awning over the door and took down the fake plastic shutters. After that it was time to clean the siding; I scrubbed the cobwebs and mildew off the vinyl. You can see where the sun had faded the material in comparison to where the shutters had been covering it. We also patched, sanded, and caulked all areas that needed it. Finally, I taped off all the doors and windows and covered them with plastic to prepare for painting.
Step Two: Painting
This was the first stage of the project that started to make me nervous. I had used our paint sprayer all summer, starting with the garage (which you can read about here), and then the back of the house (which you can read about here). By this time I was confident that I knew what I was doing. I however, was wrong. After finishing the paint job (which takes about 20 minutes with the sprayer) I noticed dripping, smudging, and smearing. Cue internal panic. Thankfully, I was able to scrape off most of the paint and redo the biggest problem areas without much of a noticeable mess. Calmness restored. I also painted the door Iced Marble by Benjamin Moore – the same color I used on our garage door and soffit.
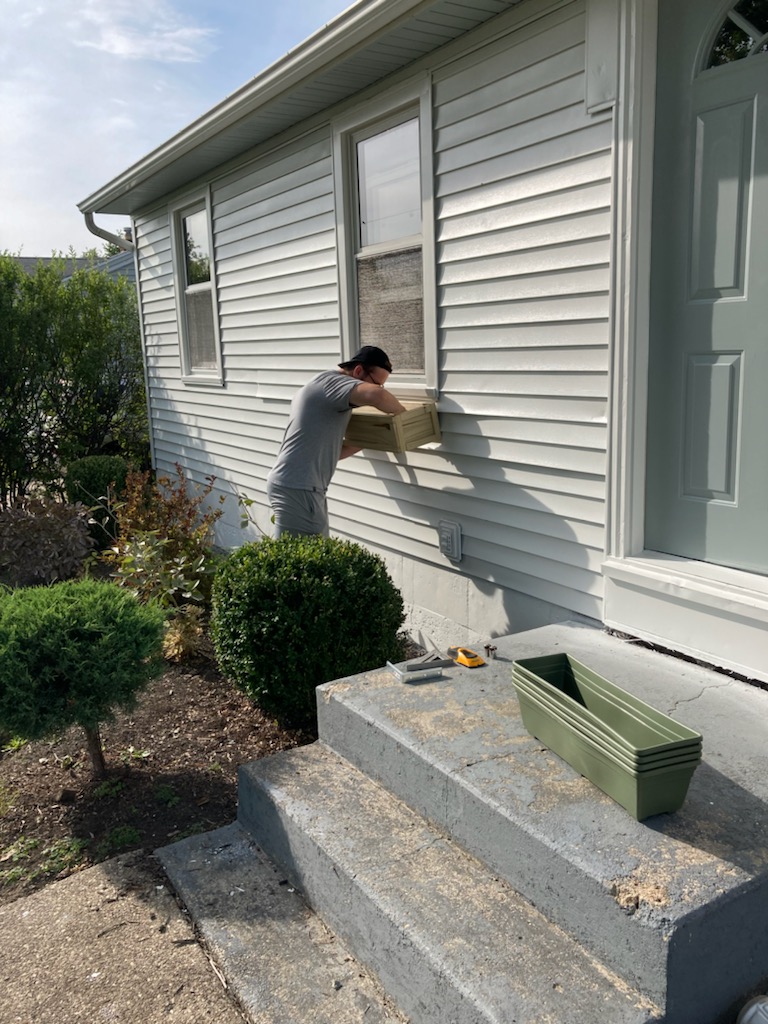
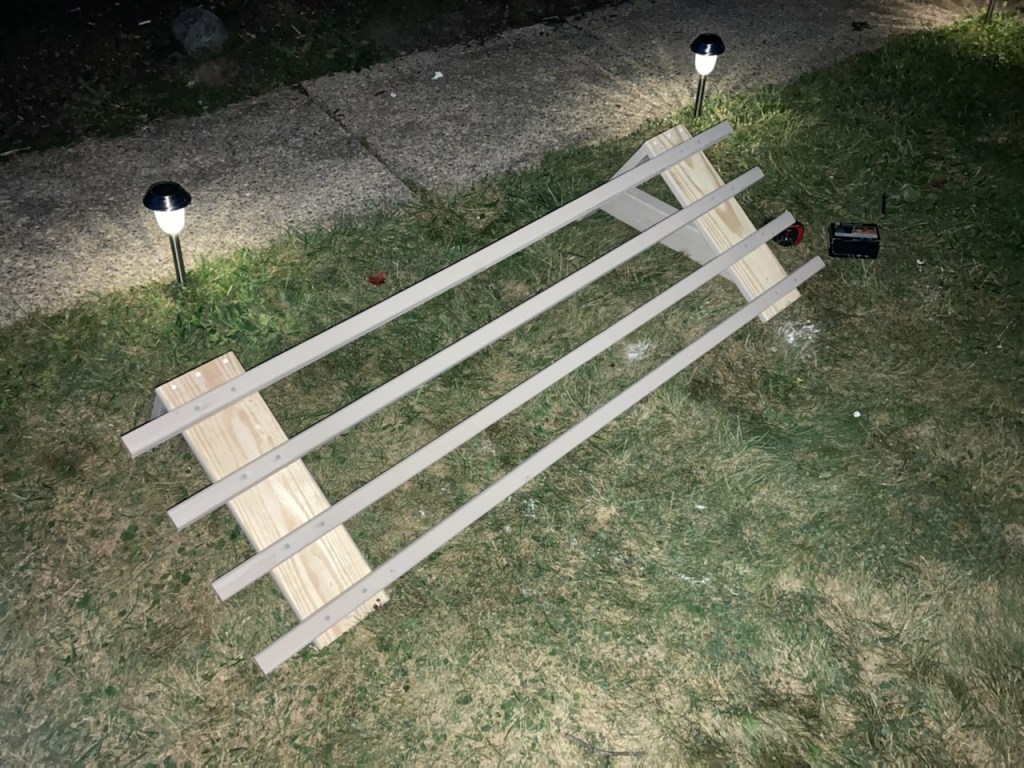
Step Three: Carpentry
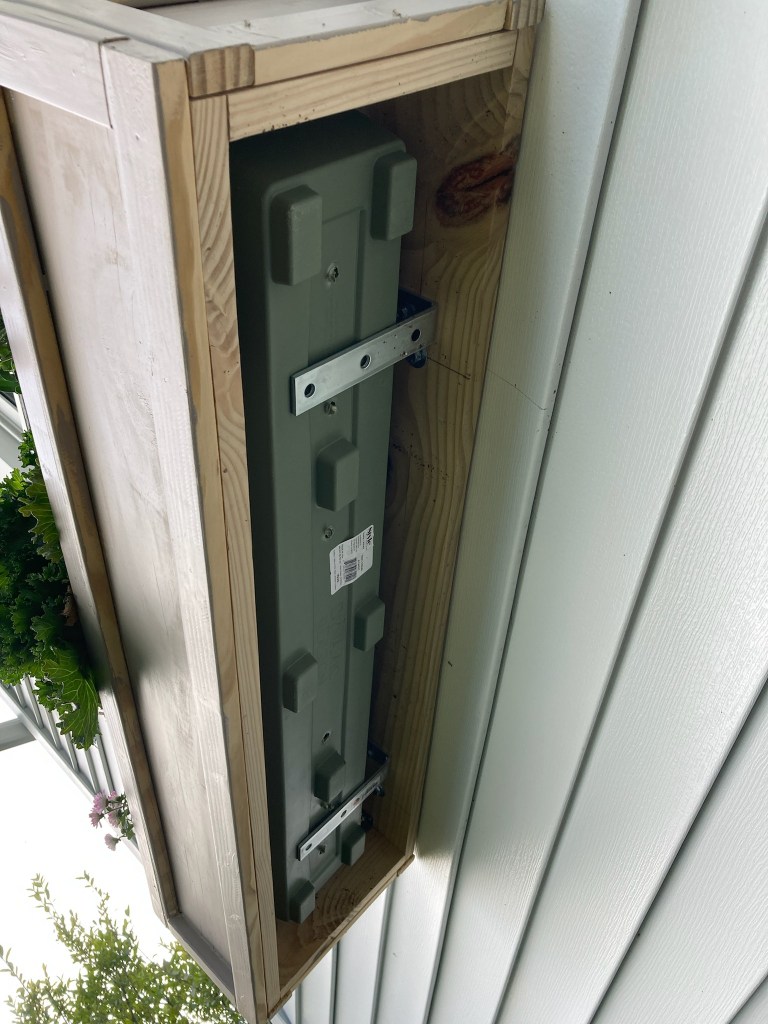
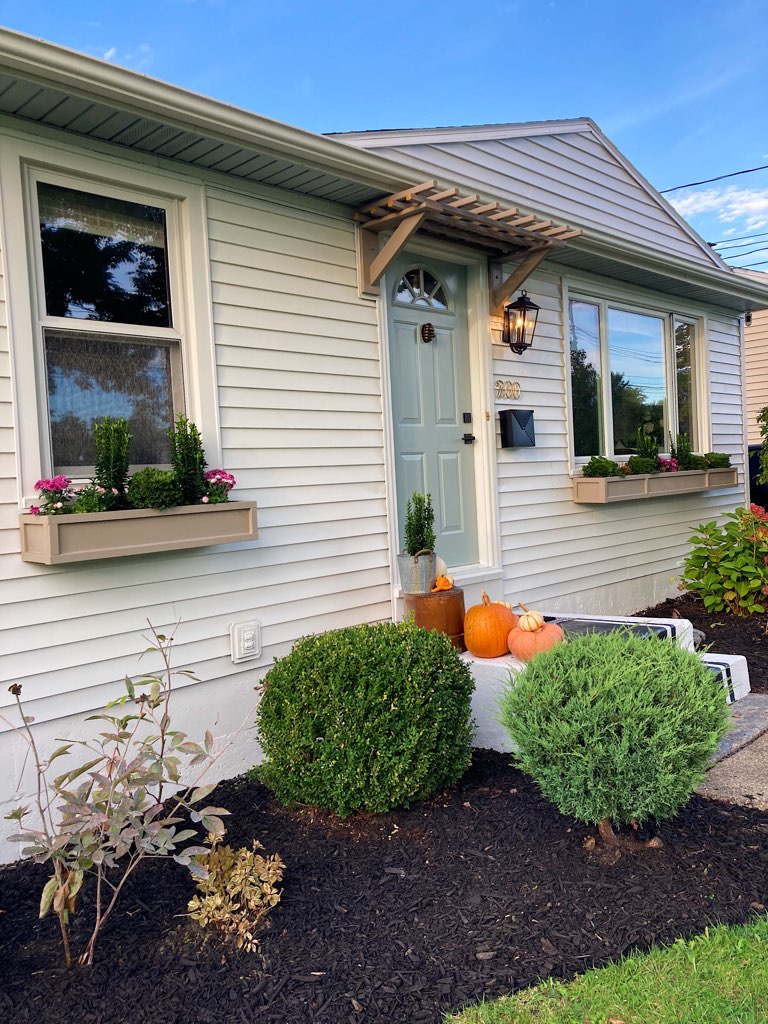
After removing the aluminum awning we were left with a piece of trim around the top of the door where it had been installed. Rather than leave it exposed, Nick built a pergola to cover the footprint of the trim. In addition to that, he made window boxes. His design involved installing “L” brackets that he would place plastic window boxes on, and then build a wood “shell” to wrap around the plastic containers. This gave the look we wanted without the bottom rotting out or warping.
The pergola was built on the ground then installed as a single piece.
Step 4: Details – here are a few we included
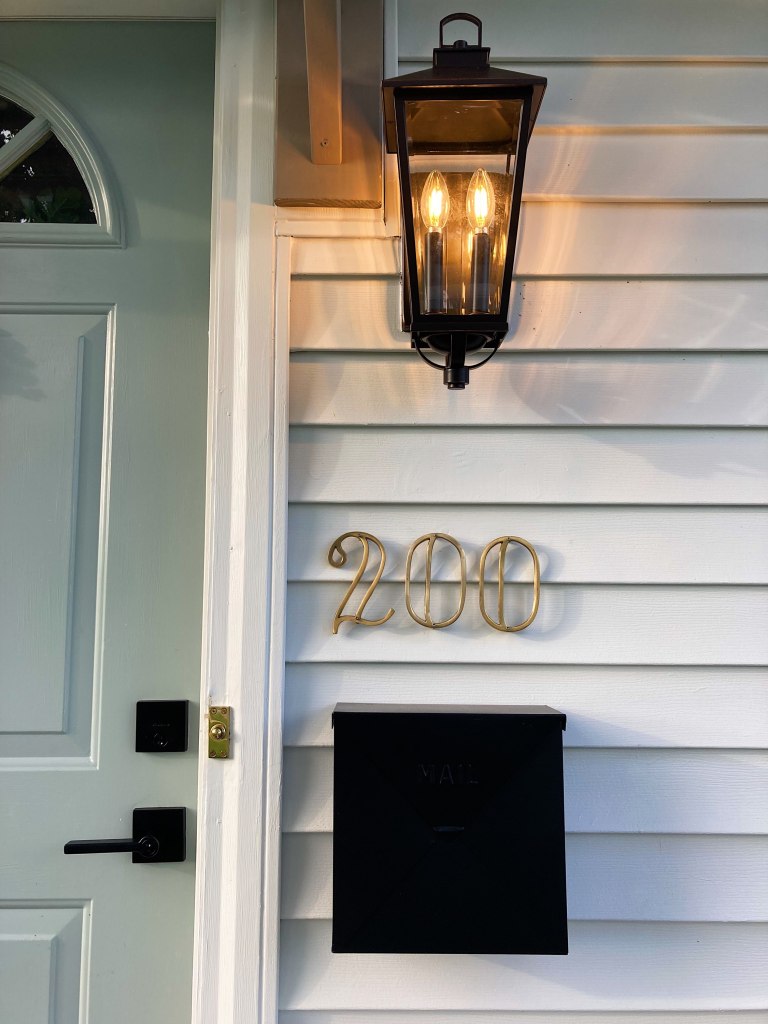
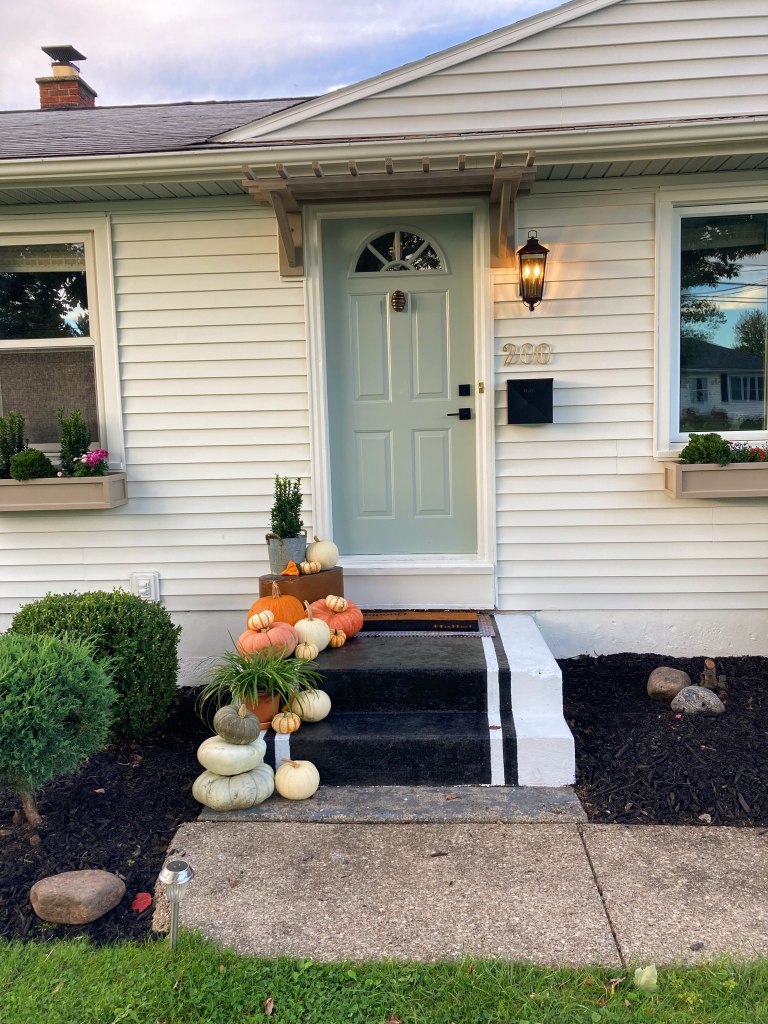
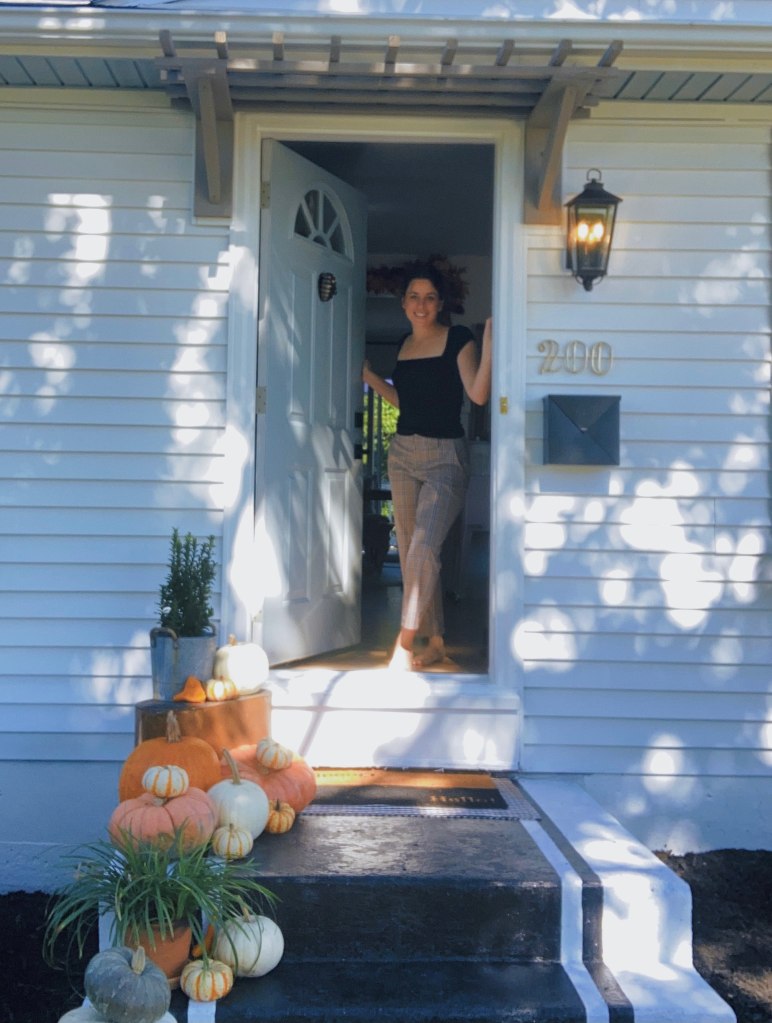
- A new Light – We purchased this one after being inspired by the gas lanterns on the homes in Charleston
- New house numbers – Out of everything we did for this project- these were the most challenging to install! It took about 5 attempts and multiple spackled drill holes to finally get it right, but I am so glad we stuck it out!
- A new mailbox – Mounted to the house instead of a post in the ground
- A new doorbell – I was waiting for this to be delivered so Nick could install it before posting. Sometimes it’s the small details that make the space feel complete.
- A door knocker – This was a wedding present that we love
- A new doorknob – I like how the style works with the mailbox
Step 5: Decorating
To me, this was the most interesting stage of the project, I call it “the awkward stage”. At the time I felt so discouraged…I had worked so hard on this makeover and something just wasn’t right. Everything (but the doorbell) had been installed, decorations were put out, flowers were planted.. so what was it? I called my favorite designer, my mom, to help me trouble shoot. She took one look and knew the problem.
Here is what she recommended:
1. Take down the wreath – We should be able to see the new door knocker
2. Streamline the stair decor and stick to a neutral color theme – It was looking too busy
3. Put fresh mulch in the garden – It would clean up the whole look
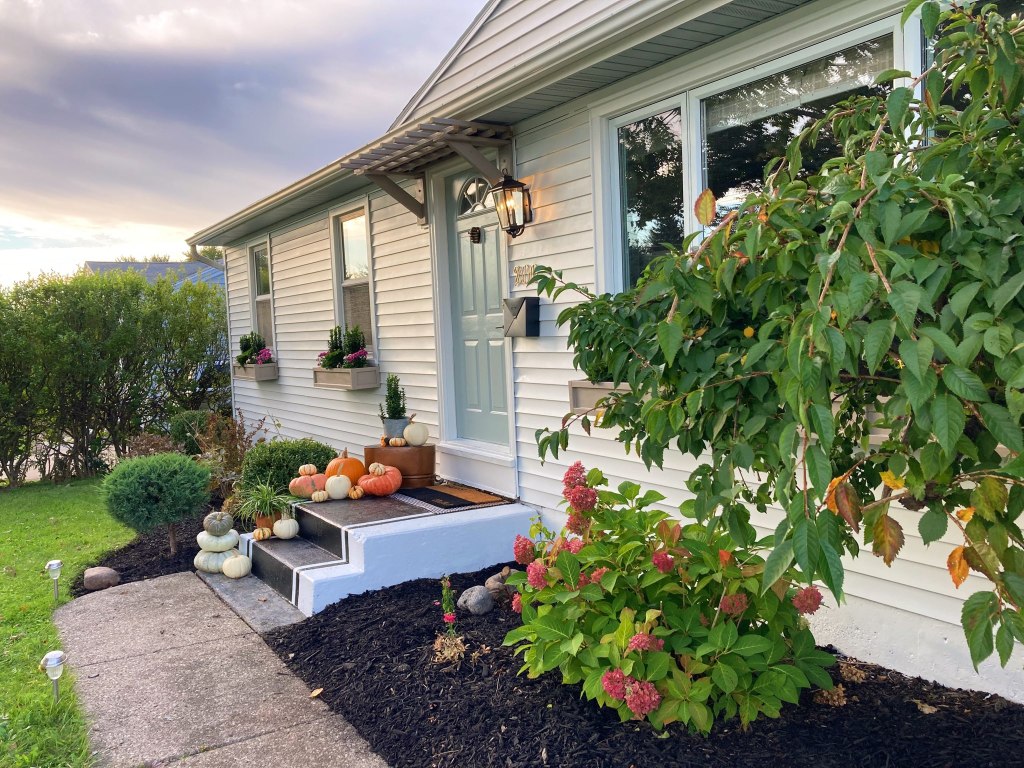
Lo and behold I took her advice and was amazed at the difference it made! See the before and after with just the few tweaks.
Extras:
I wanted the stairs to match the foundation without getting lost in a mass of white blandness. I was so excited when I came across this inspiration to paint a runner down the center of the stairs. It’s an added detail that is super fun.
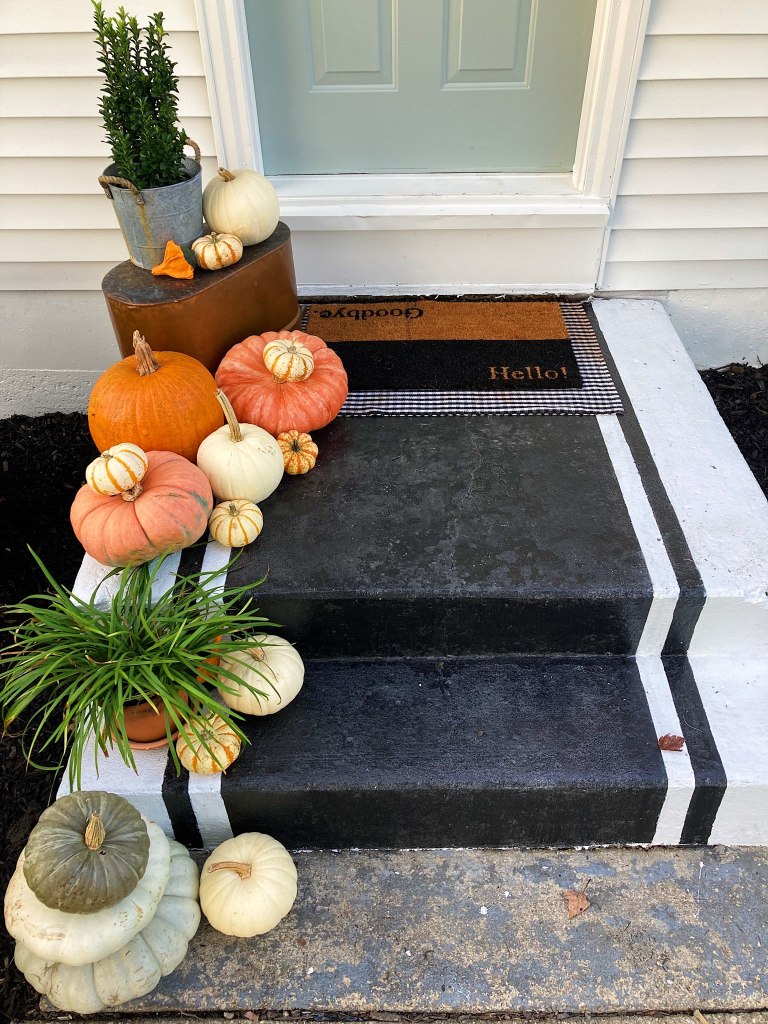
Decorating the front steps helped me check off a fall bucket list activity – pick pumpkins! Nick and I found a great farm stand on the way home from a weekend getaway. The stacking ones are my favorite ones.
For the window boxes I went with a fall grouping of flowers. The two taller plants are evergreens, so I’m hoping to keep them alive all through the winter.
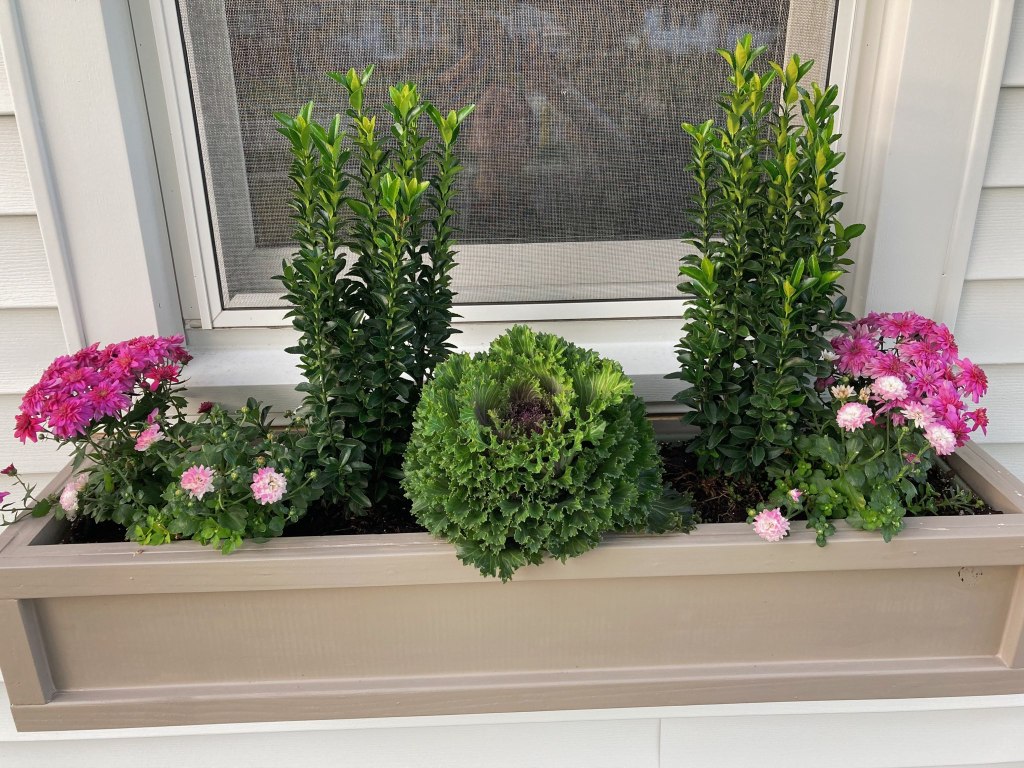
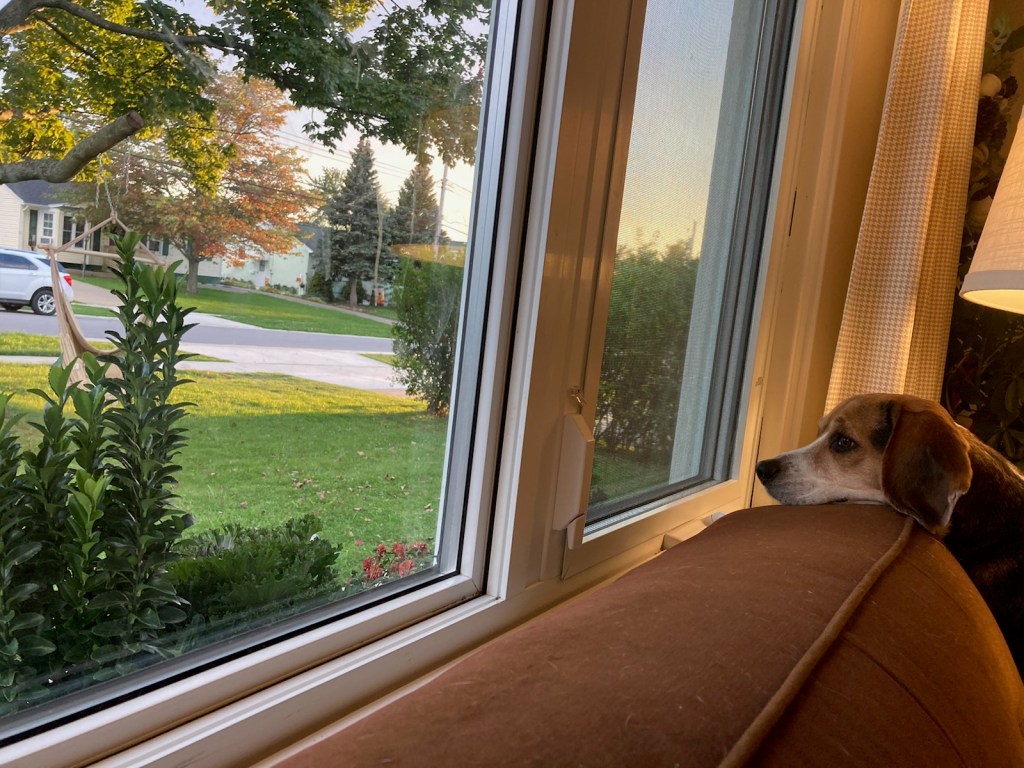
Another small detail that I love is seeing the plants in the window boxes from inside our home. (Peppermint loves it too!)
What’s left for next summer:
- Add stones to the pathway
- Redo all the landscaping
- Build another step. Right now you pretty much have to leap to get into the front door.
One Final Before and After
Thank you so much for reading! Have you started decorating for fall yet? My grandma always said she enjoyed the change in seasons because it meant you could change up your diet, wardrobe and activities. I’ll add home to the list too!

Gorgeous! I can’t wait to do our landscaping together☺️
LikeLike
I’m looking forward to it too! Many fun ideas to come.
LikeLike
Your before and afters are so impressive, what a difference! I amazed that you painted the runner, I thought it was carpet. It is striking! I love the pergola, ingenious and it looks perfect. The fresh mulch and fall decor are the crowning touches. Your home is beautiful.
LikeLike
Thank you! I thought the painted runner was fun too. I really enjoyed looking at inspiration for what others did on their concrete steps. Thank you for reading 🙂
LikeLike
Wow looks so good!! I love Pep’s lookout spot 😍
LikeLike
Thank you! It’s her favorite spot in the house lol.
LikeLike